 SPECIAL NOTE: There seems to be a popular "bug" with this level where after Indy enters the temple in the opening movie the camera
pulls back to an aerial view of the building and you cannot see Indy. To fix this:
SPECIAL NOTE: There seems to be a popular "bug" with this level where after Indy enters the temple in the opening movie the camera
pulls back to an aerial view of the building and you cannot see Indy. To fix this:-
1. Press the [Esc] key (in the game)
2. Scroll to the options on the far right and move up to Display Options (the TV icon)
3. Click the Advanced... button to access the advanced Display Options menu
4. Click OK
5. Click OK again on the main Display Options screen
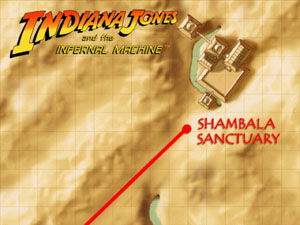
 This level is fairly straightforward. You must reactivate the clock and bell towers to summon the mysterious holy woman who will
send you on a small quest to restore her powers. Then you obtain the first machine part and defeat a hideous Ice Guardian and you
are on your way. Sound easy? Think again. Ice monsters and a small army of Russian soldiers are all standing by to make your
life difficult, and a devious jumping puzzle will have you saving your game every five seconds.
This level is fairly straightforward. You must reactivate the clock and bell towers to summon the mysterious holy woman who will
send you on a small quest to restore her powers. Then you obtain the first machine part and defeat a hideous Ice Guardian and you
are on your way. Sound easy? Think again. Ice monsters and a small army of Russian soldiers are all standing by to make your
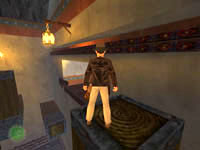
life difficult, and a devious jumping puzzle will have you saving your game every five seconds. When you have control of Indy you will be in a room with a broken elevator in the center. Head to the left and kill the spider under
the ledge before climbing to the upper deck. In the corner is a lamp with a flat ledge above. Pull up to this ledge then turn to
face the opposite ledge and do a running leap to get there.
When you have control of Indy you will be in a room with a broken elevator in the center. Head to the left and kill the spider under
the ledge before climbing to the upper deck. In the corner is a lamp with a flat ledge above. Pull up to this ledge then turn to
face the opposite ledge and do a running leap to get there.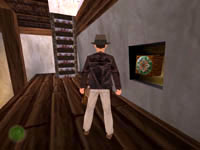 Locate the button and press it to lower the stairs leading to the roof. Head up to the snow-covered rooftop and circle around to
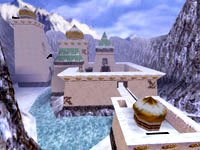
the bridge leading over the river far below. Draw your pistol and go through the doors leading into the main part of the Sanctuary.
A wolf attacks you almost immediately and the automatic movie that plays when you enter makes it almost impossible to react in time
if your guns aren't already out.
Locate the button and press it to lower the stairs leading to the roof. Head up to the snow-covered rooftop and circle around to
the bridge leading over the river far below. Draw your pistol and go through the doors leading into the main part of the Sanctuary.
A wolf attacks you almost immediately and the automatic movie that plays when you enter makes it almost impossible to react in time
if your guns aren't already out. The main doors are sealed tight so head to the small area to the left of the main doors and climb up to the ledge. Notice the rubble
on the ground and the exposed brick on the left wall. This is definitely a climbable surface but before you start climbing you need
to get the first treasure on this level. Head to the opposite end of this section and back off and hang. Drop and grab immediately
to catch onto the wooden ledge and pull up to get the Gold Bar. Head to the right wall and grab onto
the exposed brick and climb sideways and up to return to the snowy ledge above.
The main doors are sealed tight so head to the small area to the left of the main doors and climb up to the ledge. Notice the rubble
on the ground and the exposed brick on the left wall. This is definitely a climbable surface but before you start climbing you need
to get the first treasure on this level. Head to the opposite end of this section and back off and hang. Drop and grab immediately
to catch onto the wooden ledge and pull up to get the Gold Bar. Head to the right wall and grab onto
the exposed brick and climb sideways and up to return to the snowy ledge above. Now you can begin the big climb to the roof of this building. Follow the path of exposed brick as it winds its way to the top.
(see picture) When you reach the top, circle around until you find the stairs and step on them to lower the ladder and drop into
the next area. You land on some tracks with a statue at one end and a closed gate behind you.
Now you can begin the big climb to the roof of this building. Follow the path of exposed brick as it winds its way to the top.
(see picture) When you reach the top, circle around until you find the stairs and step on them to lower the ladder and drop into
the next area. You land on some tracks with a statue at one end and a closed gate behind you. You can't do much of anything in this tower until you activate the power source located far below. Start making your way down to
the bottom by dropping from ledge to ledge. Look down before each drop to make sure it isn't too far and also make special note
of the lever in one corner, a button in another, the treasure in the center of one of the walls, and a pair of posts on another
wall just perfect for whipping. You don't need to worry about any of these things until you come back, but it's nice to know where
they all are.
You can't do much of anything in this tower until you activate the power source located far below. Start making your way down to
the bottom by dropping from ledge to ledge. Look down before each drop to make sure it isn't too far and also make special note
of the lever in one corner, a button in another, the treasure in the center of one of the walls, and a pair of posts on another
wall just perfect for whipping. You don't need to worry about any of these things until you come back, but it's nice to know where
they all are. When you reach the floor you need to head over toward the three skeletons and into the alcove beyond. Back into the hole and climb
down the ladder into the hall below. As you proceed down the hall a strange icicle hanging at the far end will fall to the floor and
turn into an ice monster. These guys are tough but this one just runs away...for now. Follow him around the corner.
When you reach the floor you need to head over toward the three skeletons and into the alcove beyond. Back into the hole and climb
down the ladder into the hall below. As you proceed down the hall a strange icicle hanging at the far end will fall to the floor and
turn into an ice monster. These guys are tough but this one just runs away...for now. Follow him around the corner.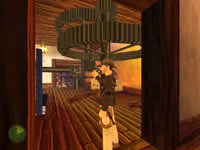 Enter the door leading to the clock room. You are now directly under the clock tower and these gears drive the hands of the clock
above. Locate the gear on the moveable block and pull it back (away from wall) so that is meshes between the other two gears. Now
go to the other end of the room and locate the ladder leading down to another hall.
Enter the door leading to the clock room. You are now directly under the clock tower and these gears drive the hands of the clock
above. Locate the gear on the moveable block and pull it back (away from wall) so that is meshes between the other two gears. Now
go to the other end of the room and locate the ladder leading down to another hall. This hall ends at a ledge overlooking a river far below and more complex machinery. It's a long but quick trip down - just jump
to the sloped ledge to the right of where you are standing and you will slide to the bottom. Whip out your gun and get ready to
battle that ice monster who ran away earlier plus two more of his buddies. When they are dead you can move to the far side of this
area (opposite where you slid down) and locate the moveable block with the gear on it.
This hall ends at a ledge overlooking a river far below and more complex machinery. It's a long but quick trip down - just jump
to the sloped ledge to the right of where you are standing and you will slide to the bottom. Whip out your gun and get ready to
battle that ice monster who ran away earlier plus two more of his buddies. When they are dead you can move to the far side of this
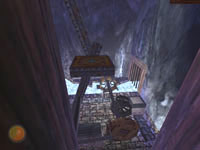
area (opposite where you slid down) and locate the moveable block with the gear on it.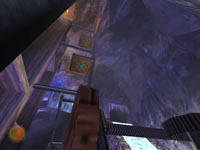 Push it toward the river and the gear will trigger an arm which pulls a waterwheel into the flow of the river and activates the
giant machine. Gears start clanking and if you look above you will see a pair of platforms start to slide back and forth. (see picture)
Now that the machine is on you need to get all the way back to the top ledge where you entered this area. Turn around and face the
wall opposite the river and locate the wooden ledges on the left.
Push it toward the river and the gear will trigger an arm which pulls a waterwheel into the flow of the river and activates the
giant machine. Gears start clanking and if you look above you will see a pair of platforms start to slide back and forth. (see picture)
Now that the machine is on you need to get all the way back to the top ledge where you entered this area. Turn around and face the
wall opposite the river and locate the wooden ledges on the left.Pull up to the first ledge and go to the back and turn around. Jump and pull up to the next level and go forward and get up against the right wall. Use your whip to climb up to the level above then turn to face the sliding platform. As the ledge moves to the right do a standing jump to land on it. From this platform you could go for the medicinal herbs located on the nearby ledge if you need them. The risk may not be worth the reward unless you are low on health supplies.
 While standing on the low moving platform, wait for it to line up with the ledges on the right and jump forward. Climb up to the
next level and head to the back where you can turn and climb up again. Now you are ready to jump to the top moving platform. When
you land you are just one more jump away from getting out of this area except there is a treasure hidden nearby. Turn to face the
wooden ledges and sidestep to the left edge of the platform. There is a single wooden ledge to the far left of the platform's
motion. Wait for the platform to reach the furthest point left and jump to the ledge where you will find a Blue Gem
in a niche on the right wall. Turn and face the river (see picture) and jump back to the moving platform. Ride it all the way to
the other side and do a running jump and grab to the entry ledge. Pull up and leave this area.
While standing on the low moving platform, wait for it to line up with the ledges on the right and jump forward. Climb up to the
next level and head to the back where you can turn and climb up again. Now you are ready to jump to the top moving platform. When
you land you are just one more jump away from getting out of this area except there is a treasure hidden nearby. Turn to face the
wooden ledges and sidestep to the left edge of the platform. There is a single wooden ledge to the far left of the platform's
motion. Wait for the platform to reach the furthest point left and jump to the ledge where you will find a Blue Gem
in a niche on the right wall. Turn and face the river (see picture) and jump back to the moving platform. Ride it all the way to
the other side and do a running jump and grab to the entry ledge. Pull up and leave this area.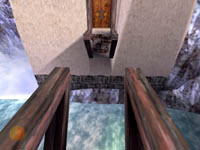 Return to the bottom of the tower with the clock (which should now be moving) and locate the door in the center of the opposite wall
from the ladder you just climbed up. Push the button and the door opens revealing a tower on the other side of the river and no
bridge. Head out onto the ledge anyway and back off and drop to a lower ledge where you will find a Green Gem
you can add to your treasure collection.
Return to the bottom of the tower with the clock (which should now be moving) and locate the door in the center of the opposite wall
from the ladder you just climbed up. Push the button and the door opens revealing a tower on the other side of the river and no
bridge. Head out onto the ledge anyway and back off and drop to a lower ledge where you will find a Green Gem
you can add to your treasure collection. Climb back up and enter the tower then head to the other side of the room with the face on the wall. Climb up to the wooden ledge
above and to the right. From here you can pull up to the small square ledge in the corner then turn and jump back to the next higher
ledge. From here walk across to the far end of this ledge and use your whip to climb up to the next level.
Climb back up and enter the tower then head to the other side of the room with the face on the wall. Climb up to the wooden ledge
above and to the right. From here you can pull up to the small square ledge in the corner then turn and jump back to the next higher
ledge. From here walk across to the far end of this ledge and use your whip to climb up to the next level. You should now be at a corner area with a button on the wall. Press the button and a pair of walkways will extend over some long gaps
in the catwalk. Cross the nearest one behind the button and in the opposite corner you will find a lever you can pull which raises
the gates above, so the statue on the tracks is now free to travel between the towers.
You should now be at a corner area with a button on the wall. Press the button and a pair of walkways will extend over some long gaps
in the catwalk. Cross the nearest one behind the button and in the opposite corner you will find a lever you can pull which raises
the gates above, so the statue on the tracks is now free to travel between the towers. Before you leave this tower there is another treasure nearby. Climb up the ladder next to the lever and head toward the statue.
Turn right and walk to the edge of this upper area and look over the side. Below is the treasure in the niche in the wall which you
can now access because the ledge is extended. Drop down and get the Red Gem then turn and climb back up
and exit through the open gate.
Before you leave this tower there is another treasure nearby. Climb up the ladder next to the lever and head toward the statue.
Turn right and walk to the edge of this upper area and look over the side. Below is the treasure in the niche in the wall which you
can now access because the ledge is extended. Drop down and get the Red Gem then turn and climb back up
and exit through the open gate.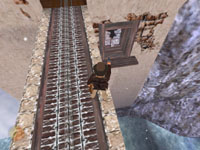 You can easily enter the other tower but there isn't anything to do on this level. Instead, as you are crossing the bridge draw your
pistol and walk along the right edge of the tracks. As you near the opposite tower your gun will auto-aim at the window below. Shoot
it out and continue until you are just outside the tower gate. Turn to face the window and drop off to land on the ledge below. Stand
just outside the window and get your gun out. You may want to go with a weapon that has an extended range. There are two ice monsters
inside; the first is just inside the windows to the left and the other is below. The second will come to life just as you enter so
be ready.
You can easily enter the other tower but there isn't anything to do on this level. Instead, as you are crossing the bridge draw your
pistol and walk along the right edge of the tracks. As you near the opposite tower your gun will auto-aim at the window below. Shoot
it out and continue until you are just outside the tower gate. Turn to face the window and drop off to land on the ledge below. Stand
just outside the window and get your gun out. You may want to go with a weapon that has an extended range. There are two ice monsters
inside; the first is just inside the windows to the left and the other is below. The second will come to life just as you enter so
be ready.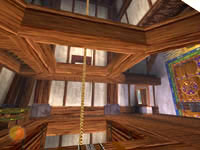 You are now on a wooden ledge with a large central hole with a rope and a narrow hole off to one side. Back off into this narrow
hole and drop to the next level. Find a similar narrow opening and drop down again and you will be on the floor of the tower
with the giant bell.
You are now on a wooden ledge with a large central hole with a rope and a narrow hole off to one side. Back off into this narrow
hole and drop to the next level. Find a similar narrow opening and drop down again and you will be on the floor of the tower
with the giant bell.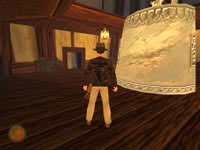 Flip the lever behind the bell to connect all of the levels above with ladders. Approach the bell and read the writings. You can
ignore the button and door on the other wall - it just leads to the other side of that missing bridge where you found the secret
earlier. Start climbing the steps and ladders to make your way up the tower.
Flip the lever behind the bell to connect all of the levels above with ladders. Approach the bell and read the writings. You can
ignore the button and door on the other wall - it just leads to the other side of that missing bridge where you found the secret
earlier. Start climbing the steps and ladders to make your way up the tower.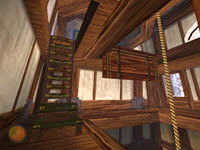 When you reach the level with the bridge leading to the other tower you need to locate one last ladder leading up to the upper level
where you will find another lever to pull. This raises the bell to the bridge level opposite the statue with the hammer - are you
starting to get the picture yet? There is one more treasure to get in this area and naturally it's back at the bottom of the tower
under the former location of the bell. Drop down all the ledges (the ladders take too long) and make your way to the bottom where
you can retrieve the Gold Bar from the pedestal in the middle of the room. Now climb all the way back up to
the level with the bell and cross the bridge back to the clock tower.
When you reach the level with the bridge leading to the other tower you need to locate one last ladder leading up to the upper level
where you will find another lever to pull. This raises the bell to the bridge level opposite the statue with the hammer - are you
starting to get the picture yet? There is one more treasure to get in this area and naturally it's back at the bottom of the tower
under the former location of the bell. Drop down all the ledges (the ladders take too long) and make your way to the bottom where
you can retrieve the Gold Bar from the pedestal in the middle of the room. Now climb all the way back up to
the level with the bell and cross the bridge back to the clock tower.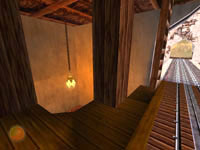 Enter the tower with the statue and turn toward the edge where you obtained the red gem earlier. Drop down and circle around to the
right and drop down to the ledge below with a lever. Pull the lever and a switch will pop out of the clock which is triggered by
the moving hands. When the hand hits the switch the statue is activated.
Enter the tower with the statue and turn toward the edge where you obtained the red gem earlier. Drop down and circle around to the
right and drop down to the ledge below with a lever. Pull the lever and a switch will pop out of the clock which is triggered by
the moving hands. When the hand hits the switch the statue is activated.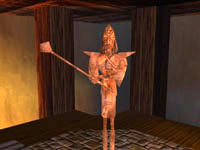 However, the statue is unable to move. Here is the trick. You have to keep pulling the lever and the switch that pops out will
rotate around the clock. Your goal is to get the switch to pop out BEHIND the big hand of the clock giving you plenty of time to
climb up to the top and get across the bridge to the other tower where you must pull a matching lever just inside and to the left
of the bell tower entrance.
However, the statue is unable to move. Here is the trick. You have to keep pulling the lever and the switch that pops out will
rotate around the clock. Your goal is to get the switch to pop out BEHIND the big hand of the clock giving you plenty of time to
climb up to the top and get across the bridge to the other tower where you must pull a matching lever just inside and to the left
of the bell tower entrance.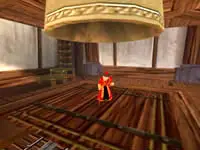 This may take your several tries so save your game just in case. When you are able to pull both levers within the time limit the
statue will start spinning and roll across the bridge and strike the bell. The bell will lift off of the floor revealing a
mysterious old lady who fills you in on more of the story. She will give you a small quest and a key to help you access a new area.
This may take your several tries so save your game just in case. When you are able to pull both levers within the time limit the
statue will start spinning and roll across the bridge and strike the bell. The bell will lift off of the floor revealing a
mysterious old lady who fills you in on more of the story. She will give you a small quest and a key to help you access a new area. When your conversation is complete, return to the clock tower and start dropping down ledges until you reach the bottom. Head toward
the face on the wall and go to the right where you will find a keyhole that is a perfect fit for your new key. The gate opens and
you can enter a really cool-looking room with waterfalls and a big statue. Ignore all that for now and make a U-turn to the right
to enter another hall. As you turn the corner a pair of ice monsters will attack. The second one appears after the first so try to
kill them fast so they can't double-up on you.
When your conversation is complete, return to the clock tower and start dropping down ledges until you reach the bottom. Head toward
the face on the wall and go to the right where you will find a keyhole that is a perfect fit for your new key. The gate opens and
you can enter a really cool-looking room with waterfalls and a big statue. Ignore all that for now and make a U-turn to the right
to enter another hall. As you turn the corner a pair of ice monsters will attack. The second one appears after the first so try to
kill them fast so they can't double-up on you. Enter the room to the right where you will find beds with sleeping skeletons, a ladder leading up to a loft, and a small closet in
the corner. Investigate the closet first and you will find a ladder that leads up to another level with a bed in the middle of the
room. Climb up on bed and jump to grab the rafters above.
Enter the room to the right where you will find beds with sleeping skeletons, a ladder leading up to a loft, and a small closet in
the corner. Investigate the closet first and you will find a ladder that leads up to another level with a bed in the middle of the
room. Climb up on bed and jump to grab the rafters above.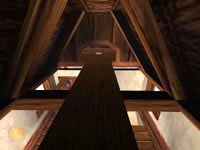 You can pull up to a walkway across the beams and crouch at the end to crawl through and get the Gold Bar.
When you have added this treasure to your collection you can continue forward and drop into the room below. This small bedroom
has a button that opens the nearby door and the Great Monastic Seal sits on a display stand in the wall.
Taking the relic also triggers a commotion outside the window. Looking out you see several Russian Soldiers storming the Sanctuary.
You now have the pleasure of fighting the occasional random soldier for the rest of this level.
You can pull up to a walkway across the beams and crouch at the end to crawl through and get the Gold Bar.
When you have added this treasure to your collection you can continue forward and drop into the room below. This small bedroom
has a button that opens the nearby door and the Great Monastic Seal sits on a display stand in the wall.
Taking the relic also triggers a commotion outside the window. Looking out you see several Russian Soldiers storming the Sanctuary.
You now have the pleasure of fighting the occasional random soldier for the rest of this level. Return to the ladder leading to the closet and climb down. A soldier may be in this room or outside in the hall. Kill them whenever
you see them. Climb the ladder up to the loft (see picture) and press the button to lower a short bridge leading to the next room.
Enter this room and circle around to the bookcase and get the Gold Coins from the shelf. Return to the
lower bedroom and make your way through the hall back to the cool-looking room with the waterfalls.
Return to the ladder leading to the closet and climb down. A soldier may be in this room or outside in the hall. Kill them whenever
you see them. Climb the ladder up to the loft (see picture) and press the button to lower a short bridge leading to the next room.
Enter this room and circle around to the bookcase and get the Gold Coins from the shelf. Return to the
lower bedroom and make your way through the hall back to the cool-looking room with the waterfalls. There are a total of three guards in this area minus however many you have already killed. Stay in this hall and use your rifle to
sniper them from long range. Collect their weapons and ammo then head to the ladder across the way and climb up. Turn and face the
big wooden beam and do a running jump to grab on and pull up. Cross the beam and repeat the running jump to land on the opposite
ledge with the button. (see picture) Press the button and the ladder on the other ledge raises to the upper level. Return to the
beam and jump back to the ledge with the ladder to climb up.
There are a total of three guards in this area minus however many you have already killed. Stay in this hall and use your rifle to
sniper them from long range. Collect their weapons and ammo then head to the ladder across the way and climb up. Turn and face the
big wooden beam and do a running jump to grab on and pull up. Cross the beam and repeat the running jump to land on the opposite
ledge with the button. (see picture) Press the button and the ladder on the other ledge raises to the upper level. Return to the
beam and jump back to the ledge with the ladder to climb up. You will be in a long hall with a railing along the left. Go to the end and U-turn to the left until you reach a locked door. Look
through the fancy window to see two glass windows inside the room. Shoot out the window on the right then return to the other end of
the hall behind you. Press the button and the door will open. Enter and kill the ice monster then make your way to the back of this
area.
You will be in a long hall with a railing along the left. Go to the end and U-turn to the left until you reach a locked door. Look
through the fancy window to see two glass windows inside the room. Shoot out the window on the right then return to the other end of
the hall behind you. Press the button and the door will open. Enter and kill the ice monster then make your way to the back of this
area.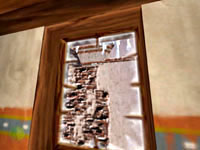 A sniper is outside on the opposite building and he will start shooting at you as soon as you step into view of the window. Use your
rifle to kill him quickly then climb out through the broken window onto the ledge. Back off the ledge and shimmy across to the
right until you are under the other window you just shot out. Climb up and enter the room.
A sniper is outside on the opposite building and he will start shooting at you as soon as you step into view of the window. Use your
rifle to kill him quickly then climb out through the broken window onto the ledge. Back off the ledge and shimmy across to the
right until you are under the other window you just shot out. Climb up and enter the room. There's not much to do in this room right now. Examine the gold basket and the hole below it then press the button on the wall to
open the door. Exit this room and return to the ladder leading back down into the waterfall area. The ladder will not go back to
the floor level so you will have to drop from the ladder ledge to the floor below.
There's not much to do in this room right now. Examine the gold basket and the hole below it then press the button on the wall to
open the door. Exit this room and return to the ladder leading back down into the waterfall area. The ladder will not go back to
the floor level so you will have to drop from the ladder ledge to the floor below.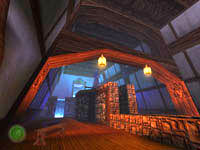 Head along the left side of the structure toward the waterfall and locate the ladder. You could also go down the right side of the
structure if you want to. If you go right you will see a closed gate leading under the statue. Climb up and enjoy the spectacular
view of the glowing blue water and the orange torch lit walls. Turn and face the large statue in the center of this room and approach
it.
Head along the left side of the structure toward the waterfall and locate the ladder. You could also go down the right side of the
structure if you want to. If you go right you will see a closed gate leading under the statue. Climb up and enjoy the spectacular
view of the glowing blue water and the orange torch lit walls. Turn and face the large statue in the center of this room and approach
it.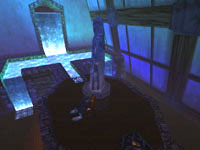 Grab a handle and turn the statue. Water starts flowing through the canal and fills the pool at the other end. Turn the statue
one more time and the gate leading into the area under the statue opens. You can now drop off this upper area to the side of the
structure with the gate and enter. Don't go down the ladder yet - there is a treasure nearby.
Grab a handle and turn the statue. Water starts flowing through the canal and fills the pool at the other end. Turn the statue
one more time and the gate leading into the area under the statue opens. You can now drop off this upper area to the side of the
structure with the gate and enter. Don't go down the ladder yet - there is a treasure nearby. Indy will give you a clue about nearby danger and the suspicious looking floor should also alert you to trouble. Approach the statue
and as soon as you take it use your back flip/roll move to quickly get back to the safe part of this room. The room will shake and
the floor will collapse but you will have the Silver Idol. You can now climb down the ladder into the
darkness below.
Indy will give you a clue about nearby danger and the suspicious looking floor should also alert you to trouble. Approach the statue
and as soon as you take it use your back flip/roll move to quickly get back to the safe part of this room. The room will shake and
the floor will collapse but you will have the Silver Idol. You can now climb down the ladder into the
darkness below. The music indicates trouble ahead. Get your guns out and kill the spider that lowers from the web in the corner as soon as you go
through the first spider web. Head down this next passage until the wooden floor turns to tiles. Crouch and crawl across these
tiles as a giant tree trunk swings back and forth just over your head. When you reach the wooden floor on the other side it is safe
to stand. Carefully go around the corner into the next room.
The music indicates trouble ahead. Get your guns out and kill the spider that lowers from the web in the corner as soon as you go
through the first spider web. Head down this next passage until the wooden floor turns to tiles. Crouch and crawl across these
tiles as a giant tree trunk swings back and forth just over your head. When you reach the wooden floor on the other side it is safe
to stand. Carefully go around the corner into the next room.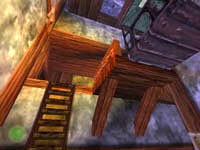 This room has an elevator overhead and a ladder leading up to a ledge. There are also two ice monsters that will start firing ice
shards at you as soon as you enter. Kill them from the partial safety of the doorway then when the coast is clear you can climb
the ladder to reach the ledge.
This room has an elevator overhead and a ladder leading up to a ledge. There are also two ice monsters that will start firing ice
shards at you as soon as you enter. Kill them from the partial safety of the doorway then when the coast is clear you can climb
the ladder to reach the ledge. The lever doesn't work so go to the opposite wall and face the window across the room. Whip the post and swing across to enter the
web-infested passage. Go to the end until you see those suspicious floor tiles again. If you step onto the tiles and take the statue
a barrel will crush you from the side passage. Instead, use your whip to fling the statue to the floor in front of you where you can
safely retrieve the Gold Idol. Whip your way back to the other ledge and enter the elevator.
The lever doesn't work so go to the opposite wall and face the window across the room. Whip the post and swing across to enter the
web-infested passage. Go to the end until you see those suspicious floor tiles again. If you step onto the tiles and take the statue
a barrel will crush you from the side passage. Instead, use your whip to fling the statue to the floor in front of you where you can
safely retrieve the Gold Idol. Whip your way back to the other ledge and enter the elevator.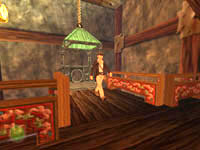 Exit the elevator and approach the large double doors. Use the Great Monastic Seal in the receptacle to open the door and enter the
next challenging area. Note: This next area requires many precise jumps. Save often! While you will survive the fall into the
water, the trip back to this area to start over is very long. Follow my directions exactly and you will make it through this room
easily.
Exit the elevator and approach the large double doors. Use the Great Monastic Seal in the receptacle to open the door and enter the
next challenging area. Note: This next area requires many precise jumps. Save often! While you will survive the fall into the
water, the trip back to this area to start over is very long. Follow my directions exactly and you will make it through this room
easily.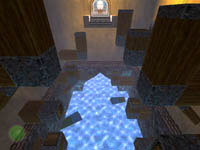 Walk to the edge and survey the situation. Your goal is the alcove on the opposite wall but there are a few stops in-between. For
now do the following moves. Back off this ledge and shimmy to the left. Drop to the ledge below and turn to face the series of wooden
beams sticking out of the wall. A standing jump gets you to the Beam #1 and a running jump gets you onto Beam #2. Note the
exposed brick around the next beam. It will collapse when you land on it but you will have enough time to jump to the next beam if
you press jump as soon as you land. Do a standing jump to Beam #3 then as it starts to wobble do a running jump to Beam #4
and angle the jump either toward the wall or the higher post on the left. You could try to do a running jump over the weak
beam and land on the final beam, but I was only able to do this once in twelve tries.
Walk to the edge and survey the situation. Your goal is the alcove on the opposite wall but there are a few stops in-between. For
now do the following moves. Back off this ledge and shimmy to the left. Drop to the ledge below and turn to face the series of wooden
beams sticking out of the wall. A standing jump gets you to the Beam #1 and a running jump gets you onto Beam #2. Note the
exposed brick around the next beam. It will collapse when you land on it but you will have enough time to jump to the next beam if
you press jump as soon as you land. Do a standing jump to Beam #3 then as it starts to wobble do a running jump to Beam #4
and angle the jump either toward the wall or the higher post on the left. You could try to do a running jump over the weak
beam and land on the final beam, but I was only able to do this once in twelve tries.Enter the passage leading into the wall at this beam and enter the room at the other end. Climb the ledge to get the Gate Key and kill the spider that appears when you take the key. Drop to the floor and return to Beam #4. Now turn and face the Beam #2 and do a running jump to grab onto the other beam and pull up. The jump works now that the middle beam is missing. Climb up to the high post at the end of this beam and then do a running jump and grab to the next highest post leading back toward the entrance.
 From this post you can do a running jump and grab the crevice in the wall above the entry ledge. Shimmy all the way to the right and
drop to the post here. (see picture) Now things get tricky. Step down to the lower beam and do a standing jump to the next one
along the wall leading back toward the alcove. Get up against the wall and back off the forward edge of this beam and drop below.
Now walk to the end of this beam and drop to the beam below it. Now jump across to the next beam and you should be able to spot a
post in the wall you can use your whip on to swing across to the opposite side of the room. You should now be on the series of
beams directly below the first four you used to get the key.
From this post you can do a running jump and grab the crevice in the wall above the entry ledge. Shimmy all the way to the right and
drop to the post here. (see picture) Now things get tricky. Step down to the lower beam and do a standing jump to the next one
along the wall leading back toward the alcove. Get up against the wall and back off the forward edge of this beam and drop below.
Now walk to the end of this beam and drop to the beam below it. Now jump across to the next beam and you should be able to spot a
post in the wall you can use your whip on to swing across to the opposite side of the room. You should now be on the series of
beams directly below the first four you used to get the key.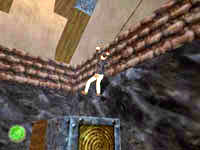 Jump forward to the next ledge and then make a running leap to the next ledge in the series. Use your whip on the post above to swing
across to the next ledge and finish it up with a short standing jump to the final ledge along this wall. Now face the opposite wall
and do a running leap to grab the long ledge. Pull up and approach the wall then turn and jump to the next ledge and climb up to
the higher ledge above this one. Jump back to the higher ledge between the tall post and the wall and face the block with the
handles.
Jump forward to the next ledge and then make a running leap to the next ledge in the series. Use your whip on the post above to swing
across to the next ledge and finish it up with a short standing jump to the final ledge along this wall. Now face the opposite wall
and do a running leap to grab the long ledge. Pull up and approach the wall then turn and jump to the next ledge and climb up to
the higher ledge above this one. Jump back to the higher ledge between the tall post and the wall and face the block with the
handles.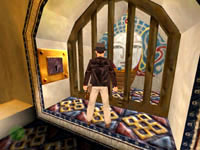 Push this block into the wall and a niche in the left wall will be revealed. Take the Silver Bar then
pull the block back toward you and out of the wall onto the ledge. Climb onto the block and use it as a step to reach the top of
the post behind you. From here you can jump and grab onto the ledge of the balcony and pull up to enter the alcove. SLAM! That
gate isn't budging. Good thing you remembered to get that Gate Key before coming all this way. Use the key to open the gate and
get the Small Plant.
Push this block into the wall and a niche in the left wall will be revealed. Take the Silver Bar then
pull the block back toward you and out of the wall onto the ledge. Climb onto the block and use it as a step to reach the top of
the post behind you. From here you can jump and grab onto the ledge of the balcony and pull up to enter the alcove. SLAM! That
gate isn't budging. Good thing you remembered to get that Gate Key before coming all this way. Use the key to open the gate and
get the Small Plant.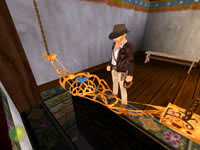 More Russians! Save your rifle ammo and do a running leap into the pool far below. Swim into either channel on the opposite wall
and follow it back to the long dark room with the statue and the canal. Climb up onto the wall around the pool and walk past the
statue and out to the end of the wall. You can jump and grab the beam above, then head left and jump over to the ledge with the
ladder. Climb up and return to the room with the odd basket. Put the plant in the basket and watch it lower into the room below.
More Russians! Save your rifle ammo and do a running leap into the pool far below. Swim into either channel on the opposite wall
and follow it back to the long dark room with the statue and the canal. Climb up onto the wall around the pool and walk past the
statue and out to the end of the wall. You can jump and grab the beam above, then head left and jump over to the ledge with the
ladder. Climb up and return to the room with the odd basket. Put the plant in the basket and watch it lower into the room below.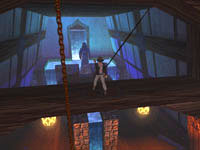 Leave this room and go down the U-Turn hall and down the ladder. From this ledge jump back out to the beam and cross over to the
middle where you should see some embossed symbols on the beam. Stand on these symbols and face the small ledge in the middle
of the opposite wall. The gold basket is below and a bar connecting the chains can be used to whip-swing to this small ledge. Indy's
weight causes the platform to sink and opens the shutters flooding the room with light. The plant grows in the sunlight and you can
drop down and pick it back up.
Leave this room and go down the U-Turn hall and down the ladder. From this ledge jump back out to the beam and cross over to the
middle where you should see some embossed symbols on the beam. Stand on these symbols and face the small ledge in the middle
of the opposite wall. The gold basket is below and a bar connecting the chains can be used to whip-swing to this small ledge. Indy's
weight causes the platform to sink and opens the shutters flooding the room with light. The plant grows in the sunlight and you can
drop down and pick it back up.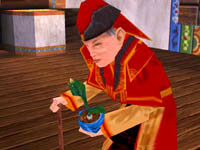 Now it's time to return to the bell tower and give the plant to the old woman. Unfortunately more Russian soldiers have infiltrated
the clock tower, so getting there won't be easy. You will encounter your first guard when you turn the corner to enter the clock
room. Kill him then quickly climb up to the next highest ledge. There will be at least one guard on each tier plus any that you
leave below. They will all be shooting at you but it is much easier to just run, jump, and climb than it is to fight them all.
When you finally reach the top, take the bridge across to the other tower and give the plant to the woman. She will transform into
a young woman and open the door leading to the guardian and the Urgon Machine Part.
Now it's time to return to the bell tower and give the plant to the old woman. Unfortunately more Russian soldiers have infiltrated
the clock tower, so getting there won't be easy. You will encounter your first guard when you turn the corner to enter the clock
room. Kill him then quickly climb up to the next highest ledge. There will be at least one guard on each tier plus any that you
leave below. They will all be shooting at you but it is much easier to just run, jump, and climb than it is to fight them all.
When you finally reach the top, take the bridge across to the other tower and give the plant to the woman. She will transform into
a young woman and open the door leading to the guardian and the Urgon Machine Part.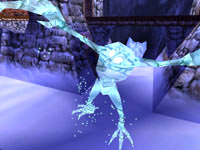 Proceed through the next room and slide down the snowy ramps until you reach the large cavern area with four towers that form a
large crossroad. Stuck to the ceiling is your first guardian. He drops to the ground and you must react instantly if you want to
survive. The Ice Guardian has two basic attacks. He will do a devastating spinning attack roll down the street that will kill you
instantly if you are hit by it. He will also climb the walls and ceiling and shoot at you with giant ice shards. You cannot harm
the creature at this time, so you need to move fast to complete the required tasks and obtain the first machine part. Save often
and watch your health.
Proceed through the next room and slide down the snowy ramps until you reach the large cavern area with four towers that form a
large crossroad. Stuck to the ceiling is your first guardian. He drops to the ground and you must react instantly if you want to
survive. The Ice Guardian has two basic attacks. He will do a devastating spinning attack roll down the street that will kill you
instantly if you are hit by it. He will also climb the walls and ceiling and shoot at you with giant ice shards. You cannot harm
the creature at this time, so you need to move fast to complete the required tasks and obtain the first machine part. Save often
and watch your health. As soon as you have control of Indy, dodge the initial attack and head down the street to the left. As you near the end of the
street turn left again and enter the door into the first tower. Grab the medicinal herb from the table (you will need it) and climb
the ice block to access the ramp leading up and around to the right. At the top of the ramp you will spot a block in the corner
(see picture) that you need to pull out. Then turn and jump onto the snow ramp and slide down to the tower door.
As soon as you have control of Indy, dodge the initial attack and head down the street to the left. As you near the end of the
street turn left again and enter the door into the first tower. Grab the medicinal herb from the table (you will need it) and climb
the ice block to access the ramp leading up and around to the right. At the top of the ramp you will spot a block in the corner
(see picture) that you need to pull out. Then turn and jump onto the snow ramp and slide down to the tower door.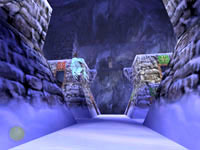 Peek out the door and locate the Ice Guardian. When the coast is clear, run down the street and through the intersection. Continue
forward and turn left into the next tower. Save your game then climb the block and start up the ramp. Keep moving, as the ramp will
collapse as you run over it. If you fall you can use the various ledges to get back up but it will be easier to just restore. Head
out the door and across the bridge into the next tower. Follow the walkway around to the door in the side that leads to a long
running jump to reach the tower across the street (first tower where you got the plant).
Peek out the door and locate the Ice Guardian. When the coast is clear, run down the street and through the intersection. Continue
forward and turn left into the next tower. Save your game then climb the block and start up the ramp. Keep moving, as the ramp will
collapse as you run over it. If you fall you can use the various ledges to get back up but it will be easier to just restore. Head
out the door and across the bridge into the next tower. Follow the walkway around to the door in the side that leads to a long
running jump to reach the tower across the street (first tower where you got the plant).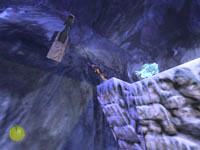 This passage was previously blocked with the stone you moved at the beginning but now you are free to follow the path and out the
door to the left. Go across the bridge to reach the remaining tower. Once inside you need to turn right and start jumping to the various
ledges as you make your way to the very top of the tower. The Ice Guardian will definitely be nearby shooting ice shards at you.
When you reach the top locate the post in the cavern wall and whip-swing across to the opposite tower (tower with collapsing ramps).
This passage was previously blocked with the stone you moved at the beginning but now you are free to follow the path and out the
door to the left. Go across the bridge to reach the remaining tower. Once inside you need to turn right and start jumping to the various
ledges as you make your way to the very top of the tower. The Ice Guardian will definitely be nearby shooting ice shards at you.
When you reach the top locate the post in the cavern wall and whip-swing across to the opposite tower (tower with collapsing ramps). Stash the whip and do a running jump to the middle of the opposite ledge by the door. Pull up and press the button to enter. You
are safe for the moment. Head over toward the green glow in the wall and you can get the Urgon Machine Part
from the niche. This part appears in your item inventory but can be used as a weapon or tool by activating it then hitting your
fire key.
Stash the whip and do a running jump to the middle of the opposite ledge by the door. Pull up and press the button to enter. You
are safe for the moment. Head over toward the green glow in the wall and you can get the Urgon Machine Part
from the niche. This part appears in your item inventory but can be used as a weapon or tool by activating it then hitting your
fire key.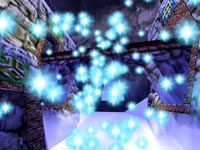 It's payback time! Head outside and arm yourself with the Urgon part. It only takes three hits with this device to destroy the
Ice Guardian but you must be at point-blank range. The Urgon part also has a lengthy recharge time so make sure you have a nearby
place to hide after each attack. You will also notice that using the part also takes away Indy's health. Keep using those plants
and med kits during the final battle. I found that standing in the middle of the street just outside a door and waiting for him to
spin-charge me was the best strategy. When he rushes toward you, side-roll into the door then run back out and get behind him and
fire. When he dies the explosion is quite spectacular.
It's payback time! Head outside and arm yourself with the Urgon part. It only takes three hits with this device to destroy the
Ice Guardian but you must be at point-blank range. The Urgon part also has a lengthy recharge time so make sure you have a nearby
place to hide after each attack. You will also notice that using the part also takes away Indy's health. Keep using those plants
and med kits during the final battle. I found that standing in the middle of the street just outside a door and waiting for him to
spin-charge me was the best strategy. When he rushes toward you, side-roll into the door then run back out and get behind him and
fire. When he dies the explosion is quite spectacular.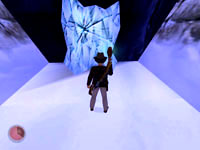 When the battle is over you can explore the rest of this area for any items you may have overlooked in the heat of battle. When you
have pillaged the towers you can head to the end of the street with the cracked ice block. Use the Urgon part one final time to
shatter the block and open the passage. Enter the hall and follow it to the exit door where you will encounter the female
caretaker one final time. She will give you some more information and open the door to send you on your way to the Palawan Lagoon.
When the battle is over you can explore the rest of this area for any items you may have overlooked in the heat of battle. When you
have pillaged the towers you can head to the end of the street with the cracked ice block. Use the Urgon part one final time to
shatter the block and open the passage. Enter the hall and follow it to the exit door where you will encounter the female
caretaker one final time. She will give you some more information and open the door to send you on your way to the Palawan Lagoon.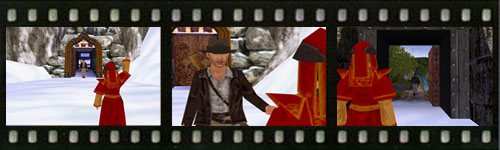

 Recommended Purchases:
(2) First Aid Kits
(1) Trauma Kit
(1) Rifle Clip