

 Return to Peru is a BONUS LEVEL you get to play when you have acquired enough money to purchase the Secret Map from the
Adventurer's Outpost. As soon as you purchase this map the next level that loads will be this one. You can play this level whenever you wish
(once you can afford the expensive map) but I recommend saving it for last. This level will challenge all of the skills and abilities you will
have acquired during the main adventure. It is your final exam so to speak.
Return to Peru is a BONUS LEVEL you get to play when you have acquired enough money to purchase the Secret Map from the
Adventurer's Outpost. As soon as you purchase this map the next level that loads will be this one. You can play this level whenever you wish
(once you can afford the expensive map) but I recommend saving it for last. This level will challenge all of the skills and abilities you will
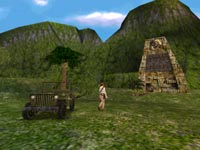
have acquired during the main adventure. It is your final exam so to speak.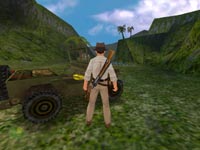 This is Indy's first trip back to this temple since his adventures in Raiders of the Lost Ark. He has learned of the existence of a
duplicate gold statue and this time he won't let it be stolen. You will visit many familiar locations from the movie plus there are several
new areas and even some hidden areas including one super-secret area near the end of the level. When you are ready to begin, head for the
passenger side of the jeep and get the Raft from the front seat.
This is Indy's first trip back to this temple since his adventures in Raiders of the Lost Ark. He has learned of the existence of a
duplicate gold statue and this time he won't let it be stolen. You will visit many familiar locations from the movie plus there are several
new areas and even some hidden areas including one super-secret area near the end of the level. When you are ready to begin, head for the
passenger side of the jeep and get the Raft from the front seat.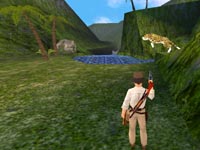 Turn right and head along the hillside and don't be too surprised when a big cat leaps off the ledge in front of you. Fire a few rounds into
the air to scare him off. He won't stay away for long so finish up your business in this area. A single Piranha swims in the pool up ahead
which you can shoot from the safety of the shore in case you think you might be swimming instead of rafting.
Turn right and head along the hillside and don't be too surprised when a big cat leaps off the ledge in front of you. Fire a few rounds into
the air to scare him off. He won't stay away for long so finish up your business in this area. A single Piranha swims in the pool up ahead
which you can shoot from the safety of the shore in case you think you might be swimming instead of rafting. Back near the sealed entrance to the right is a blue snake guarding a medicinal herb. A few rounds from your pistol will finish off this minor
threat and you can take the herb and return to the lake. You have a short raft ride ahead and only a few repair kits so remember the skills
you learned in the Tian Shan River level. Also remember to save those repair kits until you are almost out of air.
Back near the sealed entrance to the right is a blue snake guarding a medicinal herb. A few rounds from your pistol will finish off this minor
threat and you can take the herb and return to the lake. You have a short raft ride ahead and only a few repair kits so remember the skills
you learned in the Tian Shan River level. Also remember to save those repair kits until you are almost out of air.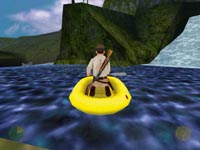 Inflate the raft and head down the river. The first section isn't too difficult. Stay near the shore and back paddle to keep your speed under
control. Avoid the rocks and follow the river around to the left. The white water will soon turn into a large calm blue lake. Steer toward
the towering waterfall to the left and locate the twin ledges at the mouth of the inlet.
Inflate the raft and head down the river. The first section isn't too difficult. Stay near the shore and back paddle to keep your speed under
control. Avoid the rocks and follow the river around to the left. The white water will soon turn into a large calm blue lake. Steer toward
the towering waterfall to the left and locate the twin ledges at the mouth of the inlet.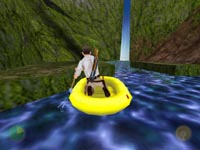 A Piranha swims near these ledges. You can shoot him once you get out of the raft. Even if you don't he cannot get past the rock into the
pool at the base of the falls. Dive in and locate the underwater tunnel to the left and swim through to the cave. Exit onto the ledge and
climb the rock ladder up to the high ledge overlooking the falls.
A Piranha swims near these ledges. You can shoot him once you get out of the raft. Even if you don't he cannot get past the rock into the
pool at the base of the falls. Dive in and locate the underwater tunnel to the left and swim through to the cave. Exit onto the ledge and
climb the rock ladder up to the high ledge overlooking the falls.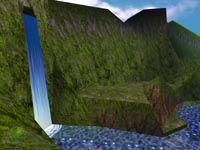 You are at the top of a steep slope leading down toward the water. Start sliding and at the last second jump and grab the opposite ledge and
pull up. Move forward to the next ridge and shoot the pair of snakes below you. Then you can drop down and safely chop away the vines covering
the entrance to the cave. Inside is a Gold Idol. Climb up the short step heading back toward the falls then turn
left toward the lake and jump down to the ledge below. If you miss the ledge and land in the water you can just climb out and use the raft.
You are at the top of a steep slope leading down toward the water. Start sliding and at the last second jump and grab the opposite ledge and
pull up. Move forward to the next ridge and shoot the pair of snakes below you. Then you can drop down and safely chop away the vines covering
the entrance to the cave. Inside is a Gold Idol. Climb up the short step heading back toward the falls then turn
left toward the lake and jump down to the ledge below. If you miss the ledge and land in the water you can just climb out and use the raft.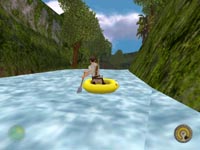 Continue with your river adventure down the next challenging set of rapids. More rocks are in this next area. Watch out for a fatal rock
trap to the right after you round the sharp bend to the left. If you get caught between this rock and the shore you will have to restore a
saved game. The current is too strong to back paddle out of this trap.
Continue with your river adventure down the next challenging set of rapids. More rocks are in this next area. Watch out for a fatal rock
trap to the right after you round the sharp bend to the left. If you get caught between this rock and the shore you will have to restore a
saved game. The current is too strong to back paddle out of this trap.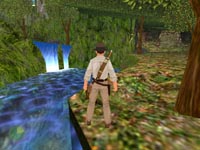 Your raft ride concludes after a short drop over a small waterfall. You land in a calm blue pool where you can exit to the shore on the left.
Investigating the boulder up the hill reveals this is where you escaped this temple the first time you were here. Looking into the lake you
can see a pair of underwater tunnels at the base of the falls. Dive in to investigate further.
Your raft ride concludes after a short drop over a small waterfall. You land in a calm blue pool where you can exit to the shore on the left.
Investigating the boulder up the hill reveals this is where you escaped this temple the first time you were here. Looking into the lake you
can see a pair of underwater tunnels at the base of the falls. Dive in to investigate further.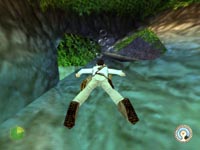 The tunnel on the left is covered in vines so use your machete to clear the way and swim inside. Keep the machete ready, as there is a Piranha
just inside this passage and another one further back. As you curve around you should spot an opening on the right. Swim up and exit to the
ledge. Climb up until you are overlooking a pool. The other Piranha may be swimming in this pool if you didn't already kill him.
The tunnel on the left is covered in vines so use your machete to clear the way and swim inside. Keep the machete ready, as there is a Piranha
just inside this passage and another one further back. As you curve around you should spot an opening on the right. Swim up and exit to the
ledge. Climb up until you are overlooking a pool. The other Piranha may be swimming in this pool if you didn't already kill him.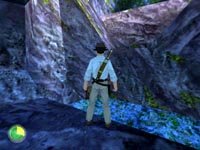 Just across this pool is a ledge. It is hard to see as it blends in with the rest of the rocks. A running jump should get you there and you
can grab and pull up. One more climb onto the next ledge and you will be facing a crude ladder leading up the cliff face. Your true objective
lies behind you but this optional climb is a fun diversion.
Just across this pool is a ledge. It is hard to see as it blends in with the rest of the rocks. A running jump should get you there and you
can grab and pull up. One more climb onto the next ledge and you will be facing a crude ladder leading up the cliff face. Your true objective
lies behind you but this optional climb is a fun diversion.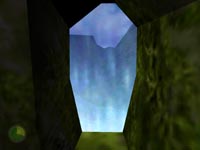 Climb the ladder and as soon as you reach the top whip out a gun and blast the pair of snakes that are already attacking. If you are fast
enough you can kill them without getting bit. Move forward up the grassy hill and turn left to see an opening with a sheet of water covering
the outside. Walk to the opening and take in the scenic overview of the first location you docked your raft. That's it! Hope it was worth it.
Climb the ladder and as soon as you reach the top whip out a gun and blast the pair of snakes that are already attacking. If you are fast
enough you can kill them without getting bit. Move forward up the grassy hill and turn left to see an opening with a sheet of water covering
the outside. Walk to the opening and take in the scenic overview of the first location you docked your raft. That's it! Hope it was worth it.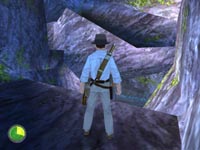 Now you can return to the ladder and climb down to the large ledge and face the water below. Directly across is a flat ledge to the right. Do
a running leap and grab onto this ledge then climb up the sloped surface leading to the left. At the top of this ledge you can turn left and
look down to see a larger ledge with a small alcove.
Now you can return to the ladder and climb down to the large ledge and face the water below. Directly across is a flat ledge to the right. Do
a running leap and grab onto this ledge then climb up the sloped surface leading to the left. At the top of this ledge you can turn left and
look down to see a larger ledge with a small alcove.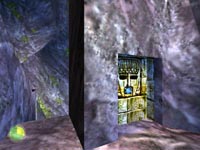 Drop down and take the Blue Gem from the mouth of the carving. You can now return to the main pool where you exited
the raft earlier. The quickest way is to jump off the ledge to the left of the treasure and land in the pool below. Swim down and back through
the cave and get some air back at the waterfall before continuing.
Drop down and take the Blue Gem from the mouth of the carving. You can now return to the main pool where you exited
the raft earlier. The quickest way is to jump off the ledge to the left of the treasure and land in the pool below. Swim down and back through
the cave and get some air back at the waterfall before continuing.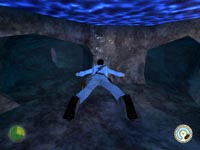 Now you can swim into the passage on the right and you will spill out over a waterfall into an underground lake. A simple maze of underwater
passages branch off from here. Stay to the left and kill the Piranha that you meet along the way. After you swim for a few seconds you should
spot a pool above you. Swim to the surface and exit.
Now you can swim into the passage on the right and you will spill out over a waterfall into an underground lake. A simple maze of underwater
passages branch off from here. Stay to the left and kill the Piranha that you meet along the way. After you swim for a few seconds you should
spot a pool above you. Swim to the surface and exit.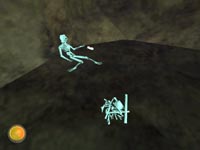 A giant lizard races across this area to attack you. Use a big gun to blast him quickly then move toward the back corner and take the First Aid
Kit from the skeleton leaning against the wall. From the looks of this area this lizard has been eating quite well lately. Return to the
water and jump in. Angle to the left and head through the first passage on the right. Another Piranha may be waiting for you.
A giant lizard races across this area to attack you. Use a big gun to blast him quickly then move toward the back corner and take the First Aid
Kit from the skeleton leaning against the wall. From the looks of this area this lizard has been eating quite well lately. Return to the
water and jump in. Angle to the left and head through the first passage on the right. Another Piranha may be waiting for you.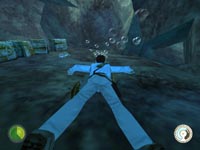 You should spot some boxes lying on the floor of this area. To the right in the wall is a small hole leading to a narrow tunnel. Have your
machete ready as there are more Piranha waiting in this passage. Swim up and exit to the ledge and climb up to the higher ledge. You should
now be overlooking the water below with the boxes beneath the surface.
You should spot some boxes lying on the floor of this area. To the right in the wall is a small hole leading to a narrow tunnel. Have your
machete ready as there are more Piranha waiting in this passage. Swim up and exit to the ledge and climb up to the higher ledge. You should
now be overlooking the water below with the boxes beneath the surface. Looking up to the wall on the right you easily spot a beam, which can be used to whip-swing across this part of the water. When you reach the
other side you can turn right and go through the narrow opening into the next chamber. There is a pool in this area as well and it connects
with the previous body of water, but taking this complicated route nets you another treasure.
Looking up to the wall on the right you easily spot a beam, which can be used to whip-swing across this part of the water. When you reach the
other side you can turn right and go through the narrow opening into the next chamber. There is a pool in this area as well and it connects
with the previous body of water, but taking this complicated route nets you another treasure.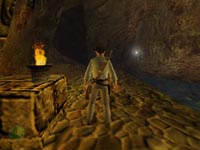 This room is rather dark so head to the firepot on the right and light it with your lighter. If you didn't spot it already you can now easily
see the Silver Idol in the niche on the far wall. It is out of your reach so use the whip to fling it into the
water. Dive in after it and add it to the collection.
This room is rather dark so head to the firepot on the right and light it with your lighter. If you didn't spot it already you can now easily
see the Silver Idol in the niche on the far wall. It is out of your reach so use the whip to fling it into the
water. Dive in after it and add it to the collection.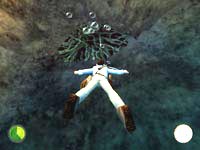 After you get the idol you need to ready the machete and look for the vine-covered hole in the floor of this pool. Slash the vines away and
swim into the creepy darkness. You cannot see a thing as the current sweeps you along this underground waterway and finally dumps you into a
raging whirlpool. Swim away from the vortex and pull out onto the shore.
After you get the idol you need to ready the machete and look for the vine-covered hole in the floor of this pool. Slash the vines away and
swim into the creepy darkness. You cannot see a thing as the current sweeps you along this underground waterway and finally dumps you into a
raging whirlpool. Swim away from the vortex and pull out onto the shore.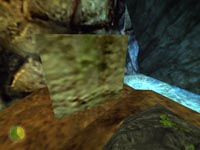 Position yourself behind the large stone block and push it toward the river. It will fall into the vortex and plug the drain causing this room
to quickly fill with water. Looking up you can see light above so start swimming up the vertical shaft. About halfway up you can locate a
nook in the blue rocks and get the Gold Bar inside.
Position yourself behind the large stone block and push it toward the river. It will fall into the vortex and plug the drain causing this room
to quickly fill with water. Looking up you can see light above so start swimming up the vertical shaft. About halfway up you can locate a
nook in the blue rocks and get the Gold Bar inside.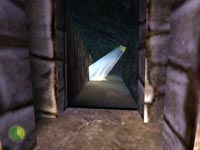 Continue to the surface where you have a choice of ledges to exit onto. Get out near the door with the shaft of light shining further down the
hall. Carefully enter the passage and approach the light. The bones of your old guide (from the movie) still lie in a pile near this deadly
trap. Stick to the right wall and don't touch the light and you can get past this trap easily.
Continue to the surface where you have a choice of ledges to exit onto. Get out near the door with the shaft of light shining further down the
hall. Carefully enter the passage and approach the light. The bones of your old guide (from the movie) still lie in a pile near this deadly
trap. Stick to the right wall and don't touch the light and you can get past this trap easily.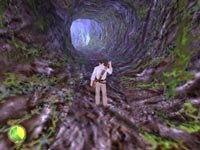 This next passage is the famous spider nest from the movie. While you won't get covered with hundreds of spiders like the movie, you will have
to kill at least a half-dozen of the poisonous critters. You can try running past them but you will probably get bit at least once and then you
have to worry about getting past them on the return trip. It's better to just advance slowly and kill them as you go.
This next passage is the famous spider nest from the movie. While you won't get covered with hundreds of spiders like the movie, you will have
to kill at least a half-dozen of the poisonous critters. You can try running past them but you will probably get bit at least once and then you
have to worry about getting past them on the return trip. It's better to just advance slowly and kill them as you go.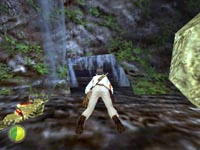 When you reach the boulder, drop and crawl through the low opening to reach the next room. Inside on the ledge is a Key
in need of a lock. I'm sure we can find one. Exit back to the spider cave and return to the water. More spiders will be dropping from the
ceiling but you can just run under them before they hit the ground. Dive in and swim to the opposite ledge and head through the door.
When you reach the boulder, drop and crawl through the low opening to reach the next room. Inside on the ledge is a Key
in need of a lock. I'm sure we can find one. Exit back to the spider cave and return to the water. More spiders will be dropping from the
ceiling but you can just run under them before they hit the ground. Dive in and swim to the opposite ledge and head through the door. This room was also made famous in the movie. Those dark diamond-shaped stones will shoot deadly darts from the wall if stepped on. You need to
carefully walk between the dark stone as you make your way across this room. The darts aren't poisonous and it takes about three or four to
kill you but you should still be careful.
This room was also made famous in the movie. Those dark diamond-shaped stones will shoot deadly darts from the wall if stepped on. You need to
carefully walk between the dark stone as you make your way across this room. The darts aren't poisonous and it takes about three or four to
kill you but you should still be careful. Hmmm...this looks familiar. A gold statue used to rest on this pedestal until you tried to replace it with a bag of sand and practically
destroyed this place. Climb onto the pedestal and jump across to the stairs beyond. Be careful, as the dark diamonds on the steps will trigger
darts as well. Climb up the ledge into the next area.
Hmmm...this looks familiar. A gold statue used to rest on this pedestal until you tried to replace it with a bag of sand and practically
destroyed this place. Climb onto the pedestal and jump across to the stairs beyond. Be careful, as the dark diamonds on the steps will trigger
darts as well. Climb up the ledge into the next area. I'd bet anything that keyhole on the left wall is a perfect match for the key you got a few moments ago. As soon as you insert the key a
large central slab sinks down revealing a dark passage. Move carefully through the darkness. You will hear plenty of noises before you see
anything. Draw your weapon and watch for Indy to target something then open fire.
I'd bet anything that keyhole on the left wall is a perfect match for the key you got a few moments ago. As soon as you insert the key a
large central slab sinks down revealing a dark passage. Move carefully through the darkness. You will hear plenty of noises before you see
anything. Draw your weapon and watch for Indy to target something then open fire.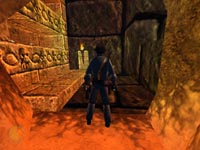 There are several scorpions scuttling around the floor in the dark crypt area and centipedes crawl around the corpses to the left. When you
are no longer getting a target you can enter the crypt and light the torch to make a final examination of the area. When you are sure everything
is safe you can turn to the wall opposite the skeletons and plan your next course of action.
There are several scorpions scuttling around the floor in the dark crypt area and centipedes crawl around the corpses to the left. When you
are no longer getting a target you can enter the crypt and light the torch to make a final examination of the area. When you are sure everything
is safe you can turn to the wall opposite the skeletons and plan your next course of action.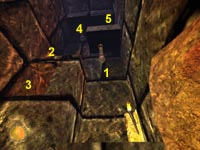 Climb onto the first ledge and light the torch. Then use your whip on the post (1) and climb up to the next ledge (2). From this ledge you can
probably target and kill many more centipedes on the opposite ledges. Then back off and drop to the nook below (3) and pull up to get the
Red Gem. Drop to the ground and repeat the climb to get back to the middle ledge (2) then use the whip on the post
(4) to climb up to the top ledge (5).
Climb onto the first ledge and light the torch. Then use your whip on the post (1) and climb up to the next ledge (2). From this ledge you can
probably target and kill many more centipedes on the opposite ledges. Then back off and drop to the nook below (3) and pull up to get the
Red Gem. Drop to the ground and repeat the climb to get back to the middle ledge (2) then use the whip on the post
(4) to climb up to the top ledge (5).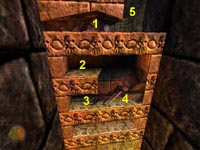 From this ledge you can do a running leap to grab onto the opposite ledge (1) then shimmy to the left just a bit and drop to the lower ledge (2)
and drop again to the ledge below (3). Now shimmy to the right and pull up into the open area (4) and get the Bamboo Pole.
Make a special note about the top area (5) as it will come into play later for the super-secret area. For now, drop to the floor and return
through the dark caves back to the previous area where you used the key.
From this ledge you can do a running leap to grab onto the opposite ledge (1) then shimmy to the left just a bit and drop to the lower ledge (2)
and drop again to the ledge below (3). Now shimmy to the right and pull up into the open area (4) and get the Bamboo Pole.
Make a special note about the top area (5) as it will come into play later for the super-secret area. For now, drop to the floor and return
through the dark caves back to the previous area where you used the key. Climb the ledge opposite the wall with the keyhole and locate the triangular-shaped hole under the nose of the face carving. Stick the bamboo
pole into the hole creating a horizontal beam in the passage behind this wall. Head toward the ledge to the right and drop back down into the
dart-trap room. As soon as you drop turn toward the same wall that the face is on and locate the low opening.
Climb the ledge opposite the wall with the keyhole and locate the triangular-shaped hole under the nose of the face carving. Stick the bamboo
pole into the hole creating a horizontal beam in the passage behind this wall. Head toward the ledge to the right and drop back down into the
dart-trap room. As soon as you drop turn toward the same wall that the face is on and locate the low opening. Crawl through into the passage behind the wall and you will spot the pole above you. Move to the vertical wall and use your whip on the bamboo
to climb to the high ledge and continue around to the right. The passage continues then turns left down another long passage with some ominous
dark floor tiles.
Crawl through into the passage behind the wall and you will spot the pole above you. Move to the vertical wall and use your whip on the bamboo
to climb to the high ledge and continue around to the right. The passage continues then turns left down another long passage with some ominous
dark floor tiles.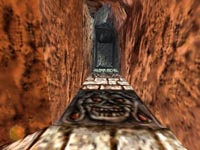 There are three dark squares in this passage and the first two are fatal. Walk right up to the edge and do a forward roll to cross each of the
first two. Jump over the third square and start climbing the ledge on the other side. Continue climbing up the next three ledges and you will
reach a short passage that turns and overlooks a large area with a climbable wall off in the distance. You've gone too far! Turn and head
back but have you lighter burning.
There are three dark squares in this passage and the first two are fatal. Walk right up to the edge and do a forward roll to cross each of the
first two. Jump over the third square and start climbing the ledge on the other side. Continue climbing up the next three ledges and you will
reach a short passage that turns and overlooks a large area with a climbable wall off in the distance. You've gone too far! Turn and head
back but have you lighter burning. When you reach the point where you would have to drop back down look across and spot the ledge across the hole. Do a running jump to reach this
ledge and light the torch on the wall to the right. Now you can easily see the Blue Gem on the wall opposite the
torch. Drop back down to the trapped hall and step on that third dark tile to ride it down to the next passage.
When you reach the point where you would have to drop back down look across and spot the ledge across the hole. Do a running jump to reach this
ledge and light the torch on the wall to the right. Now you can easily see the Blue Gem on the wall opposite the
torch. Drop back down to the trapped hall and step on that third dark tile to ride it down to the next passage. The hissing should alert you to the presence of snakes. This area spawns unlimited snakes so don't even try to kill them all. Grab the
First Aid Kit from the sucker who did try then head around to the right and find the tall ledge you can pull up onto. Once you are safe from
the snakes, pull up onto the next ledge on the right and face the next challenging area. A branch sticking out of the left wall makes a
perfect swing point to use your whip on. When you reach the opposite ledge you can climb the wall.
The hissing should alert you to the presence of snakes. This area spawns unlimited snakes so don't even try to kill them all. Grab the
First Aid Kit from the sucker who did try then head around to the right and find the tall ledge you can pull up onto. Once you are safe from
the snakes, pull up onto the next ledge on the right and face the next challenging area. A branch sticking out of the left wall makes a
perfect swing point to use your whip on. When you reach the opposite ledge you can climb the wall. Climb the wall up to the first ledge. Pull the block (1) away from the wall on the right then drop down and climb the wall to the other side
of the stone. Continue sideways along this wall and then head down to locate the treasure in the nook (2) below. On your return trips through
this area you will always go up to the top ledge (3) to continue.
Climb the wall up to the first ledge. Pull the block (1) away from the wall on the right then drop down and climb the wall to the other side
of the stone. Continue sideways along this wall and then head down to locate the treasure in the nook (2) below. On your return trips through
this area you will always go up to the top ledge (3) to continue. Climb down this portion of the wall and drop and grab to the ledge. Shimmy to the right and pull up into the dark area and get the treasure
from the back wall. You can probably hear all those angry snakes hissing at you from below as you take the Green Gem
and you will get to face them in just a second. Turn left after taking the treasure and drop through the hole and slide down to the floor of
the snake room. Shoot as many snakes as necessary to make your way back to the ledges in the back corner of this area. Climb up and whip-swing
back to the wall and climb up to the top ledge (3).
Climb down this portion of the wall and drop and grab to the ledge. Shimmy to the right and pull up into the dark area and get the treasure
from the back wall. You can probably hear all those angry snakes hissing at you from below as you take the Green Gem
and you will get to face them in just a second. Turn left after taking the treasure and drop through the hole and slide down to the floor of
the snake room. Shoot as many snakes as necessary to make your way back to the ledges in the back corner of this area. Climb up and whip-swing
back to the wall and climb up to the top ledge (3).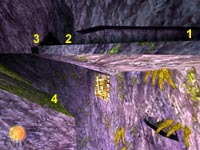 When you reach the top move to the wall on the left and turn to face the opposite wall. You need to do a daring running leap and grab onto the
crevice (1) then shimmy to the left and pull up to the right of the stone (2). Move to the other side of the stone and drop and hang from the
ledge (3). Make sure you are centered with the gold opening in the wall ahead of you before you drop. When you hit the green slope below you
will slide down. Jump from the end of the slope (4) and grab onto the gold entrance and pull up.
When you reach the top move to the wall on the left and turn to face the opposite wall. You need to do a daring running leap and grab onto the
crevice (1) then shimmy to the left and pull up to the right of the stone (2). Move to the other side of the stone and drop and hang from the
ledge (3). Make sure you are centered with the gold opening in the wall ahead of you before you drop. When you hit the green slope below you
will slide down. Jump from the end of the slope (4) and grab onto the gold entrance and pull up.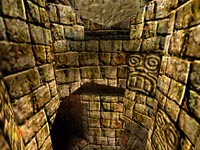 This next area is the beginning of the super-secret area. Everything that you have done from the "crypt room" up to this point will need to be
repeated (except for item pick-ups) if you want to see the secret area. Do a running leap across this circular shaft and grab just beneath
the boulder. Drop and grab the ledge beneath this and shimmy to the left and drop into the nook. Turn to face the statue and Indy will give you
a hint. Whip the statue to send it and the boulder crashing to the floor below. Drop to the floor and make your decision. The high door on
the one side leads to the end of this level. The passage leading out from where you stand leads back to the top of the crypt room (Area 5).
This next area is the beginning of the super-secret area. Everything that you have done from the "crypt room" up to this point will need to be
repeated (except for item pick-ups) if you want to see the secret area. Do a running leap across this circular shaft and grab just beneath
the boulder. Drop and grab the ledge beneath this and shimmy to the left and drop into the nook. Turn to face the statue and Indy will give you
a hint. Whip the statue to send it and the boulder crashing to the floor below. Drop to the floor and make your decision. The high door on
the one side leads to the end of this level. The passage leading out from where you stand leads back to the top of the crypt room (Area 5).SUPER SECRET AREA
 I'm assuming you have made your way from the crypt room back through the trapped hall and through the snake pit and along the climbable cliffs
to reach the point shown in this picture. If not - I'll wait. Do a running leap across to the opposite high ledge only this time the boulder
is gone so you can pull up.
I'm assuming you have made your way from the crypt room back through the trapped hall and through the snake pit and along the climbable cliffs
to reach the point shown in this picture. If not - I'll wait. Do a running leap across to the opposite high ledge only this time the boulder
is gone so you can pull up. You can study the spiral patterns of the brown circular plate in the wall and get the medicinal herb, which has managed to grow out of solid rock.
Then you can go through the narrow opening to the right to enter the puzzle room.
You can study the spiral patterns of the brown circular plate in the wall and get the medicinal herb, which has managed to grow out of solid rock.
Then you can go through the narrow opening to the right to enter the puzzle room.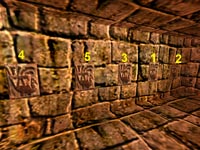 There are five square buttons on the wall in this room. Pressing each button gives you a unique musical tone. Pressing them in a certain order
gives you a "famous musical sequence". It's not too hard to figure out on your own but I've included the sequence in the picture. As you press
each button in the correct order they will light up in their own unique color.
There are five square buttons on the wall in this room. Pressing each button gives you a unique musical tone. Pressing them in a certain order
gives you a "famous musical sequence". It's not too hard to figure out on your own but I've included the sequence in the picture. As you press
each button in the correct order they will light up in their own unique color.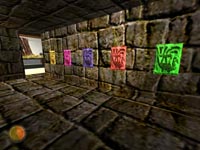 When the sequence is complete and all the buttons are lit a narrow secret door opens along the left wall. Head toward this door and enter the
secret room.
When the sequence is complete and all the buttons are lit a narrow secret door opens along the left wall. Head toward this door and enter the
secret room.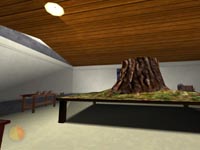 There is a lot of cool stuff in this room and anybody who has ever seen the movie Close Encounters of the Third Kind is bound to
recognize the model of the famous mountain from that movie. There are three Trauma Kits over on the table to the left. Chances are you will
never need them, but they are a nice bonus for finding this extremely difficult secret area. When you are done sightseeing you can return to
the central shaft and repeat the drop - shimmy - drop and return to the cracked floor. You can then jump to the high opening and continue.
There is a lot of cool stuff in this room and anybody who has ever seen the movie Close Encounters of the Third Kind is bound to
recognize the model of the famous mountain from that movie. There are three Trauma Kits over on the table to the left. Chances are you will
never need them, but they are a nice bonus for finding this extremely difficult secret area. When you are done sightseeing you can return to
the central shaft and repeat the drop - shimmy - drop and return to the cracked floor. You can then jump to the high opening and continue.BACK TO THE MAIN GAME
 From the cracked floor of the round room you can jump up and pull into the high opening. Follow the short passage until you arrive at a huge
canyon with ledges that circle around to the opposite side. Before you tackle this major jumping puzzle there is a treasure nearby. Back off
the right side of this first ledge and hang and drop to reach a hidden cave below. Follow the passage around to a ladder and climb up to get
the Silver Bar. Turn and do a running jump to reach the opposite ledge then drop down the hole to return to the
starting platform.
From the cracked floor of the round room you can jump up and pull into the high opening. Follow the short passage until you arrive at a huge
canyon with ledges that circle around to the opposite side. Before you tackle this major jumping puzzle there is a treasure nearby. Back off
the right side of this first ledge and hang and drop to reach a hidden cave below. Follow the passage around to a ladder and climb up to get
the Silver Bar. Turn and do a running jump to reach the opposite ledge then drop down the hole to return to the
starting platform.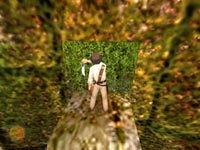 Start making your way from ledge to ledge. Each ledge requires a running jump and when you land a column starts sliding out to push you off.
You have about two seconds per ledge to line-up your next jump. When you make it to the far side and look back you will see the ledges have
now been changed into steps leading up and around in the opposite direction. Start jumping up the steps and when you reach the third step you
can cut the vines with your machete and jump the pit to get the Silver Bar.
Start making your way from ledge to ledge. Each ledge requires a running jump and when you land a column starts sliding out to push you off.
You have about two seconds per ledge to line-up your next jump. When you make it to the far side and look back you will see the ledges have
now been changed into steps leading up and around in the opposite direction. Start jumping up the steps and when you reach the third step you
can cut the vines with your machete and jump the pit to get the Silver Bar. When you have the treasure, return to the outer platform and finish the jumps to the top entrance. Looking back down you can see the
dangerous path you just took to get here. When you enter the cave ahead and step on the floor tile all of the stone columns slide back in to
reset the puzzle. A long vine ladder leads down to the starting ledge if you were to ever want to replay this puzzle for some insane reason.
When you have the treasure, return to the outer platform and finish the jumps to the top entrance. Looking back down you can see the
dangerous path you just took to get here. When you enter the cave ahead and step on the floor tile all of the stone columns slide back in to
reset the puzzle. A long vine ladder leads down to the starting ledge if you were to ever want to replay this puzzle for some insane reason.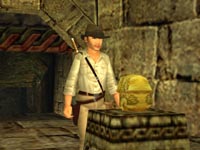 Head up the steps and through the arch. As you approach the pedestal the door shuts behind you making your next moves very permanent. This statue
is protected much like the first, so when you take it this place is going to fall apart. You will be on a very short timer so be prepared to
execute the following moves quickly and accurately. Take the Gold Statue, which also counts as your final treasure
for this level.
Head up the steps and through the arch. As you approach the pedestal the door shuts behind you making your next moves very permanent. This statue
is protected much like the first, so when you take it this place is going to fall apart. You will be on a very short timer so be prepared to
execute the following moves quickly and accurately. Take the Gold Statue, which also counts as your final treasure
for this level.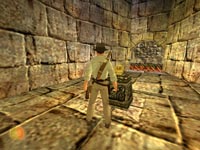 When you take the statue the room starts to quake and the floor starts to fall away beneath you. Run for the opposite door and into the passage
as the entire room collapses behind you. The passage will fall apart next so continue into the long cave and you will hear the ominous rumbling
of one of those giant Indy-squashing boulders.
When you take the statue the room starts to quake and the floor starts to fall away beneath you. Run for the opposite door and into the passage
as the entire room collapses behind you. The passage will fall apart next so continue into the long cave and you will hear the ominous rumbling
of one of those giant Indy-squashing boulders.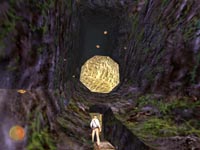 Turn around and run back to the narrow passage between the slope ramps on either side. Turn and face the boulder which is now bearing down on
you. It will roll up the ramps at high speed giving you a good head start before it starts coming back down after you. Run forward along the
entire length of this tunnel and slide down the slope at the far end. Run up to the edge of the pit and whip-swing across to the opposite side.
Turn around and run back to the narrow passage between the slope ramps on either side. Turn and face the boulder which is now bearing down on
you. It will roll up the ramps at high speed giving you a good head start before it starts coming back down after you. Run forward along the
entire length of this tunnel and slide down the slope at the far end. Run up to the edge of the pit and whip-swing across to the opposite side.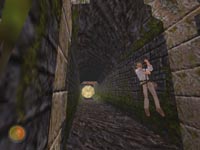 You can probably hear the rumbling of the boulder getting louder as it is now coming back at you at an even greater speed. Keep on running and
don't look back. As you near the sealed end of the passage ahead you will notice a stone stripe just before the wall. Stand on this narrow
band and get out your whip. You can use your whip here to climb up and let the boulder rumble harmlessly beneath you and smash through the
sealed exit. Drop down and exit into the daylight with your treasure.
You can probably hear the rumbling of the boulder getting louder as it is now coming back at you at an even greater speed. Keep on running and
don't look back. As you near the sealed end of the passage ahead you will notice a stone stripe just before the wall. Stand on this narrow
band and get out your whip. You can use your whip here to climb up and let the boulder rumble harmlessly beneath you and smash through the
sealed exit. Drop down and exit into the daylight with your treasure.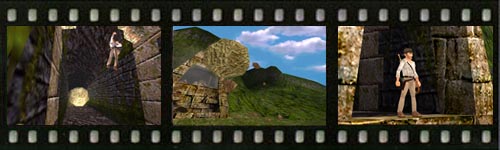
 Recommended Purchases:
Grim Fandango
Curse of Monkey Island
X-Wing Alliance