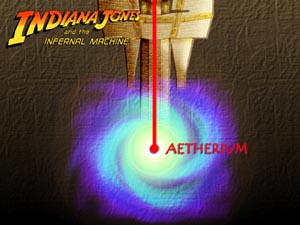

 The Aetherium is an other-dimensional universe where matter and energy join to create a unique experience for our hero. The level isn't that large
and is centered around a vertical shaft with branching passages that lead to various destinations including the lair of the powerful Marduk. Much
of your time in this level will be spent "swimming" in the blue swirling vapor known as Aether. This substance has a negative effect on Indy and
can kill him if he is exposed for too long. Keep an eye on the Stamina Meter in the bottom-right and make sure to recharge it whenever you are able
to return to the "real world" using the portals scattered about the level.
The Aetherium is an other-dimensional universe where matter and energy join to create a unique experience for our hero. The level isn't that large
and is centered around a vertical shaft with branching passages that lead to various destinations including the lair of the powerful Marduk. Much
of your time in this level will be spent "swimming" in the blue swirling vapor known as Aether. This substance has a negative effect on Indy and
can kill him if he is exposed for too long. Keep an eye on the Stamina Meter in the bottom-right and make sure to recharge it whenever you are able
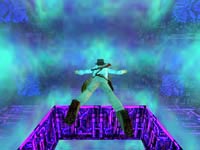
to return to the "real world" using the portals scattered about the level.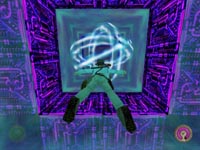 The surrounding ledges come in two kinds - the 'safe kind" and the "dangerous" kind. The dangerous ledges have white bolts of energy sparking between
the columns - avoid these ledges. Swim toward the safe ledge and you will drop to the surface when you leave the blue vapor. Turn and back off the
edge and drop into more Aether below. You will be facing a tunnel with white rings spinning around each other. Turn to the right and exit the
Aether onto the beam.
The surrounding ledges come in two kinds - the 'safe kind" and the "dangerous" kind. The dangerous ledges have white bolts of energy sparking between
the columns - avoid these ledges. Swim toward the safe ledge and you will drop to the surface when you leave the blue vapor. Turn and back off the
edge and drop into more Aether below. You will be facing a tunnel with white rings spinning around each other. Turn to the right and exit the
Aether onto the beam.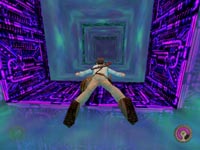 You are now in one of the four corner pockets of this area where there is no Aether. Below are more of those poisonous spiked creatures, but we'll
deal with them in a moment. You may also notice white winged creatures flying around. Even though you can target-lock these creatures you do not need
to shoot them - they won't harm you. Angle yourself so you are lined-up with the opposite beam and do a forward roll to reach the next beam.
You are now in one of the four corner pockets of this area where there is no Aether. Below are more of those poisonous spiked creatures, but we'll
deal with them in a moment. You may also notice white winged creatures flying around. Even though you can target-lock these creatures you do not need
to shoot them - they won't harm you. Angle yourself so you are lined-up with the opposite beam and do a forward roll to reach the next beam.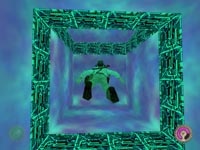 Enter the Aether and begin floating - this time you are in front of a new tunnel with green stripes. Enter the tunnel and follow it back as far as
it goes. You will make several turns as the passage twists its way toward your destination. Move Indy just like he was swimming in water and you
will arrive in a blue room.
Enter the Aether and begin floating - this time you are in front of a new tunnel with green stripes. Enter the tunnel and follow it back as far as
it goes. You will make several turns as the passage twists its way toward your destination. Move Indy just like he was swimming in water and you
will arrive in a blue room.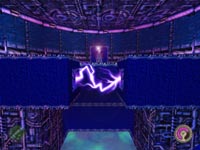 The deadly energy directly ahead is obviously dangerous so head to either the left or right and do a running leap and pull up onto the opposite side.
Move around to the pedestal and take the Tool from Beyond without getting zapped by the electrical energy. Now jump back
across the gap, reenter the Aether and swim back to the central area and exit onto the ledge on your left.
The deadly energy directly ahead is obviously dangerous so head to either the left or right and do a running leap and pull up onto the opposite side.
Move around to the pedestal and take the Tool from Beyond without getting zapped by the electrical energy. Now jump back
across the gap, reenter the Aether and swim back to the central area and exit onto the ledge on your left.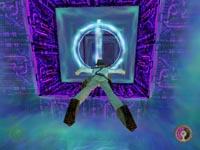 Do another forward roll to the opposite beam to face the next path of Aether. Dive into the Aether and swim down this next tunnel with the
purple stripes. Follow it around until you reach a circular opening. This is your first portal back to reality and your first chance to recharge
your stamina meter.
Do another forward roll to the opposite beam to face the next path of Aether. Dive into the Aether and swim down this next tunnel with the
purple stripes. Follow it around until you reach a circular opening. This is your first portal back to reality and your first chance to recharge
your stamina meter.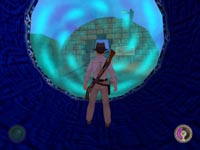 Looking through the mist you can make out a small portion of the pyramid site at Meroe. Use your Tool from Beyond on the portal to clear the mist
and pass through to the "real world". A Venom Kit lies straight ahead and on your way back you can't miss the Money Chest
over by the truck. Make sure your purple meter is filled then enter the portal and swim back to the central hub. Exit onto the beam on the left.
Looking through the mist you can make out a small portion of the pyramid site at Meroe. Use your Tool from Beyond on the portal to clear the mist
and pass through to the "real world". A Venom Kit lies straight ahead and on your way back you can't miss the Money Chest
over by the truck. Make sure your purple meter is filled then enter the portal and swim back to the central hub. Exit onto the beam on the left.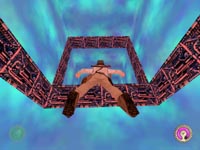 Just like before, do a forward roll to the next beam and dive into the Aether and swim down the next tunnel with the orange stripes. This tunnel is
a bit longer but you will eventually arrive at the second portal. Use the Tool from Beyond to open the portal and enter reality back at the
Palawan Island level.
Just like before, do a forward roll to the next beam and dive into the Aether and swim down the next tunnel with the orange stripes. This tunnel is
a bit longer but you will eventually arrive at the second portal. Use the Tool from Beyond to open the portal and enter reality back at the
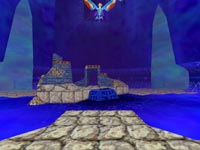
Palawan Island level.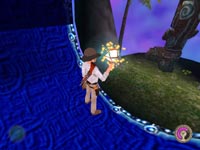 Ahead is that tiki statue from the end of that level and there are some medicinal herbs growing nearby. You will also want to walk around to the
front of the statue and get the Silver Coins at the foot of the steps. Now you can return to the portal and swim back
through the tunnel to the central hub.
Ahead is that tiki statue from the end of that level and there are some medicinal herbs growing nearby. You will also want to walk around to the
front of the statue and get the Silver Coins at the foot of the steps. Now you can return to the portal and swim back
through the tunnel to the central hub.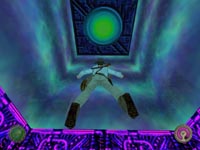 As you exit the tunnel you should see the green glowing circle ahead. Aim yourself down and you will drop to the floor below when you exit the
Aether. At least three spiked creatures will already be heading your way. Quickly turn and pull up onto the "safe ledge" behind your and get out
a gun to kill those poisonous pests.
As you exit the tunnel you should see the green glowing circle ahead. Aim yourself down and you will drop to the floor below when you exit the
Aether. At least three spiked creatures will already be heading your way. Quickly turn and pull up onto the "safe ledge" behind your and get out
a gun to kill those poisonous pests.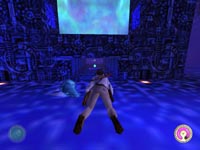 A forth spiked creature lurks in the darkness on the other side of this room - if he hasn't joined his three friends already. When the floor is safe
you need to move to either side of the central shaft and locate the low crawlspace. Duck down and crawl through to get the Aetherium Gem.
Head back around and climb onto the safe ledge and walk into the Aether. Swim to the top of the shaft (where you started the level) and then swim
forward to the safe ledge. Turn and drop off (just like you did at the beginning) and you should be facing the blue striped tunnel.
A forth spiked creature lurks in the darkness on the other side of this room - if he hasn't joined his three friends already. When the floor is safe
you need to move to either side of the central shaft and locate the low crawlspace. Duck down and crawl through to get the Aetherium Gem.
Head back around and climb onto the safe ledge and walk into the Aether. Swim to the top of the shaft (where you started the level) and then swim
forward to the safe ledge. Turn and drop off (just like you did at the beginning) and you should be facing the blue striped tunnel.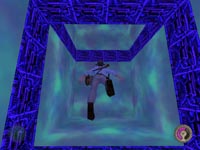 If you aren't then you will need to swim to a beam to either side and start making you way around the central shaft until you are facing the blue
tunnel (it faces North when viewing the Map). Swim along the blue passage and follow its twists and turns until you arrive at the next portal. Use
the Tool from Beyond to access the real world and you can exit to the Candle Tree from the Tian Shan River level.
If you aren't then you will need to swim to a beam to either side and start making you way around the central shaft until you are facing the blue
tunnel (it faces North when viewing the Map). Swim along the blue passage and follow its twists and turns until you arrive at the next portal. Use
the Tool from Beyond to access the real world and you can exit to the Candle Tree from the Tian Shan River level. Hidden from view are a pair of ledges to either side of this area, but only the ledge on the right (as you enter) has the First Aid Kit and the
Gold Coins. Make sure that stamina meter is full before opening the second portal opposite the one you entered. Enter
this new portal and continue through the matching blue tunnel until you find yourself floating over a room below.
Hidden from view are a pair of ledges to either side of this area, but only the ledge on the right (as you enter) has the First Aid Kit and the
Gold Coins. Make sure that stamina meter is full before opening the second portal opposite the one you entered. Enter
this new portal and continue through the matching blue tunnel until you find yourself floating over a room below.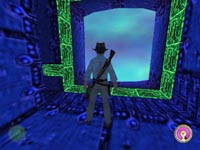 Dive down until you drop into the room. A bright green stripe lines the door to the next large arena. Looking up in this huge chamber, you can see
Sophia high above in her bubble. Also moving in on this level are a pair of Spinner Robots and a pair of spiked creatures. Use a powerful gun and
lots of back flipping to take care of this deadly menace.
Dive down until you drop into the room. A bright green stripe lines the door to the next large arena. Looking up in this huge chamber, you can see
Sophia high above in her bubble. Also moving in on this level are a pair of Spinner Robots and a pair of spiked creatures. Use a powerful gun and
lots of back flipping to take care of this deadly menace.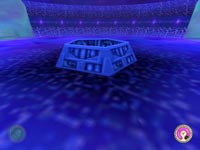 When the room is safe you need to locate the well in the center of the room. Get a running start and jump into the well and you will fall through
the shaft down and through the room where you found the Tool from Beyond. When you hit the next patch of Aether you will find yourself back at the
central hub at the beginning of the level. Repeat the steps you took earlier in locating the blue tunnel only this time we are looking for the
orange tunnel. Swim down the orange tunnel until you reach the portal looking into Palawan Island then turn around and face a small hole in the
opposite wall.
When the room is safe you need to locate the well in the center of the room. Get a running start and jump into the well and you will fall through
the shaft down and through the room where you found the Tool from Beyond. When you hit the next patch of Aether you will find yourself back at the
central hub at the beginning of the level. Repeat the steps you took earlier in locating the blue tunnel only this time we are looking for the
orange tunnel. Swim down the orange tunnel until you reach the portal looking into Palawan Island then turn around and face a small hole in the
opposite wall.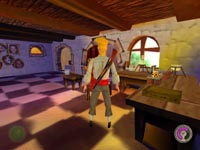 Climb up into the very dark tunnel and head toward the light. A strange transformation takes place as Indy passes into this alternate universe and
those of you familiar with the Monkey Island series of games will get a good laugh. Take the Gold Idol from the
small chest on the desk then investigate the remaining rooms and walls. You may even spot some familiar faces among the dozens of photos hanging on
the walls including; Harrison Ford, Steven Spielberg, and Guybrush Threepwood to name a few. Return through the tunnel and back into your original self.
Climb up into the very dark tunnel and head toward the light. A strange transformation takes place as Indy passes into this alternate universe and
those of you familiar with the Monkey Island series of games will get a good laugh. Take the Gold Idol from the
small chest on the desk then investigate the remaining rooms and walls. You may even spot some familiar faces among the dozens of photos hanging on
the walls including; Harrison Ford, Steven Spielberg, and Guybrush Threepwood to name a few. Return through the tunnel and back into your original self.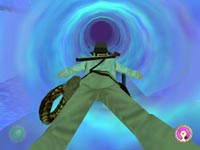 Now you get to do some serious backtracking. Return to the central hub and exit to the beam. Forward roll your way around until you are facing the
blue tunnel then swim through to the Tian Shan River reality. Pass through the Candle Tree area and into the opposite portal and continue through the
blue passage until you can drop into the room below. Reenter the arena and this time head for the vertical shaft of Aether leading high above. Step
in and begin to swim straight up.
Now you get to do some serious backtracking. Return to the central hub and exit to the beam. Forward roll your way around until you are facing the
blue tunnel then swim through to the Tian Shan River reality. Pass through the Candle Tree area and into the opposite portal and continue through the
blue passage until you can drop into the room below. Reenter the arena and this time head for the vertical shaft of Aether leading high above. Step
in and begin to swim straight up.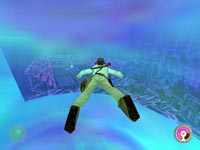 Spiral your path as you head up so you don't accidentally leave the Aether and plunge to your death. Exit onto the first ledge to the left and you
will find another Aetherium Gem in the short alcove. Return to the Aetherium and continue swimming up as the tunnel
bends over and starts to head down into a dark room with pulsating blue columns of light.
Spiral your path as you head up so you don't accidentally leave the Aether and plunge to your death. Exit onto the first ledge to the left and you
will find another Aetherium Gem in the short alcove. Return to the Aetherium and continue swimming up as the tunnel
bends over and starts to head down into a dark room with pulsating blue columns of light.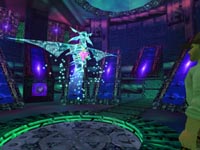 Drop into the room and come face-to-face with Marduk - the REAL Marduk and not that toy robot from the previous level. This is the first half of the
two-part battle with Marduk but you aren't equipped to fight him right now. In fact, nothing you have in your possession can even touch this guy.
Turn and run behind the columns and head left along the outer perimeter until you reach the blue striped passage to the right. Head down this path
and enter the Aether - you will probably take a hit or two from Marduk so just suck it up for now.
Drop into the room and come face-to-face with Marduk - the REAL Marduk and not that toy robot from the previous level. This is the first half of the
two-part battle with Marduk but you aren't equipped to fight him right now. In fact, nothing you have in your possession can even touch this guy.
Turn and run behind the columns and head left along the outer perimeter until you reach the blue striped passage to the right. Head down this path
and enter the Aether - you will probably take a hit or two from Marduk so just suck it up for now.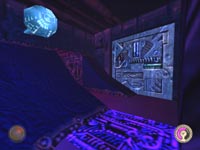 Swim down and drop to the floor below and exit into the outer hall. A spiked creature and a spinning robot attack from the left. When they are dead
you can continue in their direction over the blue square. Turn left at the silver door and head into the pink passage next to the large round
electrode sticking out of the wall. Follow the passage around until you reach the next reality portal and use your Tool from Beyond.
Swim down and drop to the floor below and exit into the outer hall. A spiked creature and a spinning robot attack from the left. When they are dead
you can continue in their direction over the blue square. Turn left at the silver door and head into the pink passage next to the large round
electrode sticking out of the wall. Follow the passage around until you reach the next reality portal and use your Tool from Beyond. Step out into Teotihuacan and drop down to the lower area on the left to get the Silver Bar. Now approach the statue and
get the Mirror you used to open the exit to this level so long ago. This item could be useful in reflecting some of Marduk's
white energy right back at him.
Step out into Teotihuacan and drop down to the lower area on the left to get the Silver Bar. Now approach the statue and
get the Mirror you used to open the exit to this level so long ago. This item could be useful in reflecting some of Marduk's
white energy right back at him.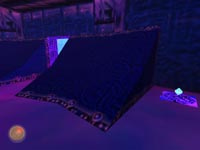 Return through the portal and head left where you will be attacked by a pair of spinning robots. Kill them and continue to the end of the passage.
You will pass by an alcove to the left with a shaft of Aether as you head to the back corner to get another Aetherium Gem.
Now return to the previous alcove and enter the shaft and swim back to the chamber where Marduk awaits.
Return through the portal and head left where you will be attacked by a pair of spinning robots. Kill them and continue to the end of the passage.
You will pass by an alcove to the left with a shaft of Aether as you head to the back corner to get another Aetherium Gem.
Now return to the previous alcove and enter the shaft and swim back to the chamber where Marduk awaits.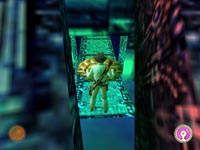 As you exit the Aether quickly arm yourself with the mirror and head down the hall to the central room. You need to always keep yourself lined-up with
Marduk so his energy bounces back and hits him. He must hit himself several times before the battle is over and he will alternate between this level
and the upper deck. When he flies above you can no longer deflect his shots so you must locate the green ramp along the outer perimeter hall and take
it up to the next level.
As you exit the Aether quickly arm yourself with the mirror and head down the hall to the central room. You need to always keep yourself lined-up with
Marduk so his energy bounces back and hits him. He must hit himself several times before the battle is over and he will alternate between this level
and the upper deck. When he flies above you can no longer deflect his shots so you must locate the green ramp along the outer perimeter hall and take
it up to the next level.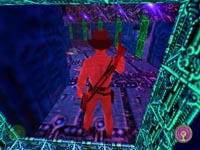 When you enter the upper level you will need to trade your mirror in for a gun as a pair of spiked creatures attack you when you enter. Stay near the
door so Marduk can't hit you. When the spiked creatures are dead you can get the mirror back out and resume your deflection attacks from this level.
Marduk will eventually return to the lower floor and so must you. Slide down the blue angled column to reach the center floor and keep up the attacks
with the mirror. Repeat the trip back upstairs and back down if necessary until you finally blast the pink gem loose and Marduk flees through the
iris in the floor.
When you enter the upper level you will need to trade your mirror in for a gun as a pair of spiked creatures attack you when you enter. Stay near the
door so Marduk can't hit you. When the spiked creatures are dead you can get the mirror back out and resume your deflection attacks from this level.
Marduk will eventually return to the lower floor and so must you. Slide down the blue angled column to reach the center floor and keep up the attacks
with the mirror. Repeat the trip back upstairs and back down if necessary until you finally blast the pink gem loose and Marduk flees through the
iris in the floor.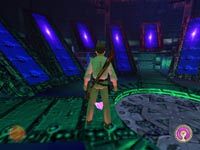 Return to the floor and get the Marduk Medallion. Now head to the center and stand on the iris and Indy will give you more
clues. Head for that switch along the outer wall and use the pink gem to lower the giant electrical ball from the ceiling. Approach the center of
the room once more and Indy will give you some additional hints.
Return to the floor and get the Marduk Medallion. Now head to the center and stand on the iris and Indy will give you more
clues. Head for that switch along the outer wall and use the pink gem to lower the giant electrical ball from the ceiling. Approach the center of
the room once more and Indy will give you some additional hints.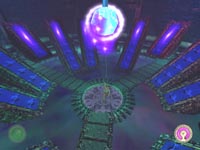 Whip the sphere and your whip will become supercharged with ancient power. Each time you whip the sphere gives your whip five additional supercharges.
Whip the sphere five times and Indy will tell you "that's enough". You now have 25 Supercharged Whip uses at your disposal. You will need most of
them for the final battle so don't waste them on anything other than what I tell you.
Whip the sphere and your whip will become supercharged with ancient power. Each time you whip the sphere gives your whip five additional supercharges.
Whip the sphere five times and Indy will tell you "that's enough". You now have 25 Supercharged Whip uses at your disposal. You will need most of
them for the final battle so don't waste them on anything other than what I tell you.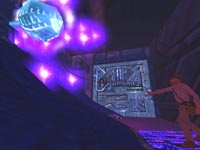 Head back down the side passage you took when getting the mirror. This time when you reach the blue floor plate with the electrical sphere in the wall
you can stand on the plate and whip the sphere to charge it and open the silver door into the next area. Enter this area and swim into the vertical
shaft of Aether and head down until you reach the ledge opposite the one you obtained one of the gems from earlier.
Head back down the side passage you took when getting the mirror. This time when you reach the blue floor plate with the electrical sphere in the wall
you can stand on the plate and whip the sphere to charge it and open the silver door into the next area. Enter this area and swim into the vertical
shaft of Aether and head down until you reach the ledge opposite the one you obtained one of the gems from earlier.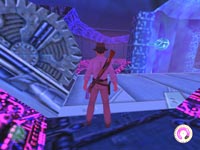 Follow the passage until you reach the giant gear on the left then walk out onto the ledge in the main arena. Talk to Sophia and she will put the
pressure on for you to rescue her. Whip the electrical node to the right of the opening and it will power-up the gear which retracts the ledge and
also opens up a new hall to the rear. Marduk also returns in a weakened ghostly form. He's not as lethal as before but he will still cause you
problems. Enter the new shaft of Aether and swim to the next portal and use the Tool from Beyond. Enter the real world and get the
Green Solomon Gem.
Follow the passage until you reach the giant gear on the left then walk out onto the ledge in the main arena. Talk to Sophia and she will put the
pressure on for you to rescue her. Whip the electrical node to the right of the opening and it will power-up the gear which retracts the ledge and
also opens up a new hall to the rear. Marduk also returns in a weakened ghostly form. He's not as lethal as before but he will still cause you
problems. Enter the new shaft of Aether and swim to the next portal and use the Tool from Beyond. Enter the real world and get the
Green Solomon Gem.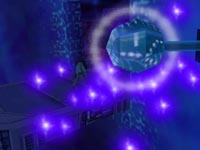 Dive into the Aether and swim back down to the curving passage below and follow it to the next gear and electrical sphere. Whip it to retract the
ledge and enter the outer hall to find another patch of Aether to the right guarded by a spiked creature. Dive in and swim to the next portal and
use the Tool to access reality.
Dive into the Aether and swim back down to the curving passage below and follow it to the next gear and electrical sphere. Whip it to retract the
ledge and enter the outer hall to find another patch of Aether to the right guarded by a spiked creature. Dive in and swim to the next portal and
use the Tool to access reality.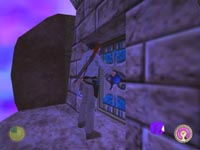 Step onto the ledge and claim the Blue Solomon Gem then return to the Aether and swim back down to the hall below. Follow
it around to the third gear and step outside to whip the remaining node. The ledge retracts as usual but Sophia and her sphere drops to the floor
and she is released. Marduk has plans for Sophia and you aren't going to like them. The new and improved Marduk is back to full strength for the
second half of this final epic battle. However, he is confined to the central area so you are free to move about in safety in the outer hall.
Step onto the ledge and claim the Blue Solomon Gem then return to the Aether and swim back down to the hall below. Follow
it around to the third gear and step outside to whip the remaining node. The ledge retracts as usual but Sophia and her sphere drops to the floor
and she is released. Marduk has plans for Sophia and you aren't going to like them. The new and improved Marduk is back to full strength for the
second half of this final epic battle. However, he is confined to the central area so you are free to move about in safety in the outer hall.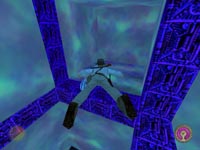 Run out to the outer hall and head right. You will probably take a shot in the back from Marduk. Head to the end of the passage and kill the spinner
robot before entering the Aether and swimming up. You will arrive an a confusing intersection. Take the path that curves back over the tunnel you
just ran along to get here. Swim to the end and up to the portal. Use the tool to access reality and get the Red Solomon Gem.
Swim back down the long passage and when you reach the junction turn right and then go down (see picture) to drop to the floor below. You are now
next to that very tall vertical shaft of Aether that leads all the way to the floor of the Arena - just where you want to go.
Run out to the outer hall and head right. You will probably take a shot in the back from Marduk. Head to the end of the passage and kill the spinner
robot before entering the Aether and swimming up. You will arrive an a confusing intersection. Take the path that curves back over the tunnel you
just ran along to get here. Swim to the end and up to the portal. Use the tool to access reality and get the Red Solomon Gem.
Swim back down the long passage and when you reach the junction turn right and then go down (see picture) to drop to the floor below. You are now
next to that very tall vertical shaft of Aether that leads all the way to the floor of the Arena - just where you want to go.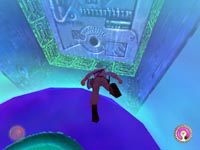 When you reach the bottom of the shaft you should be very close to the silver door with the green stripe. Use the Green Gem to open the door and
reveal another portal - this one leads to Babylon. Use the tool to open it and watch the devastating effect of "reality" on Marduk and his world.
Enter the small room moving to either side of the opening to avoid Marduk's accurate attacks. Grab the Trauma Kit and Poison Kit from this area and
get the Money Chest from behind the crate. Save your game and get ready to rumble.
When you reach the bottom of the shaft you should be very close to the silver door with the green stripe. Use the Green Gem to open the door and
reveal another portal - this one leads to Babylon. Use the tool to open it and watch the devastating effect of "reality" on Marduk and his world.
Enter the small room moving to either side of the opening to avoid Marduk's accurate attacks. Grab the Trauma Kit and Poison Kit from this area and
get the Money Chest from behind the crate. Save your game and get ready to rumble.BATTLE STRATEGY:
The final battle with Marduk is just a few moments away. You are going to need to open the final two doors using the remaining Solomon Gems. Once these doors and their subsequent portals are opened there will be enough "reality" leaking in that you can engage Marduk in a somewhat fair fight. Marduk will be constantly firing on you and it only takes three or four direct hits to kill you so always keep a Trauma Kit ready - you will go through at least five (if not more) before the battle is over.
 You will engage Marduk from the top of the center structure. Once you are standing on this structure Marduk will no longer fire at you. He will
switch to swooping attacks. You must wait for him to attack and use your supercharged whip. You need to hit him about ten times and you should have
at least 20 charges left in your whip. If you run out of charges you will have to take the tall vertical shaft of Aether back to the first arena and
recharge your whip then return. Watch out for Marduk's fake attacks where he pulls up at the last second. Only whip him after he grapples with you
and make sure to heal yourself frequently. QuickSaving after a few successful attacks is also a good idea.
You will engage Marduk from the top of the center structure. Once you are standing on this structure Marduk will no longer fire at you. He will
switch to swooping attacks. You must wait for him to attack and use your supercharged whip. You need to hit him about ten times and you should have
at least 20 charges left in your whip. If you run out of charges you will have to take the tall vertical shaft of Aether back to the first arena and
recharge your whip then return. Watch out for Marduk's fake attacks where he pulls up at the last second. Only whip him after he grapples with you
and make sure to heal yourself frequently. QuickSaving after a few successful attacks is also a good idea.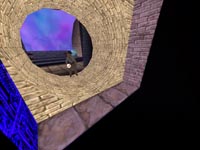 Leave the first portal area and head to the right. Pockets of Aether will slow you down as you are forced to swim through them to reach the door.
Use the Red Gem to open this door and the tool to open the portal beyond. More reality damages Marduk and you can enter and get the First Aid Kit
to the left. Head back out to the arena and make your way to the final door. Use the Blue Gem to open the door and the tool to open the final
portal (see picture) which has nothing inside other than some steps leading to a possible future exit.
Leave the first portal area and head to the right. Pockets of Aether will slow you down as you are forced to swim through them to reach the door.
Use the Red Gem to open this door and the tool to open the portal beyond. More reality damages Marduk and you can enter and get the First Aid Kit
to the left. Head back out to the arena and make your way to the final door. Use the Blue Gem to open the door and the tool to open the final
portal (see picture) which has nothing inside other than some steps leading to a possible future exit.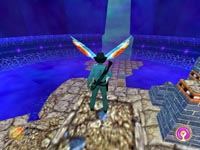 Time to get busy! Head for the center structure and quickly climb the short steps to the top of the "building" and get out your whip. Marduk will
circle very quickly. Always spin to face him and wait for his attack. Whip him only when he has you in his wings. After you hit him a few times he
will start making fake attack runs so don't let him fool you into wasting your whip charges. Keep up the fight and save often and Marduk will finally
be vanquished and Sophia will be returned.
Time to get busy! Head for the center structure and quickly climb the short steps to the top of the "building" and get out your whip. Marduk will
circle very quickly. Always spin to face him and wait for his attack. Whip him only when he has you in his wings. After you hit him a few times he
will start making fake attack runs so don't let him fool you into wasting your whip charges. Keep up the fight and save often and Marduk will finally
be vanquished and Sophia will be returned.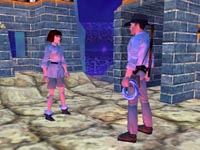 Our heroes are finally reunited but the party is cut short when an earthquake starts to rock this place. Sophia takes off toward those steps you found
through the third portal so you had better follow her. Even though the screen is shaking and rocks are falling everywhere, this segment isn't as
dangerous as you might think. There isn't a time limit and you can't really get hurt unless you fall into a pit.
Our heroes are finally reunited but the party is cut short when an earthquake starts to rock this place. Sophia takes off toward those steps you found
through the third portal so you had better follow her. Even though the screen is shaking and rocks are falling everywhere, this segment isn't as
dangerous as you might think. There isn't a time limit and you can't really get hurt unless you fall into a pit.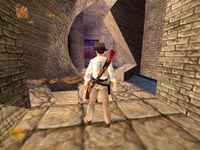 Climb over the falling debris as you make your way through the crumbling passage. When you reach this area you will need to make a long running leap
across the chasm and pull up on the other side. Better save your game - it would be a shame to die this close to the end. Keep following the passage
up and around.
Climb over the falling debris as you make your way through the crumbling passage. When you reach this area you will need to make a long running leap
across the chasm and pull up on the other side. Better save your game - it would be a shame to die this close to the end. Keep following the passage
up and around.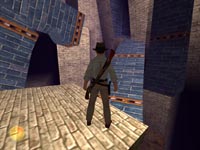 When you arrive at this area you will have a dark stone column ahead that forms a ramp leading up. Follow this ramp and the room will start to rock
and the dark stone column to the left will collapse and form a step for you to climb up and out into the next passage. Continue through the collapsing
hall until you reach the next important area.
When you arrive at this area you will have a dark stone column ahead that forms a ramp leading up. Follow this ramp and the room will start to rock
and the dark stone column to the left will collapse and form a step for you to climb up and out into the next passage. Continue through the collapsing
hall until you reach the next important area.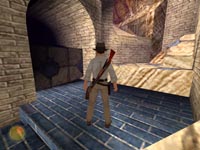 When you reach this patch of black stone floor you will notice a dark passage to the left blocked by a fallen column. Climb over this column into a
very dark area beyond. Use your lighter and you will discover a wall nook with the game's final treasure. Take the Silver Idol
and climb back over the column. Head around the corner to the left.
When you reach this patch of black stone floor you will notice a dark passage to the left blocked by a fallen column. Climb over this column into a
very dark area beyond. Use your lighter and you will discover a wall nook with the game's final treasure. Take the Silver Idol
and climb back over the column. Head around the corner to the left.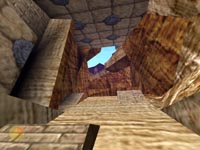 The patch of daylight ahead signals the end of this level. Sophia urges you on as you head up the sloped passage and climb over the large stones and
rock ledges leading to the surface. As you once again reunite with Sophia, Dr. Volodnikov arrives on the scene. Put you guns away - it seems the
good doctor is actually that - a GOOD doctor. He offers you and Sophia a hand in getting out of the hole you are in and after a pleasant conversation
you all head off into the sunset in search of a good bottle of Vodka.
The patch of daylight ahead signals the end of this level. Sophia urges you on as you head up the sloped passage and climb over the large stones and
rock ledges leading to the surface. As you once again reunite with Sophia, Dr. Volodnikov arrives on the scene. Put you guns away - it seems the
good doctor is actually that - a GOOD doctor. He offers you and Sophia a hand in getting out of the hole you are in and after a pleasant conversation
you all head off into the sunset in search of a good bottle of Vodka.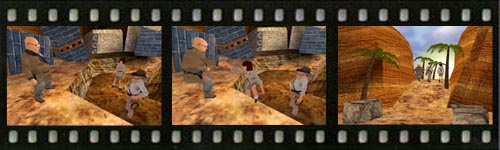

 Recommended Purchases:
(1) Shotgun Clip
(3) Trauma Kits
(1) SECRET MAP (Yes, you can finally buy it)