

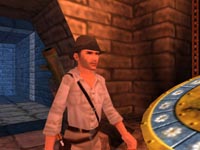
 Indy arrives back in Babylon. You may recognize this starting room from the second level in the game where you used the three tablet pieces from the
library. It seems Turner and Sophia have beaten you to The Machine but Turner has placed all the Machine Parts into the wrong receptacles. Naturally
it is your job to locate all the parts and put them in their proper locations. You will also have a final showdown with an "invisible" Turner to claim
the final Machine Part.
Indy arrives back in Babylon. You may recognize this starting room from the second level in the game where you used the three tablet pieces from the
library. It seems Turner and Sophia have beaten you to The Machine but Turner has placed all the Machine Parts into the wrong receptacles. Naturally
it is your job to locate all the parts and put them in their proper locations. You will also have a final showdown with an "invisible" Turner to claim
the final Machine Part.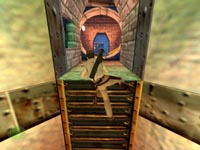 Head through the round opening and turn to back off the ledge and climb down the ladder. Turn and go through the next door then get the Trauma Kit,
First Aid, and bazooka rockets from the ledge on the left. Back off the center of this ledge and climb down the ladder to the next area. Turn to
face the room and get out one of your "big guns".
Head through the round opening and turn to back off the ledge and climb down the ladder. Turn and go through the next door then get the Trauma Kit,
First Aid, and bazooka rockets from the ledge on the left. Back off the center of this ledge and climb down the ladder to the next area. Turn to
face the room and get out one of your "big guns".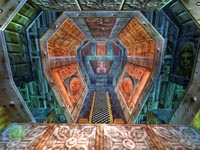 Three robots are at the far end of this hall. The first two will activate when you step forward. Blast them before they get too close then advance
a bit further to trigger the third larger robot who advances quickly with giant slicing blades. Back flip if necessary to avoid the huge explosion.
Move up the steps and into the small alcove which is actually a lift. It will rise automatically.
Three robots are at the far end of this hall. The first two will activate when you step forward. Blast them before they get too close then advance
a bit further to trigger the third larger robot who advances quickly with giant slicing blades. Back flip if necessary to avoid the huge explosion.
Move up the steps and into the small alcove which is actually a lift. It will rise automatically. You can either back flip out of the lift or ride it to the top and then move forward to drop down off the upper ledge. Return to the lift and drop
into the shallow pit below the former location of the lift. Press the gold button to lower a long ramp out in the main hall then climb out of the
pit and return to the main room.
You can either back flip out of the lift or ride it to the top and then move forward to drop down off the upper ledge. Return to the lift and drop
into the shallow pit below the former location of the lift. Press the gold button to lower a long ramp out in the main hall then climb out of the
pit and return to the main room.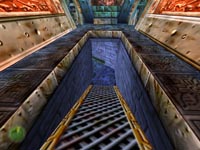 Head down the long ramp and follow the curving passage around to the left. When you reach the closed door press the gold switch on the right to open
it and enter the Machine Room. A movie takes over when you enter and you will witness the treachery of Turner as he tosses Sophia into the blue energy
field and uses the Taklit part to make himself invisible.
Head down the long ramp and follow the curving passage around to the left. When you reach the closed door press the gold switch on the right to open
it and enter the Machine Room. A movie takes over when you enter and you will witness the treachery of Turner as he tosses Sophia into the blue energy
field and uses the Taklit part to make himself invisible.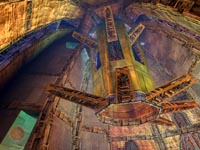 When you have control over Indy you will be under immediate attack by some mini-guardians. These guys are a real pain. They can zap you two or three
times before you destroy them. Use the shotgun for best results but don't get too close to the explosion when they finally go BOOM! If you look up
you will see several platforms above - looks like jumping puzzles to me. You will also notice many more floating guardians above. They won't bother
you until you go up to them.
When you have control over Indy you will be under immediate attack by some mini-guardians. These guys are a real pain. They can zap you two or three
times before you destroy them. Use the shotgun for best results but don't get too close to the explosion when they finally go BOOM! If you look up
you will see several platforms above - looks like jumping puzzles to me. You will also notice many more floating guardians above. They won't bother
you until you go up to them.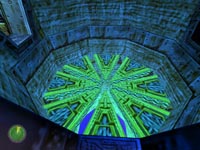 To go up we'll start by going down. Kill the first pair of annoying guardians then head right and jump into the water below. Pull up into the door
in the center structure then turn to kill the spiked creature that moves around in the opposite doorway. These creatures are poisonous so be careful
when you see others. Turn and face the room behind you. A swirling blue vortex lies below the green sections of floor below you in the shallow pit.
To go up we'll start by going down. Kill the first pair of annoying guardians then head right and jump into the water below. Pull up into the door
in the center structure then turn to kill the spiked creature that moves around in the opposite doorway. These creatures are poisonous so be careful
when you see others. Turn and face the room behind you. A swirling blue vortex lies below the green sections of floor below you in the shallow pit.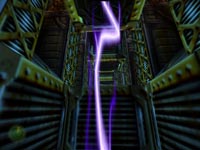 Drop into the pit and head for the door on the left. You will see a dark hall with blue energy discharging into the floor. You need to study the pattern
of the electrical bolts, and when you have the timing down enter the passage and climb and jump as necessary to get through this hallway. Make one giant
leap over the deep elevator shaft at the end to land in the next room.
Drop into the pit and head for the door on the left. You will see a dark hall with blue energy discharging into the floor. You need to study the pattern
of the electrical bolts, and when you have the timing down enter the passage and climb and jump as necessary to get through this hallway. Make one giant
leap over the deep elevator shaft at the end to land in the next room.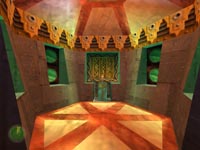 This round room has a machine receptacle along the opposite wall. Reading the Babylonian text, Indy learns that this socket is for the Urgon Part. Remove
Nub's Part and put it in your pack. This deactivates the electrical bolts in the passage behind you. Time to leave but don't
forget the Red Gem and Green Gem on either side of the exit. Most of the treasure in this level
will be gems, and you will always find them in pairs.
This round room has a machine receptacle along the opposite wall. Reading the Babylonian text, Indy learns that this socket is for the Urgon Part. Remove
Nub's Part and put it in your pack. This deactivates the electrical bolts in the passage behind you. Time to leave but don't
forget the Red Gem and Green Gem on either side of the exit. Most of the treasure in this level
will be gems, and you will always find them in pairs.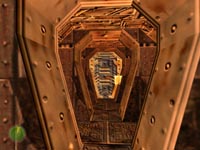 Jump the elevator shaft and return through the "much safer" passage leading to the circular room. Head through the opposite door and into the long dark
tunnel. Use your lighter to brighten things up and press the button at the end of the passage to open the door. Kill the spiked creature on the other
side of the door then jump into the blue column of pulsating light. As long as you remain in the light you can swim just like you were underwater.
Jump the elevator shaft and return through the "much safer" passage leading to the circular room. Head through the opposite door and into the long dark
tunnel. Use your lighter to brighten things up and press the button at the end of the passage to open the door. Kill the spiked creature on the other
side of the door then jump into the blue column of pulsating light. As long as you remain in the light you can swim just like you were underwater.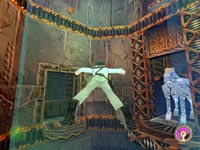 Swim up the shaft of light until you reach the silver horse-like creature then steer toward the ledge near the door on the left. Enter this door
and climb the ladder on the right wall leading to the upper walkway. Follow this walkway as it circles back around to the right and you will soon come
to a pit with ladders on each wall. The path also continues around but we want to climb down to the passage below.
Swim up the shaft of light until you reach the silver horse-like creature then steer toward the ledge near the door on the left. Enter this door
and climb the ladder on the right wall leading to the upper walkway. Follow this walkway as it circles back around to the right and you will soon come
to a pit with ladders on each wall. The path also continues around but we want to climb down to the passage below.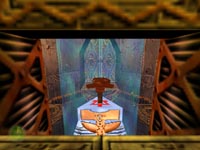 When you reach the bottom you will notice a low opening with a clear view of the top of the horse-creature's head. Looks like another misplaced Machine
Part. Take Azerim's Part and the blue shaft of levitating light will turn off and the large pole in the outer shaft will rise to
a horizontal position. Turn and go down the passage behind you to another deep shaft. Take the ladder on either side wall to climb down and recover the
Gold Idol then return to top of both ladder shafts.
When you reach the bottom you will notice a low opening with a clear view of the top of the horse-creature's head. Looks like another misplaced Machine
Part. Take Azerim's Part and the blue shaft of levitating light will turn off and the large pole in the outer shaft will rise to
a horizontal position. Turn and go down the passage behind you to another deep shaft. Take the ladder on either side wall to climb down and recover the
Gold Idol then return to top of both ladder shafts.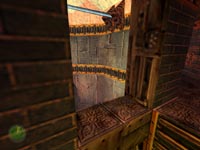 You now need to jump to this narrow ledge. This is a tricky jump since a normal standing jump will cause you to hit your head and fall into the ladder
shaft. Take one extra step back and do a forward roll to land on the narrow ledge overlooking the deep shaft. Your destination lies across the shaft and
the pole that is now stretched out above you makes a perfect swing bar for your whip. Swing across and save your game.
You now need to jump to this narrow ledge. This is a tricky jump since a normal standing jump will cause you to hit your head and fall into the ladder
shaft. Take one extra step back and do a forward roll to land on the narrow ledge overlooking the deep shaft. Your destination lies across the shaft and
the pole that is now stretched out above you makes a perfect swing bar for your whip. Swing across and save your game. Press the button to open the door and step through with shotgun at the ready. You are now on the second level of the Machine Room with all new guardians
waiting for you. Kill the one that attacks as you enter then jump out to the narrow ledge. Start jumping to the next two ledges leading around to the left
and kill any guardians that try to zap you. Make a running jump from the final ledge to the doorway and it will open for you.
Press the button to open the door and step through with shotgun at the ready. You are now on the second level of the Machine Room with all new guardians
waiting for you. Kill the one that attacks as you enter then jump out to the narrow ledge. Start jumping to the next two ledges leading around to the left
and kill any guardians that try to zap you. Make a running jump from the final ledge to the doorway and it will open for you.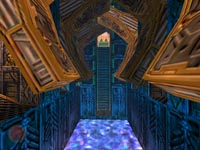 This room looks dangerous but for the moment it is perfectly harmless. Jump into the water making a note of the electrical nodes under the water. Swim to
the opposite side and pull up to the ledge and climb the ladder into the next room. This room is identical to the first round room you obtained the Nub Part
from only this one has Urgon's Part. Remove it and replace it with Nub's Part, which powers up those electrical nodes and electrifies
the water in the pool behind you. On your way out the door grab the Red Gem and Blue Gem on either
side of the exit.
This room looks dangerous but for the moment it is perfectly harmless. Jump into the water making a note of the electrical nodes under the water. Swim to
the opposite side and pull up to the ledge and climb the ladder into the next room. This room is identical to the first round room you obtained the Nub Part
from only this one has Urgon's Part. Remove it and replace it with Nub's Part, which powers up those electrical nodes and electrifies
the water in the pool behind you. On your way out the door grab the Red Gem and Blue Gem on either
side of the exit. Study the rotating gears and get the timing down then jump to the first and run across the rest as they form a flat bridge over the deadly water below.
Jump to the exit and you will find an elevator waiting for you. It takes you down when you step onto it and you will find yourself back at the first
round room with the empty receptacle. Insert the Urgon Part then return to the elevator.
Study the rotating gears and get the timing down then jump to the first and run across the rest as they form a flat bridge over the deadly water below.
Jump to the exit and you will find an elevator waiting for you. It takes you down when you step onto it and you will find yourself back at the first
round room with the empty receptacle. Insert the Urgon Part then return to the elevator. Press the button on the right to raise the lift. Press the right button at each of the next two floors to reach the top and jump out to the narrow ledge
in the Machine Room. Watch out for more guardians then turn and jump to the greenish hall on the left. Follow it as it curves to the right and grab the
Green Gem and Blue Gem from the nooks in the wall. At least one more guardian will be waiting for
you at the end of this hall.
Press the button on the right to raise the lift. Press the right button at each of the next two floors to reach the top and jump out to the narrow ledge
in the Machine Room. Watch out for more guardians then turn and jump to the greenish hall on the left. Follow it as it curves to the right and grab the
Green Gem and Blue Gem from the nooks in the wall. At least one more guardian will be waiting for
you at the end of this hall.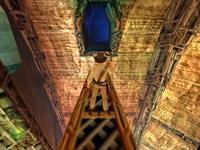 Jumping out to the next ledge is tricky. A running jump will take you too far so make a standing jump forward and grab on and pull up. Turn left to face
the blue door and whip out your gun to kill the spiked creature hiding in the darkness. Do a running leap to enter the hall and follow it around to the
elevator shaft. Press the gold button to call the lift then enter and press the button on the right go up.
Jumping out to the next ledge is tricky. A running jump will take you too far so make a standing jump forward and grab on and pull up. Turn left to face
the blue door and whip out your gun to kill the spiked creature hiding in the darkness. Do a running leap to enter the hall and follow it around to the
elevator shaft. Press the gold button to call the lift then enter and press the button on the right go up. Exit the lift and follow the short curving hall to the center area where you find Sophia trapped in her energy bubble and Turner who holds the final Machine
Part. After a brief speech he turns invisible. You must now fight Turner while avoiding the guardians who are hiding in the ceiling alcoves. They will
normally fire from above but sometimes they will float down and attack you in this circular hall. Use a powerful and rapid firing weapon to kill Turner
as quickly as possible. When he dies you can take the Taklit Part along with his gun/ammo and a First Aid Kit.
Exit the lift and follow the short curving hall to the center area where you find Sophia trapped in her energy bubble and Turner who holds the final Machine
Part. After a brief speech he turns invisible. You must now fight Turner while avoiding the guardians who are hiding in the ceiling alcoves. They will
normally fire from above but sometimes they will float down and attack you in this circular hall. Use a powerful and rapid firing weapon to kill Turner
as quickly as possible. When he dies you can take the Taklit Part along with his gun/ammo and a First Aid Kit. Locate the nearest Angel Stone and use the Azerim part to float to the upper ring. Kill more guardians and a spiked creature as you locate the green opening
in the central core. Jump the hole in the floor to land in the opening and immediately use the Taklit part to turn invisible so the electric ball can't
zap you. Turn and jump to the next two ledges on the left and press the button to deactivate the electric ball. You can now switch to the Azerim part
and float up to the top of the core.
Locate the nearest Angel Stone and use the Azerim part to float to the upper ring. Kill more guardians and a spiked creature as you locate the green opening
in the central core. Jump the hole in the floor to land in the opening and immediately use the Taklit part to turn invisible so the electric ball can't
zap you. Turn and jump to the next two ledges on the left and press the button to deactivate the electric ball. You can now switch to the Azerim part
and float up to the top of the core. Walk around the ledge until you find the gap in the middle wall that lets you approach Marduk's Head. It will come to life and
give a brief speech then you are free to take it off the pedestal. Replace it with the Azerim part and Sophia will lower back down into the lower area
of the Machine Room. A door slides open behind you so turn and exit.
Walk around the ledge until you find the gap in the middle wall that lets you approach Marduk's Head. It will come to life and
give a brief speech then you are free to take it off the pedestal. Replace it with the Azerim part and Sophia will lower back down into the lower area
of the Machine Room. A door slides open behind you so turn and exit. This passage is dark so use your lighter and you will see that there is a crawlspace under the low ledge on the right wall. Crouch and crawl through into
the round room and take the Green Gem and Red Gem from the wall nooks. Return to the hall and
head for the elevator to the right.
This passage is dark so use your lighter and you will see that there is a crawlspace under the low ledge on the right wall. Crouch and crawl through into
the round room and take the Green Gem and Red Gem from the wall nooks. Return to the hall and
head for the elevator to the right.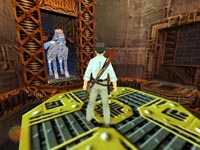 The lift takes you down the central shaft and stops on the same level as the horse-creature - okay, we may as well call him Marduk. Head through the door
on the right (or left) and climb back up the ladder to the upper walkway. Follow it around until you can drop into the passage with the low opening
overlooking Marduk's body. Place the head on the body and watch the movie.
The lift takes you down the central shaft and stops on the same level as the horse-creature - okay, we may as well call him Marduk. Head through the door
on the right (or left) and climb back up the ladder to the upper walkway. Follow it around until you can drop into the passage with the low opening
overlooking Marduk's body. Place the head on the body and watch the movie.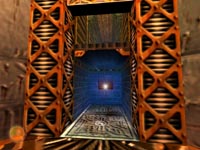 Climb out of the shaft and head around to either ladder and climb down to return to the central area. Check out the area where Marduk used to be and you
will discover a short passage with a Silver Idol stuck in the nook along the back wall. Grab the final treasure then follow
the path that Marduk took into the room across the shaft.
Climb out of the shaft and head around to either ladder and climb down to return to the central area. Check out the area where Marduk used to be and you
will discover a short passage with a Silver Idol stuck in the nook along the back wall. Grab the final treasure then follow
the path that Marduk took into the room across the shaft. When you enter this room head for the short wall on the right and climb up. More guardians are floating around so kill them before you complete your next
task. Approach the control mechanism and insert the Taklit part into the socket. The machine powers up and you can now use the levers to save Sophia.
Well you could if you knew what you were doing... Instead you send her falling into the swirling vortex below and after a powerful shockwave you find
yourself dangling over the vortex. Taking a deep breath you let go and plummet into the Aetherium...
When you enter this room head for the short wall on the right and climb up. More guardians are floating around so kill them before you complete your next
task. Approach the control mechanism and insert the Taklit part into the socket. The machine powers up and you can now use the levers to save Sophia.
Well you could if you knew what you were doing... Instead you send her falling into the swirling vortex below and after a powerful shockwave you find
yourself dangling over the vortex. Taking a deep breath you let go and plummet into the Aetherium...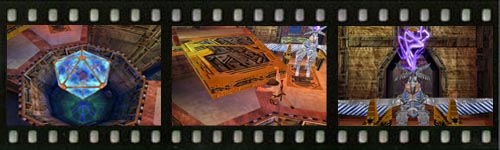

 Recommended Purchases:
(2) Shotgun Shells
(2) First Aid Kits
(1-10) Trauma Kits (You will want a total of 10)