

 Nub's Tomb is easily the largest level in this entire adventure. All of your skills will be put to the test as you explore this ancient
architectural wonder. Explore the maze of passages and locate secret levels and hidden rooms as you search for the final Machine Part.
You will get to fight dozens of Russian soldiers and even have a close encounter with Dr. Volodnikov. Most of the puzzles in this game are
jumping and climbing so make sure to save your game often to avoid repeating large portions of the level. Begin by heading to the end of
the tunnel and jump over the snakes as you begin to slide down the first slope.
Nub's Tomb is easily the largest level in this entire adventure. All of your skills will be put to the test as you explore this ancient
architectural wonder. Explore the maze of passages and locate secret levels and hidden rooms as you search for the final Machine Part.
You will get to fight dozens of Russian soldiers and even have a close encounter with Dr. Volodnikov. Most of the puzzles in this game are
jumping and climbing so make sure to save your game often to avoid repeating large portions of the level. Begin by heading to the end of
the tunnel and jump over the snakes as you begin to slide down the first slope. You could turn and kill the pair of snakes below if you want or you can ignore them and turn to face the large stone steps leading up and
to the left. Jump to the first step across the room then start climbing up the others toward the left. When you reach the top, turn and
face the rear wall and jump to grab the crevice leading around the perimeter of this room.
You could turn and kill the pair of snakes below if you want or you can ignore them and turn to face the large stone steps leading up and
to the left. Jump to the first step across the room then start climbing up the others toward the left. When you reach the top, turn and
face the rear wall and jump to grab the crevice leading around the perimeter of this room.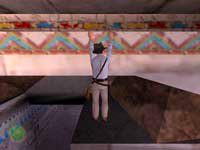 Shimmy to the right until you can see a ledge below you with a door to the left. Drop and grab the ledge then follow it back as far as it
goes before dropping to the floor on the left. If you drop too soon you will be at the bottom of an un-climbable slope and have to start
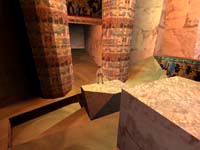
over. Head down the long dark hall until you arrive in a large room with many columns and a large broken pillar in the center.
Shimmy to the right until you can see a ledge below you with a door to the left. Drop and grab the ledge then follow it back as far as it
goes before dropping to the floor on the left. If you drop too soon you will be at the bottom of an un-climbable slope and have to start
over. Head down the long dark hall until you arrive in a large room with many columns and a large broken pillar in the center. Head around the broken pillar and past the ramp leading down to the right. Head straight back into the back passage where you will see a
closed gate at the opposite end. There are three deadly spiders in this area. Most are hiding in the dark alcoves to the side so you will
hear them before you see them. When they are dead you can go to the third alcove on the left and get the Gold Coins
from the shallow pool. Watch out for more spiders when you enter this area.
Head around the broken pillar and past the ramp leading down to the right. Head straight back into the back passage where you will see a
closed gate at the opposite end. There are three deadly spiders in this area. Most are hiding in the dark alcoves to the side so you will
hear them before you see them. When they are dead you can go to the third alcove on the left and get the Gold Coins
from the shallow pool. Watch out for more spiders when you enter this area.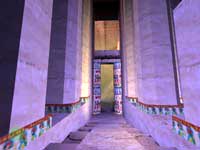 Return to the broken pillar and follow the ramp down to the left into the next area. Make sure to kill the snake slithering around this area.
Head to the left toward the dark ledge and climb to the top. Head around to the right until you are overlooking the room below. A pair of
scorpions skitter around the floor. Kill them with whatever gun will target them from this distance. When they are dead circle around
the high slope to your left and slide down to the stone step.
Return to the broken pillar and follow the ramp down to the left into the next area. Make sure to kill the snake slithering around this area.
Head to the left toward the dark ledge and climb to the top. Head around to the right until you are overlooking the room below. A pair of
scorpions skitter around the floor. Kill them with whatever gun will target them from this distance. When they are dead circle around
the high slope to your left and slide down to the stone step. Drop to the ground and crawl into the low passage. When you reach the left turn stand up and then climb up into the short passage to get the
Silver Coins. Drop back down and crawl out the other end of the low cave and you should be near the two dead
scorpions (if their bodies haven't vanished already).
Drop to the ground and crawl into the low passage. When you reach the left turn stand up and then climb up into the short passage to get the
Silver Coins. Drop back down and crawl out the other end of the low cave and you should be near the two dead
scorpions (if their bodies haven't vanished already).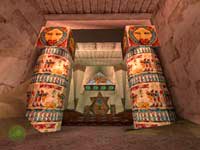 Up ahead you will see two huge columns which frame the entrance to the steps leading up to a large sealed door. Follow the passage and explore
this area to discover a statue with a missing arm, a lever, some smaller statues and some tapestries on each side of the room. Find the
statue on the left (facing stairs) and push it toward the back wall to reveal a torn tapestry. Use your machete to hack it away and discover
a hidden passage. Do a running leap over the deep chasm and continue down the passage until you slide down a slope.
Up ahead you will see two huge columns which frame the entrance to the steps leading up to a large sealed door. Follow the passage and explore
this area to discover a statue with a missing arm, a lever, some smaller statues and some tapestries on each side of the room. Find the
statue on the left (facing stairs) and push it toward the back wall to reveal a torn tapestry. Use your machete to hack it away and discover
a hidden passage. Do a running leap over the deep chasm and continue down the passage until you slide down a slope. Pull the lever in the nook on the right and a door opens behind you. Follow this new passage and make two hanging drops to reach the next room
with the wire floor. Walk onto the first section and it will swing down dropping you into a pit with at least three snakes. Kill the snakes
and crawl under the low stone to reach the other end of this area where you will find a skeleton and a Gold Bar. Crawl
back to the other side and pull up out of the pit.
Pull the lever in the nook on the right and a door opens behind you. Follow this new passage and make two hanging drops to reach the next room
with the wire floor. Walk onto the first section and it will swing down dropping you into a pit with at least three snakes. Kill the snakes
and crawl under the low stone to reach the other end of this area where you will find a skeleton and a Gold Bar. Crawl
back to the other side and pull up out of the pit.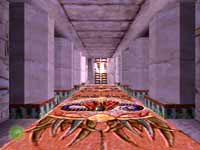 Go to the far wall and slash the torn tapestry to reveal a block you can pull out from the wall. Pull it out three times and you can then
enter the passage it was blocking. Follow it around to the right until you reach the room lined with columns and the brown decorative floor.
This floor is made up of two large pivoting squares. As long as you keep running and don't stop, you will easily make it to the other side.
The ladder on the far wall is broken so turn to the left and climb up to the ledge then turn and jump across to the opposite ledge. Climb up
to reach the ladder leading up and shimmy to the left to pull up into the next passage.
Go to the far wall and slash the torn tapestry to reveal a block you can pull out from the wall. Pull it out three times and you can then
enter the passage it was blocking. Follow it around to the right until you reach the room lined with columns and the brown decorative floor.
This floor is made up of two large pivoting squares. As long as you keep running and don't stop, you will easily make it to the other side.
The ladder on the far wall is broken so turn to the left and climb up to the ledge then turn and jump across to the opposite ledge. Climb up
to reach the ladder leading up and shimmy to the left to pull up into the next passage. When you enter the next large area you need to steer left until you reach the large theater. Make your way to the floor killing the snakes
that patrol this area. Move around to the back of the central podium and push the button. A statue of Anubis rolls out onto the ledge above
and you realize that arm would work back on the previous statue...but how to get it?
When you enter the next large area you need to steer left until you reach the large theater. Make your way to the floor killing the snakes
that patrol this area. Move around to the back of the central podium and push the button. A statue of Anubis rolls out onto the ledge above
and you realize that arm would work back on the previous statue...but how to get it?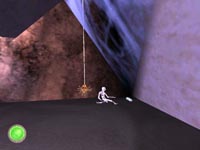 Enter the dark door behind the podium and turn right. A skeleton lies next to the Silver Bar in the web-covered
corner of this hall. Naturally a pair of spiders drop from the ceiling to make things more interesting. Kill the spiders and take the
treasure. Now turn and go to the opposite end of this hall and turn right into the last alcove. Draw your whip and when you enter the alcove
Indy will look up and aim for the bird-head sticking out of the wall.
Enter the dark door behind the podium and turn right. A skeleton lies next to the Silver Bar in the web-covered
corner of this hall. Naturally a pair of spiders drop from the ceiling to make things more interesting. Kill the spiders and take the
treasure. Now turn and go to the opposite end of this hall and turn right into the last alcove. Draw your whip and when you enter the alcove
Indy will look up and aim for the bird-head sticking out of the wall.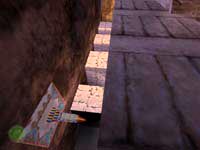 Whip the head and climb up to the first of four small ledges. Jump across all the ledges then turn and climb up to the large flat ledge
to the right. Head back toward the other side of the room and jump up to the lower ledge on the right then climb up to the top. Turn to
face the opposite structure on this level and do a running jump to reach it. Now turn right and move over to look down on the theater.
Whip the head and climb up to the first of four small ledges. Jump across all the ledges then turn and climb up to the large flat ledge
to the right. Head back toward the other side of the room and jump up to the lower ledge on the right then climb up to the top. Turn to
face the opposite structure on this level and do a running jump to reach it. Now turn right and move over to look down on the theater.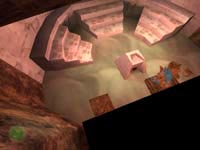 Make sure you are in the far corner so when you look down the brown ledge is directly below you. (see picture) Turn and back off then drop
and grab to catch the first ledge and drop once more to land on the square platform. Turn to face the statue and use your whip to fling his
arm to the ground. Drop down and get the Mechanical Arm then exit the theater by heading up to the top of the
seating area.
Make sure you are in the far corner so when you look down the brown ledge is directly below you. (see picture) Turn and back off then drop
and grab to catch the first ledge and drop once more to land on the square platform. Turn to face the statue and use your whip to fling his
arm to the ground. Drop down and get the Mechanical Arm then exit the theater by heading up to the top of the
seating area.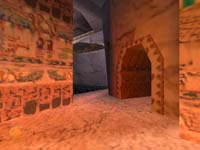 Back at the junction you can head to the left and follow the passage until it takes you back to the very first room of this level. A Russian
sniper is over by the entrance and he will shoot if you get too far to the left of the large column. Ignore him and head for the arched
entrance on the right. We'll take care of that guard in a moment.
Back at the junction you can head to the left and follow the passage until it takes you back to the very first room of this level. A Russian
sniper is over by the entrance and he will shoot if you get too far to the left of the large column. Ignore him and head for the arched
entrance on the right. We'll take care of that guard in a moment.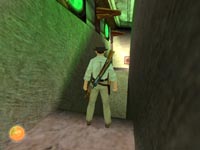 Turn left and you will reach a dark hall bathed in a green glow. A deep pit blocks your way but a post above allows you to whip-swing across.
Push the button to lower the sarcophagus to the right and head toward it. Grab the Blue Gem from the niche
before heading through the new opening.
Turn left and you will reach a dark hall bathed in a green glow. A deep pit blocks your way but a post above allows you to whip-swing across.
Push the button to lower the sarcophagus to the right and head toward it. Grab the Blue Gem from the niche
before heading through the new opening.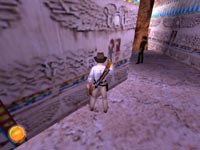 Turn left and stay against the wall as you peek around the corner and spot the Russian guard. You have the element of surprise so charge
around the corner and open fire. The sound of his death signals another guard who will come running around from behind. Turn and kill him
as he comes around the corner. Now move off down the hall in the other direction and you will soon come to the familiar room with the large
broken pillar.
Turn left and stay against the wall as you peek around the corner and spot the Russian guard. You have the element of surprise so charge
around the corner and open fire. The sound of his death signals another guard who will come running around from behind. Turn and kill him
as he comes around the corner. Now move off down the hall in the other direction and you will soon come to the familiar room with the large
broken pillar. Head past the pillar and down the long sloped ramp. Stay to the left and use the flanking column as a shield from the three guards in the
next room. These guys are tough and they will roll to the side to avoid your fire. Use the machine gun to drop them fast then take their
ammos and weapons.
Head past the pillar and down the long sloped ramp. Stay to the left and use the flanking column as a shield from the three guards in the
next room. These guys are tough and they will roll to the side to avoid your fire. Use the machine gun to drop them fast then take their
ammos and weapons.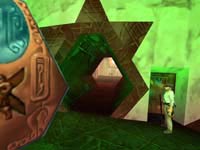 Climb over the obstruction to the left. You can either climb up and drop down the tall cliff to the right or slide down and crawl back
through the low cave to the left. Head toward the opposite end of the long hall and use the mechanical arm on the statue by the door.
Now go pull the lever to open the door allowing you to enter the next exciting area.
Climb over the obstruction to the left. You can either climb up and drop down the tall cliff to the right or slide down and crawl back
through the low cave to the left. Head toward the opposite end of the long hall and use the mechanical arm on the statue by the door.
Now go pull the lever to open the door allowing you to enter the next exciting area.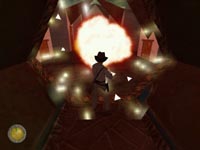 Head down the long dark hall and get out your shotgun or bazooka. You are about to encounter your first robot. These things are hard to
kill and when they do explode they can cause considerable damage if you are too close. As soon as you get near this room the robot powers-up
and comes at you. When you target him start firing until he explodes. You can always back flip after firing to avoid explosion damage.
Head down the long dark hall and get out your shotgun or bazooka. You are about to encounter your first robot. These things are hard to
kill and when they do explode they can cause considerable damage if you are too close. As soon as you get near this room the robot powers-up
and comes at you. When you target him start firing until he explodes. You can always back flip after firing to avoid explosion damage. Head toward the left side of the room and locate the blue gem in the ceiling and the Angel Stone below it. Use the Azerim part to levitate
up to the ledge. A ramp leads off to the right but you need to turn and face the middle platform and do a running leap out to it. Follow
the ramp up as it narrows then widens as you descend to the other platform. Do another running jump to the far ledge then turn and head
down the short ramp leading to the skeleton and his unused Trauma Kit.
Head toward the left side of the room and locate the blue gem in the ceiling and the Angel Stone below it. Use the Azerim part to levitate
up to the ledge. A ramp leads off to the right but you need to turn and face the middle platform and do a running leap out to it. Follow
the ramp up as it narrows then widens as you descend to the other platform. Do another running jump to the far ledge then turn and head
down the short ramp leading to the skeleton and his unused Trauma Kit.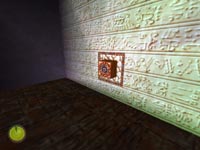 Now head up the passage and turn left to locate the button on the wall. Press the button to lower a platform below that turns into stairs
leading down to a secret level. Just about that time Dr. Volodnikov and his armed escorts arrive. The good doctor heads down the stairs and
closes the floor behind him leaving you in a room with a bunch of trigger-happy guards. Start sniping the guards from the upper ledge. If
you see a large group of them clustered together you can always drop a grenade into the group - that's always a crowd pleaser.
Now head up the passage and turn left to locate the button on the wall. Press the button to lower a platform below that turns into stairs
leading down to a secret level. Just about that time Dr. Volodnikov and his armed escorts arrive. The good doctor heads down the stairs and
closes the floor behind him leaving you in a room with a bunch of trigger-happy guards. Start sniping the guards from the upper ledge. If
you see a large group of them clustered together you can always drop a grenade into the group - that's always a crowd pleaser.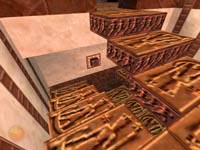 When the floor is safe you can go back and hit the button to lower the stairs then drop to the floor. Before you go down the stairs you need
to locate the torn tapestry on the right column (facing gate) and slash it open with your machete. Now go down the steps and press the
button to raise the steps above you and reveal the entrance to the secret area beyond. It's just you and the doctor for the next several
minutes so get ready to have some fun.
When the floor is safe you can go back and hit the button to lower the stairs then drop to the floor. Before you go down the stairs you need
to locate the torn tapestry on the right column (facing gate) and slash it open with your machete. Now go down the steps and press the
button to raise the steps above you and reveal the entrance to the secret area beyond. It's just you and the doctor for the next several
minutes so get ready to have some fun.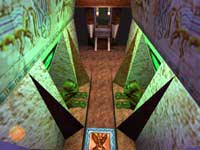 Looking down you will see an Angel Stone and the blue gem above makes this a great place to use the Azerim part. The floor isn't that far
so just hang and drop then continue to the next area. This central structure is surrounded by a perimeter hall with steps and connecting
passages. Head to the right and find Volodnikov examine a machine. He will grab a gear from the machine and run when you yell at him.
The chase is on!
Looking down you will see an Angel Stone and the blue gem above makes this a great place to use the Azerim part. The floor isn't that far
so just hang and drop then continue to the next area. This central structure is surrounded by a perimeter hall with steps and connecting
passages. Head to the right and find Volodnikov examine a machine. He will grab a gear from the machine and run when you yell at him.
The chase is on! Apparently Indy is out of shape because the "large" doctor seems to be able to outrun our hero. Looks like we need to use our mind instead
of our body. Volodnikov seems to be cheating by going down the middle passage. Cut him off by pulling this block out from the wall then
circle around and enter the opposite entrance and approach the block from the other side. Pull it into the center of this area so it rests
on the Angel Stone.
Apparently Indy is out of shape because the "large" doctor seems to be able to outrun our hero. Looks like we need to use our mind instead
of our body. Volodnikov seems to be cheating by going down the middle passage. Cut him off by pulling this block out from the wall then
circle around and enter the opposite entrance and approach the block from the other side. Pull it into the center of this area so it rests
on the Angel Stone.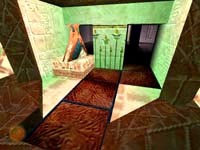 The doc is still managing to avoid you. Now he is ducking inside the central structure at the top level and hiding in the back room. He
then runs out the opposite side that you approach from. Check out his hiding place and pull the stone with the gold statue away from the
wall then push it toward the wall with the two openings. Finally push it to either opening to block his escape. Now return to the outside
and chase him around one final time. This time when he hides in the central area you will corner him and be able to get the gear he took
from the machine.
The doc is still managing to avoid you. Now he is ducking inside the central structure at the top level and hiding in the back room. He
then runs out the opposite side that you approach from. Check out his hiding place and pull the stone with the gold statue away from the
wall then push it toward the wall with the two openings. Finally push it to either opening to block his escape. Now return to the outside
and chase him around one final time. This time when he hides in the central area you will corner him and be able to get the gear he took
from the machine. Arm your rifle as you leave this building. A sniper is on the exit ledge. Kill him then use the rope ladder (or Azerim part) to reach the
upper level and press the button to open the stairs again. Run up the stairs and double back to quickly enter the alcove you created earlier
when you cut away the tapestry. Get out your machine gun and prepare to battle the three guards now patrolling this area. If they don't
come near your hiding place you will have to hunt them down. Return to the torn tapestry and pull out the block inside and move it all the
way to the other column. Use the block as a step to reach the high opening.
Arm your rifle as you leave this building. A sniper is on the exit ledge. Kill him then use the rope ladder (or Azerim part) to reach the
upper level and press the button to open the stairs again. Run up the stairs and double back to quickly enter the alcove you created earlier
when you cut away the tapestry. Get out your machine gun and prepare to battle the three guards now patrolling this area. If they don't
come near your hiding place you will have to hunt them down. Return to the torn tapestry and pull out the block inside and move it all the
way to the other column. Use the block as a step to reach the high opening.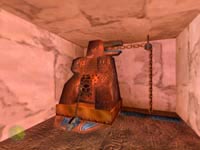 Inside the top of the pillar you can walk back and climb down the ladder to the wire floor. Snakes hiss below you as you walk to the back of
this area and locate the large machine with the lever. Pull the lever to raise a gate below then make your way back to the ladder and climb
up and drop out of the pillar opening. Reenter the opposite pillar and you will find a passage that the block had been concealing earlier.
Inside the top of the pillar you can walk back and climb down the ladder to the wire floor. Snakes hiss below you as you walk to the back of
this area and locate the large machine with the lever. Pull the lever to raise a gate below then make your way back to the ladder and climb
up and drop out of the pillar opening. Reenter the opposite pillar and you will find a passage that the block had been concealing earlier. Inside is another ladder leading down to the lower passage you saw a minute ago beneath the wire floor. A pair of deadly snakes attack from
the far end of the hall. Kill them and enter the room at the end and take the Bronze Key from the niche on the wall
to the right. Return to the main room and approach the gated door and the keyhole to the left. Use the key to open the gate and gain
access to the elevator.
Inside is another ladder leading down to the lower passage you saw a minute ago beneath the wire floor. A pair of deadly snakes attack from
the far end of the hall. Kill them and enter the room at the end and take the Bronze Key from the niche on the wall
to the right. Return to the main room and approach the gated door and the keyhole to the left. Use the key to open the gate and gain
access to the elevator. This elevator is run on "turtle power" but this turtle has lost his drive gear. Lucky for us you have one in your inventory, but even after
you insert it into the slot the lift still seems broken. Exit the elevator and go get the square block from between the two columns and slide
it into the elevator. The added weight sends the lift to the bottom and also causes the counterweight to rise to the top. Head back to the
Angel Stone and use Azerim's part to rise to the upper level. This time you can take the ramp leading up to the right.
This elevator is run on "turtle power" but this turtle has lost his drive gear. Lucky for us you have one in your inventory, but even after
you insert it into the slot the lift still seems broken. Exit the elevator and go get the square block from between the two columns and slide
it into the elevator. The added weight sends the lift to the bottom and also causes the counterweight to rise to the top. Head back to the
Angel Stone and use Azerim's part to rise to the upper level. This time you can take the ramp leading up to the right.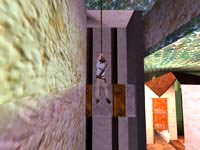 Walk out onto the narrow platform and face the counterweight across the way. Use your whip to swing across and land on the weight and you
will sink to the room below. There are two robots in this room. The first attacks upon your arrival so kill him with your shotgun or bazooka
while you are still standing on the weight.
Walk out onto the narrow platform and face the counterweight across the way. Use your whip to swing across and land on the weight and you
will sink to the room below. There are two robots in this room. The first attacks upon your arrival so kill him with your shotgun or bazooka
while you are still standing on the weight.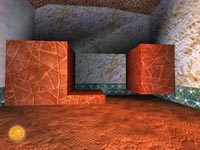 Drop to the floor and circle around to the left to kill the remaining robot. Continue to the back corner where the second robot was hiding
and locate these brown ledges. Step up on the low ledge and pull up to the top and turn to jump to the opposite block. Now turn and face
the main room and get ready for a tricky jumping and climbing puzzle.
Drop to the floor and circle around to the left to kill the remaining robot. Continue to the back corner where the second robot was hiding
and locate these brown ledges. Step up on the low ledge and pull up to the top and turn to jump to the opposite block. Now turn and face
the main room and get ready for a tricky jumping and climbing puzzle. Do a running jump to reach the far ledge (1) then jump up and grab the top of the wall (2) and shimmy to the right. When you are all the way
to the right you can drop to the ledge (3) below and grab on and pull up. Do two running jumps forward to reach the next ledge (4) and the
final ledge (not in picture) and stop. Turn left and locate the blue glow coming from the dark ledge across the way. Make a very tricky
angled jump to reach this ledge and get the Silver Idol. Now jump up and grab the wall and shimmy back to
the ledge (4) on the left. Turn and jump back to the ledge against the wall and head toward the middle section. Turn left to enter the
area with the water.
Do a running jump to reach the far ledge (1) then jump up and grab the top of the wall (2) and shimmy to the right. When you are all the way
to the right you can drop to the ledge (3) below and grab on and pull up. Do two running jumps forward to reach the next ledge (4) and the
final ledge (not in picture) and stop. Turn left and locate the blue glow coming from the dark ledge across the way. Make a very tricky
angled jump to reach this ledge and get the Silver Idol. Now jump up and grab the wall and shimmy back to
the ledge (4) on the left. Turn and jump back to the ledge against the wall and head toward the middle section. Turn left to enter the
area with the water. This shallow pool before you is what I like to call "the safe zone". Around the corner are a pair of robots that will attack you as soon as
they can see you. But don't feel too safe. There are also five piranhas swimming around this area. Try to lure the fish into the "safe zone"
and kill them there one at a time. If they won't cooperate then just go after them and keep moving so they can't gang-up on you. Stay
underwater whenever you are in the main area and the robots will soon take care of themselves.
This shallow pool before you is what I like to call "the safe zone". Around the corner are a pair of robots that will attack you as soon as
they can see you. But don't feel too safe. There are also five piranhas swimming around this area. Try to lure the fish into the "safe zone"
and kill them there one at a time. If they won't cooperate then just go after them and keep moving so they can't gang-up on you. Stay
underwater whenever you are in the main area and the robots will soon take care of themselves. Swim down toward the pile of rubble on the right and go behind the largest piece to find the Gold Bar. You will
probably want to surface and get a full load of air for this next trip. Dive back down and return to the main room.
Swim down toward the pile of rubble on the right and go behind the largest piece to find the Gold Bar. You will
probably want to surface and get a full load of air for this next trip. Dive back down and return to the main room. Swim toward the back and into the narrow door between the two columns. The passage turns to the right and continues until you reach a dead
end with a switch in the wall. Pull out the switch and a giant bull statue rises out of the hole in the previous room and rises up out of
the water. Return to the previous room and exit onto the low ledge to the right.
Swim toward the back and into the narrow door between the two columns. The passage turns to the right and continues until you reach a dead
end with a switch in the wall. Pull out the switch and a giant bull statue rises out of the hole in the previous room and rises up out of
the water. Return to the previous room and exit onto the low ledge to the right.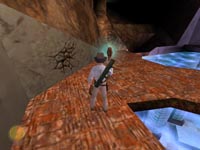 You shouldn't have to look too hard to find the obvious cracked wall. Use the Urgon part to open up a passage leading into the secret room
where you can get the Red Gem from the shelf on the far wall. Return to the ledge outside and jump across to the
top of the bull's head and then to the opposite ledge. Circle around to the exit and climb up - save your game!
You shouldn't have to look too hard to find the obvious cracked wall. Use the Urgon part to open up a passage leading into the secret room
where you can get the Red Gem from the shelf on the far wall. Return to the ledge outside and jump across to the
top of the bull's head and then to the opposite ledge. Circle around to the exit and climb up - save your game!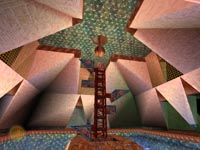 When you enter this enormous room a giant electrified ball drops from the ceiling and begins to discharge powerful blue bolts of electricity.
It only takes a few to kill you so quickly get up against the right wall of this entrance and wait a moment. Your path leads away to the
left so wait until the ball is recharging and then dash toward the first entrance to the left and quickly get behind the protective wall.
When you enter this enormous room a giant electrified ball drops from the ceiling and begins to discharge powerful blue bolts of electricity.
It only takes a few to kill you so quickly get up against the right wall of this entrance and wait a moment. Your path leads away to the
left so wait until the ball is recharging and then dash toward the first entrance to the left and quickly get behind the protective wall. Explore this short passage and you will find a crumbled ladder and a cracked wall. Use the Urgon part to smash open the wall and reveal a
hidden room with the Gold Idol inside. Now return to the other end and wait for the ball to discharge then
quickly run out and right back into the next opening on the left. Grab the Trauma Kit from the skeleton when you enter.
Explore this short passage and you will find a crumbled ladder and a cracked wall. Use the Urgon part to smash open the wall and reveal a
hidden room with the Gold Idol inside. Now return to the other end and wait for the ball to discharge then
quickly run out and right back into the next opening on the left. Grab the Trauma Kit from the skeleton when you enter.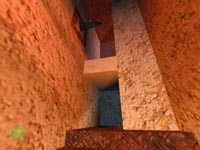 The passage continues around but you are more interested in the upper passage and that whipping post. Climb the first step and use your
whip to climb to the upper level. You are safe up in this area so follow the ledge around to the right and swing across to the middle
section.
The passage continues around but you are more interested in the upper passage and that whipping post. Climb the first step and use your
whip to climb to the upper level. You are safe up in this area so follow the ledge around to the right and swing across to the middle
section.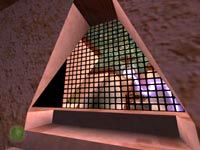 Turn to the right and you should be able to see the ball through the wire mesh. It can't hit you so enter the triangular opening and take
the narrow passage to the left and follow it around to the right. Go until you see another wire mesh on your right then turn left and jump
over to the ledge on the wall. Turn right and jump to the next ledge in the corner.
Turn to the right and you should be able to see the ball through the wire mesh. It can't hit you so enter the triangular opening and take
the narrow passage to the left and follow it around to the right. Go until you see another wire mesh on your right then turn left and jump
over to the ledge on the wall. Turn right and jump to the next ledge in the corner.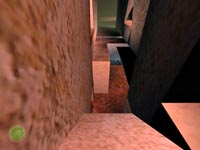 This is a tricky jump and if you miss you will repeat everything you just did - unless you save your game. Start sliding down the slope and
press forward and jump and hold them to grab onto the far ledge. Pull up and take a few steps forward then pull up into the opening on the
left. Follow it around to the right where you can use the Azerim part to levitate to the upper passage.
This is a tricky jump and if you miss you will repeat everything you just did - unless you save your game. Start sliding down the slope and
press forward and jump and hold them to grab onto the far ledge. Pull up and take a few steps forward then pull up into the opening on the
left. Follow it around to the right where you can use the Azerim part to levitate to the upper passage.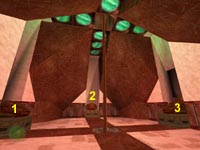 Enter the huge room above the electric ball and locate the three Ram-head platforms. Pull and push them until they are all up against the
center hole then head toward the alcove behind the starting location of statue (2). There is a button here which will raise the electric ball
and also the metal cages over the buttons on either side of the room. The Ram-head statues will protect you from the ball so run toward the
button at location (1) and push it once then run to the button at location (3) and press it three times. This will drain the water from the
pool below and disable the electric ball.
Enter the huge room above the electric ball and locate the three Ram-head platforms. Pull and push them until they are all up against the
center hole then head toward the alcove behind the starting location of statue (2). There is a button here which will raise the electric ball
and also the metal cages over the buttons on either side of the room. The Ram-head statues will protect you from the ball so run toward the
button at location (1) and push it once then run to the button at location (3) and press it three times. This will drain the water from the
pool below and disable the electric ball. Make your way back to the lower main area which is now crawling with Russians. Kill them all and dive into the water below. Surface and
climb out on the center ledge and circle around until you find the opening with the ladder. Climb up the ladder then turn and jump to the
triangular step across the hole. Turn and jump to the next higher step and repeat once more. You should now be staring right at
Nub's Machine Part; the fourth and final piece to the puzzle.
Make your way back to the lower main area which is now crawling with Russians. Kill them all and dive into the water below. Surface and
climb out on the center ledge and circle around until you find the opening with the ladder. Climb up the ladder then turn and jump to the
triangular step across the hole. Turn and jump to the next higher step and repeat once more. You should now be staring right at
Nub's Machine Part; the fourth and final piece to the puzzle. Jump into the water below and exit back onto that same central ledge and locate the power panel opposite the ladder you just climbed. Use the
Nub part to activate the panel and extend the bridge across the water. Climb back up the ladder and take the bridge to the perimeter area and
follow it back around to the same side of the room as the entrance (near the tricky slope jump from earlier).
Jump into the water below and exit back onto that same central ledge and locate the power panel opposite the ladder you just climbed. Use the
Nub part to activate the panel and extend the bridge across the water. Climb back up the ladder and take the bridge to the perimeter area and
follow it back around to the same side of the room as the entrance (near the tricky slope jump from earlier).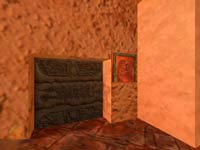 You should locate a dark stone door with a power panel (see picture) that you can use Nub's part to open. Enter the passage beyond and
start killing the snakes that patrol the split hallway leading down to the next area. Drop down at the end of the passage and you will be
back in the room at the bottom of the elevator.
You should locate a dark stone door with a power panel (see picture) that you can use Nub's part to open. Enter the passage beyond and
start killing the snakes that patrol the split hallway leading down to the next area. Drop down at the end of the passage and you will be
back in the room at the bottom of the elevator.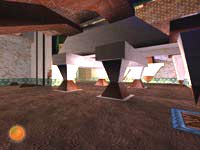 You have two main goals in this room and both require the Nub part. Head toward the area with the counterweight and use the device to power-up
the panel and activate the elevator. Now head to the other side of the room with the Angel Stone (see picture) and use the Nub part on the
panel there to open the ceiling tile revealing a blue crystal. Now you can use the Azerim part to levitate to the central walkway.
You have two main goals in this room and both require the Nub part. Head toward the area with the counterweight and use the device to power-up
the panel and activate the elevator. Now head to the other side of the room with the Angel Stone (see picture) and use the Nub part on the
panel there to open the ceiling tile revealing a blue crystal. Now you can use the Azerim part to levitate to the central walkway. Turn left and head down the long metal mesh floor to the elevator and pull out the block. You will have to pull it twice so you can get
inside then press the button which actually works now. Ride all the way to the top of the tomb and exit at the top. Go to either side and
circle around to the back and head up the steps.
Turn left and head down the long metal mesh floor to the elevator and pull out the block. You will have to pull it twice so you can get
inside then press the button which actually works now. Ride all the way to the top of the tomb and exit at the top. Go to either side and
circle around to the back and head up the steps. Turn to face the elevator shaft and climb to the top of the structure. Lying on the pedestal before you is the level's final treasure. Take
the Silver Bar then drop back down and return to the front of the elevator. Continue down the passage over the
pile of dirt and you will arrive at a closed door with a skeleton and a Trauma Kit. Use Nub's part on the door and it will open.
Turn to face the elevator shaft and climb to the top of the structure. Lying on the pedestal before you is the level's final treasure. Take
the Silver Bar then drop back down and return to the front of the elevator. Continue down the passage over the
pile of dirt and you will arrive at a closed door with a skeleton and a Trauma Kit. Use Nub's part on the door and it will open.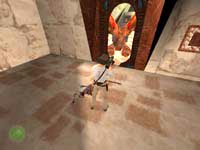 Stay to the side of the entrance and arm your bazooka. There is one big, bad robot just inside. Do a side-roll to line-up with the door and
fire at the robot. Back flip after firing to avoid the backwash of the explosion then you can enter this room in safety...for now. Ahead of
you is a small pyramid in the center of the room and there are Nub Power Panels scattered about the various walls. There are also four large
square metal plates located around this room.
Stay to the side of the entrance and arm your bazooka. There is one big, bad robot just inside. Do a side-roll to line-up with the door and
fire at the robot. Back flip after firing to avoid the backwash of the explosion then you can enter this room in safety...for now. Ahead of
you is a small pyramid in the center of the room and there are Nub Power Panels scattered about the various walls. There are also four large
square metal plates located around this room.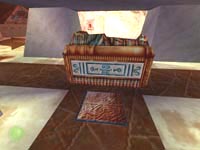 Approach the pyramid and go inside. Step on the pressure plate as you approach the coffin then open the lid and meet King Nub. A power panel
reveals itself behind you. Use the Nub part on the panel and the coffin will flip over revealing Nub's Eye. Take
the enormous ruby and head out the back of the pyramid and locate the receptacle for the gem. Before you insert the gem you need to prepare
for the final battle with the boss.
Approach the pyramid and go inside. Step on the pressure plate as you approach the coffin then open the lid and meet King Nub. A power panel
reveals itself behind you. Use the Nub part on the panel and the coffin will flip over revealing Nub's Eye. Take
the enormous ruby and head out the back of the pyramid and locate the receptacle for the gem. Before you insert the gem you need to prepare
for the final battle with the boss.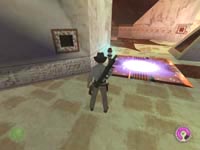 Locate each of the four metal plates and use the Nub part to activate them. Once they are turned on they are pulsing with deadly amounts
of energy so don't step on them. Circle the room and use the central pyramid when necessary and activate all four power plates then return
to the socket where the gem will be inserted. Put the gem in the receptacle and watch the show.
Locate each of the four metal plates and use the Nub part to activate them. Once they are turned on they are pulsing with deadly amounts
of energy so don't step on them. Circle the room and use the central pyramid when necessary and activate all four power plates then return
to the socket where the gem will be inserted. Put the gem in the receptacle and watch the show.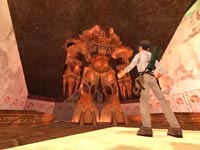 BATTLE STRATEGY:
Nub's nasty robot guardian isn't too tough when you know his weakness. The first thing to know is that you have no weapons which can harm this giant monster. The second thing is that he can only attack you with his laser and as long as you keep moving he can't hit you. The robot will pursue you in a direct line of sight so you need to get one of the metal power plates between you and the robot and lure him over the plate. He will sizzle and fry until the plate shorts out and then he will continue to pursue you.
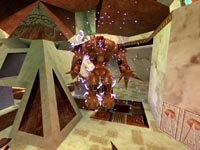 You have to repeat this process until he has been zapped six times. This means you are going to have to use the Nub part to power-up
the plates after the robot shorts them out. You can only power up each plate twice. Use the central pyramid as a shortcut and as a shield
against his deadly red laser he shoots from his giant red eye. After the final explosion the giant metal body will remain standing, immobile
and harmless.
You have to repeat this process until he has been zapped six times. This means you are going to have to use the Nub part to power-up
the plates after the robot shorts them out. You can only power up each plate twice. Use the central pyramid as a shortcut and as a shield
against his deadly red laser he shoots from his giant red eye. After the final explosion the giant metal body will remain standing, immobile
and harmless. Climb onto the first ledge of the pyramid then go into the center and pull up to the top ledge. Locate the side with the dead robot and use
the flat top of his head as a jumping platform to reach the outer ledge. Circle around until you find this button and press it to lower a
bridge behind you. Turn and cross the bridge into the next passage.
Climb onto the first ledge of the pyramid then go into the center and pull up to the top ledge. Locate the side with the dead robot and use
the flat top of his head as a jumping platform to reach the outer ledge. Circle around until you find this button and press it to lower a
bridge behind you. Turn and cross the bridge into the next passage. Head down the final long passage and make a turn to the right. Climb over some fallen pillars and continue forward and around to the left.
The movie should take over and you will be rescued by Sophia and Turner, but not before you get a surprise visit from Volodnikov. After a
lengthy converation you turn the pieces over to the CIA and climb out of the tomb. Time to head back to Babylon and discover the secrets of
the Infernal Machine.
Head down the final long passage and make a turn to the right. Climb over some fallen pillars and continue forward and around to the left.
The movie should take over and you will be rescued by Sophia and Turner, but not before you get a surprise visit from Volodnikov. After a
lengthy converation you turn the pieces over to the CIA and climb out of the tomb. Time to head back to Babylon and discover the secrets of
the Infernal Machine.

 Recommended Purchases:
(2) First Aid Kits
(1) Trauma Kit