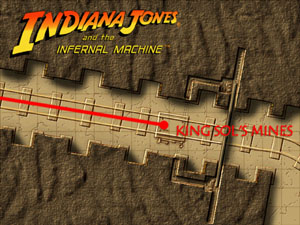

 Just like in the Temple of Doom, Indy embarks on a great underground mine cart adventure. There are plenty of puzzles to solve and even
more exciting cart chases and large battles with Russian troops. Your main objective is to find the Eye of Horus and the three King Solomon Gems.
When you have acquired these objects you can proceed deeper into the complex to search Nub's Tomb for the final Machine Part. In addition to a huge
number of Russian soldiers, you will also encounter many spiders and snakes. Keep one hand on your gun and the other on the Poison Kits.
Just like in the Temple of Doom, Indy embarks on a great underground mine cart adventure. There are plenty of puzzles to solve and even
more exciting cart chases and large battles with Russian troops. Your main objective is to find the Eye of Horus and the three King Solomon Gems.
When you have acquired these objects you can proceed deeper into the complex to search Nub's Tomb for the final Machine Part. In addition to a huge
number of Russian soldiers, you will also encounter many spiders and snakes. Keep one hand on your gun and the other on the Poison Kits.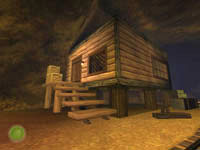 Quickly learn the controls of your mine cart. UP is faster and DOWN is slower or even reverse if you press it enough. Press [C] to duck under the
low pipes over the track but you only duck for a second so get the timing down or you will take serious damage. Ride the rails until you reach the
large cavern with the house on the right. Exit the cart (CTRL+left or right depending on which side you wish to exit) and head up the step into
the railway control room.
Quickly learn the controls of your mine cart. UP is faster and DOWN is slower or even reverse if you press it enough. Press [C] to duck under the
low pipes over the track but you only duck for a second so get the timing down or you will take serious damage. Ride the rails until you reach the
large cavern with the house on the right. Exit the cart (CTRL+left or right depending on which side you wish to exit) and head up the step into
the railway control room.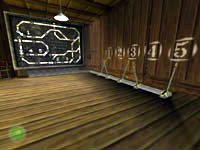 The five switches along the wall redirect the track at five junctions shown on the map. The power is out on this device and you will need to find
a fuse to put in the box on the wall behind the map before it will function. Grab the Trauma Kit from the desk on your way back to the mine cart.
Get back in the car and continue until you reach the next large cavern with a huge door and an elevated wood section with crates on top.
The five switches along the wall redirect the track at five junctions shown on the map. The power is out on this device and you will need to find
a fuse to put in the box on the wall behind the map before it will function. Grab the Trauma Kit from the desk on your way back to the mine cart.
Get back in the car and continue until you reach the next large cavern with a huge door and an elevated wood section with crates on top.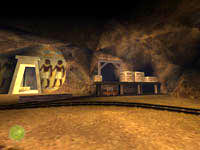 Head through the large door with the Egyptians on the right and follow the passage to the left. Keep a safe distance and shoot the TNT boxes to
reveal a Silver Idol in the niche. Return to the cavern and head over to the wooden platform. Check out the box on
the small cart below and you will find a 50-amp Fuse. Climb onto the wooden deck and go to the back corner. Climb over
the small box and get the Blue Gem from the dark corner then return to the mine cart.
Head through the large door with the Egyptians on the right and follow the passage to the left. Keep a safe distance and shoot the TNT boxes to
reveal a Silver Idol in the niche. Return to the cavern and head over to the wooden platform. Check out the box on
the small cart below and you will find a 50-amp Fuse. Climb onto the wooden deck and go to the back corner. Climb over
the small box and get the Blue Gem from the dark corner then return to the mine cart.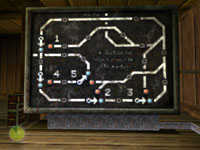 Ride the rails all the way back to the control room and reenter the building. Use the fuse in the box behind the map then approach the map and
levers. Time to survey the big picture with a ride around the perimeter of this complex maze of tunnels. Flipping levers 1 and 3 will switch
the tracks so you can make one big circle around the mine. Lever 4 is stuck - actually the switch is stuck but we will fix that later.
Ride the rails all the way back to the control room and reenter the building. Use the fuse in the box behind the map then approach the map and
levers. Time to survey the big picture with a ride around the perimeter of this complex maze of tunnels. Flipping levers 1 and 3 will switch
the tracks so you can make one big circle around the mine. Lever 4 is stuck - actually the switch is stuck but we will fix that later. Get back in the cart and ride around the new sections of track. When you pass over the elevated section in the well-lit room the door opens below
and a small army of Russians swarm into the mine. They will scatter so you will have plenty to do for the rest of the level. Continue until you
reach Switch #4 and exit the cart. Examine the switch - stuck! Examine the decorative column against the wall - treasure! Take the
Blue Gem and get back in the cart and continue the ride.
Get back in the cart and ride around the new sections of track. When you pass over the elevated section in the well-lit room the door opens below
and a small army of Russians swarm into the mine. They will scatter so you will have plenty to do for the rest of the level. Continue until you
reach Switch #4 and exit the cart. Examine the switch - stuck! Examine the decorative column against the wall - treasure! Take the
Blue Gem and get back in the cart and continue the ride.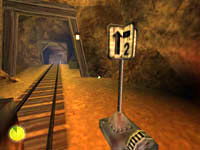 Your next stop is Switch #2. You will pass through several tight tunnels with low pipes so be ready to duck. You are safe from all the spiders as
long as you remain in the cart. When you reach the switch, stop and exit the cart and turn to face the direction you came from. To the right of
the entrance is a Green Gem. Collect the treasure and return to the cart and continue the ride.
Your next stop is Switch #2. You will pass through several tight tunnels with low pipes so be ready to duck. You are safe from all the spiders as
long as you remain in the cart. When you reach the switch, stop and exit the cart and turn to face the direction you came from. To the right of
the entrance is a Green Gem. Collect the treasure and return to the cart and continue the ride.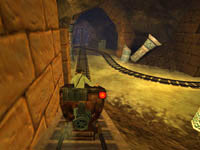 When you reach the slope leading into this large cavern you will spot two other tracks ahead that join with this one. Go just past the intersection
then reverse direction to switch over to the right track. Continue going backwards until you go through another door into a room with a huge pool
and a pair of waterfalls.
When you reach the slope leading into this large cavern you will spot two other tracks ahead that join with this one. Go just past the intersection
then reverse direction to switch over to the right track. Continue going backwards until you go through another door into a room with a huge pool
and a pair of waterfalls.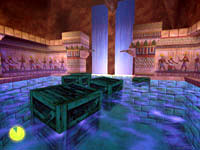 There are several crates floating in the pool. Do a running jump to the nearest then standing jumps to the others until you are facing the left
waterfall. Use your whip on the bird-head to swing through the falls into the opening behind it. Inside you will find the Eye of Horus
resting in the niche. Face the back of the waterfall and use your whip to swing back out to the crate. Turn to face the right waterfall and dive
into the water. Swim down and behind the falls to locate the Red Gem. Return to the surface by the floating crates.
There are several crates floating in the pool. Do a running jump to the nearest then standing jumps to the others until you are facing the left
waterfall. Use your whip on the bird-head to swing through the falls into the opening behind it. Inside you will find the Eye of Horus
resting in the niche. Face the back of the waterfall and use your whip to swing back out to the crate. Turn to face the right waterfall and dive
into the water. Swim down and behind the falls to locate the Red Gem. Return to the surface by the floating crates.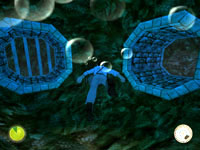 Looking toward the parked mine cart you should see a large opening under the water. Swim down and through this opening then when you reach the
next pair of openings swim over and get the Green Gem from the left opening with the bars. Now swim through the other
opening and follow it until you see some stone blocks on the bottom then swim straight up and surface in the room above. Sitting on a pedestal is
the Gold Idol. Take it and then jump back in the water and return to the main pool. Exit and get back in the mine
cart to continue the adventure.
Looking toward the parked mine cart you should see a large opening under the water. Swim down and through this opening then when you reach the
next pair of openings swim over and get the Green Gem from the left opening with the bars. Now swim through the other
opening and follow it until you see some stone blocks on the bottom then swim straight up and surface in the room above. Sitting on a pedestal is
the Gold Idol. Take it and then jump back in the water and return to the main pool. Exit and get back in the mine
cart to continue the adventure.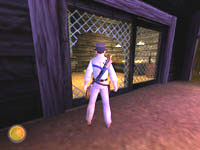 Your trip along the railways gets more dangerous up ahead. Soldiers line the tracks and will fire at you and a second mine car begins to chase
you complete with a Soviet sharpshooter. The chase ends when a tossed grenade blows up several boxes of TNT. When this happens quickly stop and
exit your cart and kill the soldiers who survived the blast. Dodge the electrical discharge from the broken light and go through the hole in the
wire mesh leading into the supply room. Take the Brass Key from the table then return to the cart and continue the ride.
Your trip along the railways gets more dangerous up ahead. Soldiers line the tracks and will fire at you and a second mine car begins to chase
you complete with a Soviet sharpshooter. The chase ends when a tossed grenade blows up several boxes of TNT. When this happens quickly stop and
exit your cart and kill the soldiers who survived the blast. Dodge the electrical discharge from the broken light and go through the hole in the
wire mesh leading into the supply room. Take the Brass Key from the table then return to the cart and continue the ride.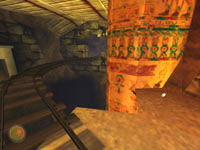 Follow the rails until you reach Switch #1 then stop the car and head back along the tracks on foot. Just before you reach the elevated section you
should easily spot the First Aid Kit next to the decorative column on the right. Carefully walk out onto the elevated section and follow it around
until you go through the next opening.
Follow the rails until you reach Switch #1 then stop the car and head back along the tracks on foot. Just before you reach the elevated section you
should easily spot the First Aid Kit next to the decorative column on the right. Carefully walk out onto the elevated section and follow it around
until you go through the next opening.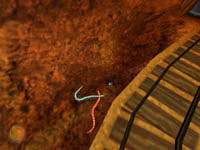 Just inside this next area to the left you should hear some hissing. Looking over the edge reveals a pair of snakes guarding the next treasure.
You can kill both snakes from the safety of the tracks before dropping down to claim the Blue Gem. Climb back out and
return to the mine cart.
Just inside this next area to the left you should hear some hissing. Looking over the edge reveals a pair of snakes guarding the next treasure.
You can kill both snakes from the safety of the tracks before dropping down to claim the Blue Gem. Climb back out and
return to the mine cart.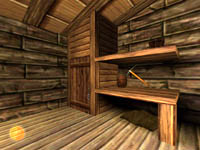 Continue the ride past Switch #2 and down into the area with the 3-track junction. A soldier will fire a bazooka at you blowing up a piece of the
track. You jump the gap and continue through the next door. Stop immediately and exit the car. Ahead on the high ledge on the left are several
soldiers - one will even toss grenades at you. Use your rifle to snipe them from a safe distance. Dodge any ticking grenades that come flying at
you. Enter the shack and get the Satchel Charge and Trauma Kit. The locked closet looks intriguing. Use the brass key to open it and get the
Oil Can.
Continue the ride past Switch #2 and down into the area with the 3-track junction. A soldier will fire a bazooka at you blowing up a piece of the
track. You jump the gap and continue through the next door. Stop immediately and exit the car. Ahead on the high ledge on the left are several
soldiers - one will even toss grenades at you. Use your rifle to snipe them from a safe distance. Dodge any ticking grenades that come flying at
you. Enter the shack and get the Satchel Charge and Trauma Kit. The locked closet looks intriguing. Use the brass key to open it and get the
Oil Can.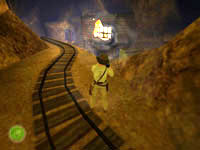 Return to the tracks and ride to Switch #4. Kill the soldiers in this area and use the oil can to loosen-up the switch. Now ride the rails back
to the big house with the levers and the map. When you enter this area your path takes you up the tracks to the right. Just before you go
through the door leading out of thise area stop and exit the cart. You should now be shielded from immediate fire from the troops below. Kill
them with your rifle or toss grenades at them. There is one big guy inside the house. Get out your bazooka and face the window. When Indy aims
at the house you know you have a "lock" on him - FIRE!
Return to the tracks and ride to Switch #4. Kill the soldiers in this area and use the oil can to loosen-up the switch. Now ride the rails back
to the big house with the levers and the map. When you enter this area your path takes you up the tracks to the right. Just before you go
through the door leading out of thise area stop and exit the cart. You should now be shielded from immediate fire from the troops below. Kill
them with your rifle or toss grenades at them. There is one big guy inside the house. Get out your bazooka and face the window. When Indy aims
at the house you know you have a "lock" on him - FIRE!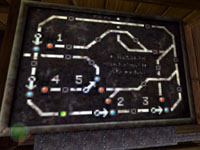 Enter the house and you will notice a green blip moving around on the track map. This is another mine car coming at you loaded with a pair of
soldiers. Flip lever 4 to alter their path and watch the chaos that follows. Indy will flip lever 5 automatically then you can return to the
upper track and continue the ride along the new path you've just opened.
Enter the house and you will notice a green blip moving around on the track map. This is another mine car coming at you loaded with a pair of
soldiers. Flip lever 4 to alter their path and watch the chaos that follows. Indy will flip lever 5 automatically then you can return to the
upper track and continue the ride along the new path you've just opened. Follow the rails along the new section of tracks as you pass by Switch #4 and #5. You will pass by several soldiers and will eventually arrive at
a large room with a wooden platform to the right of the tracks. You may need to kill a few soldiers once you exit the cart. When it is safe to
continue we will start to collect the three King Solomon Gems.
Follow the rails along the new section of tracks as you pass by Switch #4 and #5. You will pass by several soldiers and will eventually arrive at
a large room with a wooden platform to the right of the tracks. You may need to kill a few soldiers once you exit the cart. When it is safe to
continue we will start to collect the three King Solomon Gems.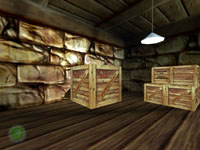 Climb onto the wood deck and push the large box to reveal the large hole beyond. Target the barrels inside and fire at them from the hole to blast
a new opening leading to a skeleton, spider, Poison Kit, and a ladder leading up. When you have killed the spider and taken the venom kit you can
climb up to the ledge overlooking a deep chasm.
Climb onto the wood deck and push the large box to reveal the large hole beyond. Target the barrels inside and fire at them from the hole to blast
a new opening leading to a skeleton, spider, Poison Kit, and a ladder leading up. When you have killed the spider and taken the venom kit you can
climb up to the ledge overlooking a deep chasm.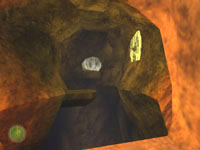 Two long running jumps are required to reach the central ledge and the opposite ledge. You will have to grab and pull up after each jump. Slash
the web with your machete and kill the attacking spiders. Continue through the web and spider infested passage until you reach the next room.
Indy "senses a trap" so be careful as you enter. A large red gem tempts you from the blocks on the left.
Two long running jumps are required to reach the central ledge and the opposite ledge. You will have to grab and pull up after each jump. Slash
the web with your machete and kill the attacking spiders. Continue through the web and spider infested passage until you reach the next room.
Indy "senses a trap" so be careful as you enter. A large red gem tempts you from the blocks on the left.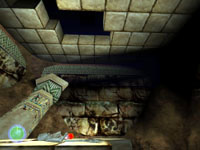 If you look up you will notice that the blocks on the ground used to be in the ceiling. When you take the Red Solomon Gem the rest
of the blocks will come down as well. Your only escape is into the pit behind the jewel. The only problem is the pit is full of snakes. Toss a
grenade into the hole and that should take care of all your snake problems. Then take the jewel, jump into the hole, and crawl through the low
opening into the next passage. Follow it around as you hack through more webs and kill their owners. The last web you slash will have you
standing opposite the small ledge you jumped to earlier. Jump back to it then turn left and jump across to return to the mine cart.
If you look up you will notice that the blocks on the ground used to be in the ceiling. When you take the Red Solomon Gem the rest
of the blocks will come down as well. Your only escape is into the pit behind the jewel. The only problem is the pit is full of snakes. Toss a
grenade into the hole and that should take care of all your snake problems. Then take the jewel, jump into the hole, and crawl through the low
opening into the next passage. Follow it around as you hack through more webs and kill their owners. The last web you slash will have you
standing opposite the small ledge you jumped to earlier. Jump back to it then turn left and jump across to return to the mine cart.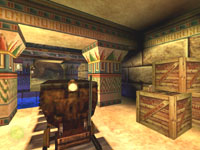 Continue the ride until you go down a hill and across a narrow pool with a statue to the right. Stop the cart when you reach the other side and
exit. Looking back you should find a Trauma Kit on the crate (see picture) that you can get before jumping into the water. Directly under the
tracks is a hole in the opposite wall. Swim in and turn left then almost immediately turn right to find the Red Gem.
Continue the ride until you go down a hill and across a narrow pool with a statue to the right. Stop the cart when you reach the other side and
exit. Looking back you should find a Trauma Kit on the crate (see picture) that you can get before jumping into the water. Directly under the
tracks is a hole in the opposite wall. Swim in and turn left then almost immediately turn right to find the Red Gem.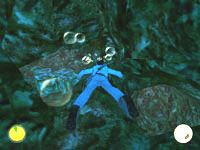 Follow the underwater cave around until is splits. The right passage leads to the pool under the broken tracks from the bazooka blast earlier. You
cannot exit the pool so it is essentially a dead end with a bunch of soldiers shooting at you. Go to the left and you should quickly see some of
those stone blocks below. Surface in this area and you will be in a torch-lit room with burial crypts set into the walls.
Follow the underwater cave around until is splits. The right passage leads to the pool under the broken tracks from the bazooka blast earlier. You
cannot exit the pool so it is essentially a dead end with a bunch of soldiers shooting at you. Go to the left and you should quickly see some of
those stone blocks below. Surface in this area and you will be in a torch-lit room with burial crypts set into the walls.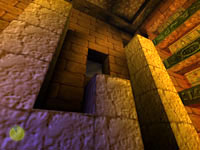 Look up the wall opposite the pool and you will see several stone columns that form ledges. There are also openings in the wall leading out to
the area beyond. Jump over the water and grab the lowest ledge and pull up then turn right and pull up onto the next ledge and exit through the
door leading to a ledge overlooking the area with the bazooka crater.
Look up the wall opposite the pool and you will see several stone columns that form ledges. There are also openings in the wall leading out to
the area beyond. Jump over the water and grab the lowest ledge and pull up then turn right and pull up onto the next ledge and exit through the
door leading to a ledge overlooking the area with the bazooka crater.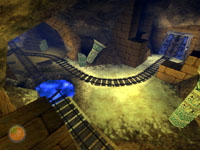 There are at least two soldiers in this area. They usually attack from the right as they come down the track leading down the hill into this area.
You can snipe them with your rifle or toss grenades at them. When they are all dead you can turn right and jump to the high ledge across the gap
and reenter the previous room at a higher level. Note: If you fall or get shot off the ledge while standing outside you can use the pool to
swim back to the crypt room. Don't forget to collect the ammo while you are down here.
There are at least two soldiers in this area. They usually attack from the right as they come down the track leading down the hill into this area.
You can snipe them with your rifle or toss grenades at them. When they are all dead you can turn right and jump to the high ledge across the gap
and reenter the previous room at a higher level. Note: If you fall or get shot off the ledge while standing outside you can use the pool to
swim back to the crypt room. Don't forget to collect the ammo while you are down here.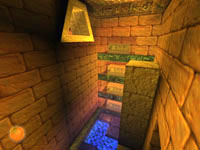 From this new ledge, turn right and make a huge running leap to the opposite tall stone column. Grab and pull up then turn to face the gold
opening in the opposite wall. Do a running leap to this opening and go inside. Drop down into the shallow pit and climb up into the duplicate
gold entry and you should spot the Green Solomon Gem right in front of you.
From this new ledge, turn right and make a huge running leap to the opposite tall stone column. Grab and pull up then turn to face the gold
opening in the opposite wall. Do a running leap to this opening and go inside. Drop down into the shallow pit and climb up into the duplicate
gold entry and you should spot the Green Solomon Gem right in front of you.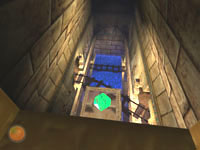 When you have the second Solomon Gem you can do a running leap off the ledge the jewel was previously resting on. Make sure you run so you hit the
water and not the track which results in two broken legs and your death. Climb out of the water and get back in the mine car and continue the ride
until you reach Switch #5. More soldiers are guarding this area of the passage. Kill them quickly and take their ammo.
When you have the second Solomon Gem you can do a running leap off the ledge the jewel was previously resting on. Make sure you run so you hit the
water and not the track which results in two broken legs and your death. Climb out of the water and get back in the mine car and continue the ride
until you reach Switch #5. More soldiers are guarding this area of the passage. Kill them quickly and take their ammo.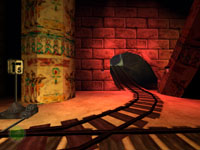 Locate the side passage (tinted in red) and follow it up the short hill. At the top are an endless supply of poisonous spiders that drop from the
ceiling. Around the corner and up the longer hill are two more soldiers. One of them is tossing grenades. Your best strategy is to use your
Auto-Pistol and rush up the hill. Wait for him to throw a grenade then run past it and kill them while he is preparing another. Get their ammo
and continue.
Locate the side passage (tinted in red) and follow it up the short hill. At the top are an endless supply of poisonous spiders that drop from the
ceiling. Around the corner and up the longer hill are two more soldiers. One of them is tossing grenades. Your best strategy is to use your
Auto-Pistol and rush up the hill. Wait for him to throw a grenade then run past it and kill them while he is preparing another. Get their ammo
and continue.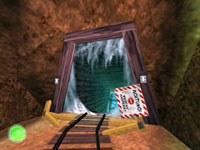 When you reach this entrance you may recognize the warning sign and the slope beyond. This is where the other Russians broke through earlier and
exploding into the far wall. Walk down the tracks until you reach the "end of the line" then use your whip to swing across the chasm and continue
through the door on the other side.
When you reach this entrance you may recognize the warning sign and the slope beyond. This is where the other Russians broke through earlier and
exploding into the far wall. Walk down the tracks until you reach the "end of the line" then use your whip to swing across the chasm and continue
through the door on the other side.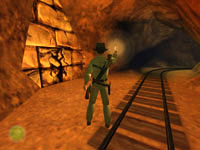 The track continues back into the darkness. Flip open your lighter and you will easily spot the cracked wall on the left. Use the Urgon part to
bust open this wall and send a coffin shooting across the room on the other side. Carefully approach the entrance and you will notice the floor is
alive with at least a half-dozen snakes. Toss a single grenade through the door to kill them all and enter.
The track continues back into the darkness. Flip open your lighter and you will easily spot the cracked wall on the left. Use the Urgon part to
bust open this wall and send a coffin shooting across the room on the other side. Carefully approach the entrance and you will notice the floor is
alive with at least a half-dozen snakes. Toss a single grenade through the door to kill them all and enter.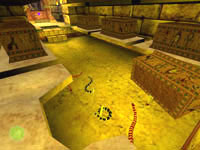 Go to the far end of the room where the Blue Solomon Gem waits patiently for you to add it to your inventory. In case
you didn't notice the outline of the trapped floor panel you may want to execute a quick back flip so you don't fall to your death. Head back to
the opening and return to the tracks. Turn left and follow the tracks to the dead end.
Go to the far end of the room where the Blue Solomon Gem waits patiently for you to add it to your inventory. In case
you didn't notice the outline of the trapped floor panel you may want to execute a quick back flip so you don't fall to your death. Head back to
the opening and return to the tracks. Turn left and follow the tracks to the dead end.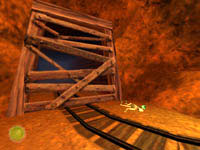 Mr. Bones won't be needing that Green Gem anymore. When you have collected the tenth treasure you can return to the
chasm, swing across and follow the tracks back to your mine car. Watch out for a lot of spiders that have gathered in the tunnel since you were
here last. You can run past them or take the time to kill them all if you wish. Ride the rails until you reach the large cavern where you initially
found the fuse - the one with the large stone door and Egyptian artwork.
Mr. Bones won't be needing that Green Gem anymore. When you have collected the tenth treasure you can return to the
chasm, swing across and follow the tracks back to your mine car. Watch out for a lot of spiders that have gathered in the tunnel since you were
here last. You can run past them or take the time to kill them all if you wish. Ride the rails until you reach the large cavern where you initially
found the fuse - the one with the large stone door and Egyptian artwork.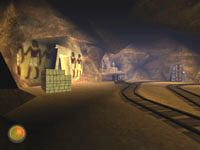 As you race through this cavern you should be able to locate at least three guards. When you reach the door leading out of this area stop the car
and get out. Kill the large soldier who is right behind you then slowly walk back into the main chamber. There will be a guard standing on the
crates on the wooden platform on the opposite end plus another soldier patrols the area beyond the stack of stones to the left. Use the stones
as cover and kill the soldier then use the rifle to snipe the guard on the crate. He tosses grenades but you are out of his range. Climb onto the
wooden deck and get the First Aid Kit and Satchel Charge from the crate where the guard was standing. Then enter the nearby door.
As you race through this cavern you should be able to locate at least three guards. When you reach the door leading out of this area stop the car
and get out. Kill the large soldier who is right behind you then slowly walk back into the main chamber. There will be a guard standing on the
crates on the wooden platform on the opposite end plus another soldier patrols the area beyond the stack of stones to the left. Use the stones
as cover and kill the soldier then use the rifle to snipe the guard on the crate. He tosses grenades but you are out of his range. Climb onto the
wooden deck and get the First Aid Kit and Satchel Charge from the crate where the guard was standing. Then enter the nearby door.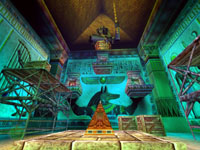 Follow the passage down the ramp and around to the left where a pair of guards need your attention. Turn right and go through the door leading into
a huge room with scaffolding on either side, a statue on the back wall and a mini-pyramid in the center of the room. Approach the pyramid and insert
the Eye of Horus into the available socket. The entire center section will rise several meters off the ground. You are now even with the scaffolding
on the left.
Follow the passage down the ramp and around to the left where a pair of guards need your attention. Turn right and go through the door leading into
a huge room with scaffolding on either side, a statue on the back wall and a mini-pyramid in the center of the room. Approach the pyramid and insert
the Eye of Horus into the available socket. The entire center section will rise several meters off the ground. You are now even with the scaffolding
on the left.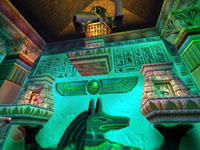 Two ledges on the opposite wall appear to be help up by the painting's hands. Each ledge has a colored altar where you need to use the matching
Solomon Gem. Jump to the left scaffolding then onto the ledge and use the Red Gem. This raises the center section even higher allowing you to
jump back across and reach the scaffolding on the right. Then you can jump to the opposite ledge and use the Green Gem, which causes the arm of the
statue above to swing out over the floor below.
Two ledges on the opposite wall appear to be help up by the painting's hands. Each ledge has a colored altar where you need to use the matching
Solomon Gem. Jump to the left scaffolding then onto the ledge and use the Red Gem. This raises the center section even higher allowing you to
jump back across and reach the scaffolding on the right. Then you can jump to the opposite ledge and use the Green Gem, which causes the arm of the
statue above to swing out over the floor below.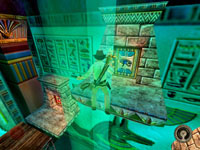 The hand of the statue holds a blue gem that can be used with the Taklit part to levitate. Drop off this ledge to the crates below then locate and
stand on the Angel Stone and use the Taklit part to levitate to the top ledge. Jump onto it and use the final Blue Gem to raise the center section
the rest of the way revealing a nook with a lever.
The hand of the statue holds a blue gem that can be used with the Taklit part to levitate. Drop off this ledge to the crates below then locate and
stand on the Angel Stone and use the Taklit part to levitate to the top ledge. Jump onto it and use the final Blue Gem to raise the center section
the rest of the way revealing a nook with a lever.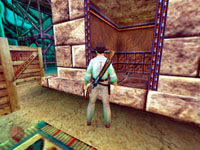 Jump down to the green ledge then to the crates and finally the floor and enter the nook. Flip the lever to make the entire center section lower
back into the floor taking you with it. You are now down in the lower chamber near the exit of this level. Turn to face the long yellow hall and
whip-swing across the gap to reach the opposite side. Move forward and the door opens leading into Nub's Tomb.
Jump down to the green ledge then to the crates and finally the floor and enter the nook. Flip the lever to make the entire center section lower
back into the floor taking you with it. You are now down in the lower chamber near the exit of this level. Turn to face the long yellow hall and
whip-swing across the gap to reach the opposite side. Move forward and the door opens leading into Nub's Tomb.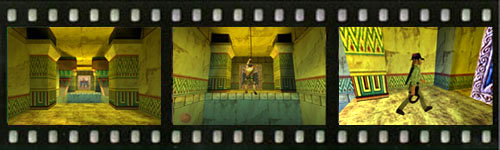
 Recommended Purchases:
(1) Rifle Clip