

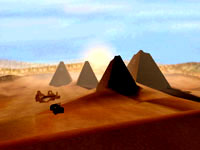
 Our quest leads us into the desert of Anglo-Egyptian Sudan where we arrive at the four pyramids of the Nubian kings. Only one
of these pyramids holds the secret to the Infernal Machine but you can be sure you will have to explore them all to find out
which one. The ultimate goal in this level is to reach the top of each pyramid where you will find a Lens Room that you must
activate to reveal the locations of hidden statues that you must use to unlock the final pyramid. It's a lot of hard work and
a lot of fun.
Our quest leads us into the desert of Anglo-Egyptian Sudan where we arrive at the four pyramids of the Nubian kings. Only one
of these pyramids holds the secret to the Infernal Machine but you can be sure you will have to explore them all to find out
which one. The ultimate goal in this level is to reach the top of each pyramid where you will find a Lens Room that you must
activate to reveal the locations of hidden statues that you must use to unlock the final pyramid. It's a lot of hard work and
a lot of fun.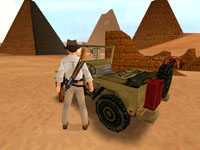 When you arrive at the pyramids you will hop out of the jeep and read the sign next to the crumbling ruins. When you have
control over Indy you need to get back in the jeep pretty fast. You may have noticed a pack of Hyenas over by the pyramids.
They will close in quickly and attack - you are safe as long as you are in the jeep and moving.
When you arrive at the pyramids you will hop out of the jeep and read the sign next to the crumbling ruins. When you have
control over Indy you need to get back in the jeep pretty fast. You may have noticed a pack of Hyenas over by the pyramids.
They will close in quickly and attack - you are safe as long as you are in the jeep and moving.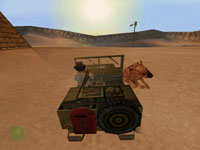 You now get to drive around and run over all the hyenas. This is actually pretty fun and totally safe as long as you don't
drive into the deep pit behind the pyramids. Chase down all the hyenas and run them over. Don't forget you can use the TURBO
button for that extra burst of speed. During your "road kill marathon" you may notice a little boy standing in the entrance of
one of the pyramids. He will run inside if you or the hyenas get too close.
You now get to drive around and run over all the hyenas. This is actually pretty fun and totally safe as long as you don't
drive into the deep pit behind the pyramids. Chase down all the hyenas and run them over. Don't forget you can use the TURBO
button for that extra burst of speed. During your "road kill marathon" you may notice a little boy standing in the entrance of
one of the pyramids. He will run inside if you or the hyenas get too close.There may be a deceptive part during this time where it appears that all the hyenas are dead. Pull up to the dark opening and go inside. Talk to the boy, which will trigger the final pack of hyenas. If the boy doesn't answer you then the hyenas are all dead. Get back in the jeep quick as they final hyenas appear out of nowhere. When you have killed all the hyenas you will hear the Indy Victory Music. You may also want to take this time to run over all the scorpions in this area.
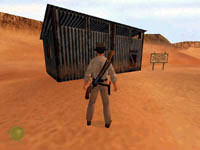 Head to the opposite side of the pyramid that had the boy inside and locate the tool shack. The door is locked but you can
go to one end and look through the window. Hmmmm...dynamite. Aim your pistols through the window and blast the crates of
explosives creating a hole in the opposite wall. Enter the shack and get the Bazooka and Rockets. You can also get a
Wooden Bucket and a Drive Chain and don't forget that Trauma Kit on your way
out.
Head to the opposite side of the pyramid that had the boy inside and locate the tool shack. The door is locked but you can
go to one end and look through the window. Hmmmm...dynamite. Aim your pistols through the window and blast the crates of
explosives creating a hole in the opposite wall. Enter the shack and get the Bazooka and Rockets. You can also get a
Wooden Bucket and a Drive Chain and don't forget that Trauma Kit on your way
out.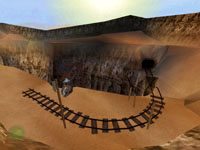 Head toward the large mining pit behind the pyramids and slide down to the ledge with the tracks and the machine. Put the
Drive Chain on the gears to repair the motor then pull the lever to start the elevator. Time your jump to the lift as the
platform levels out and ride it to the bottom. Head to the right and get the Wheel from the broken
mine cart.
Head toward the large mining pit behind the pyramids and slide down to the ledge with the tracks and the machine. Put the
Drive Chain on the gears to repair the motor then pull the lever to start the elevator. Time your jump to the lift as the
platform levels out and ride it to the bottom. Head to the right and get the Wheel from the broken
mine cart.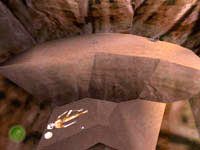 Then head to the other end where you will find a shallow pit. The opposite ledge has three scorpions hissing at
you. Kill them from the safety of your ledge then drop into the pit and get the Pocket Watch from
the skeleton - he won't be needing it anymore. Climb out onto the scorpion ledge then turn and jump across to the other side.
Return to the lift and ride back up. This is tricky. You have to jump onto the platform as it swings toward you then step
back to the edge and do a running leap just as the platform crests the top of the tower. If you don't jump off in time you
will fall and die.
Then head to the other end where you will find a shallow pit. The opposite ledge has three scorpions hissing at
you. Kill them from the safety of your ledge then drop into the pit and get the Pocket Watch from
the skeleton - he won't be needing it anymore. Climb out onto the scorpion ledge then turn and jump across to the other side.
Return to the lift and ride back up. This is tricky. You have to jump onto the platform as it swings toward you then step
back to the edge and do a running leap just as the platform crests the top of the tower. If you don't jump off in time you
will fall and die.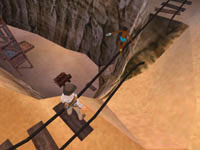 When you reach the top you should notice a sparkling object in the cave across the pit. Follow the tracks leading toward the
cave until the movie takes over. Use your new watch to make friends with the little boy and he will walk across the single
rail and get the Crystal Eye. Once you have the large gem you can exit up the slope leading out of
the pit and head back toward the tool shed.
When you reach the top you should notice a sparkling object in the cave across the pit. Follow the tracks leading toward the
cave until the movie takes over. Use your new watch to make friends with the little boy and he will walk across the single
rail and get the Crystal Eye. Once you have the large gem you can exit up the slope leading out of
the pit and head back toward the tool shed.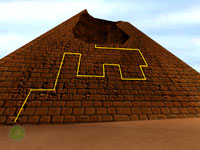 Face the pyramid and climb up the crumbling surface to reach the broken section at the top. From the top you can look through
a hole to the left and see a pair of snakes guarding a treasure. You'll get that in just a bit. Drop down and head to the
right. You will come to a spiked pit with a spider on the other side. You can jump across and kill him with pistols if you
are a fast draw otherwise you will have to use a larger weapon to target him from this side of the pit.
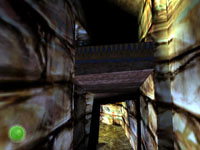
Face the pyramid and climb up the crumbling surface to reach the broken section at the top. From the top you can look through
a hole to the left and see a pair of snakes guarding a treasure. You'll get that in just a bit. Drop down and head to the
right. You will come to a spiked pit with a spider on the other side. You can jump across and kill him with pistols if you
are a fast draw otherwise you will have to use a larger weapon to target him from this side of the pit.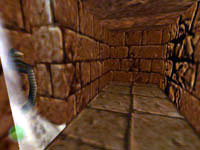 Drop down into the darkness below and use your lighter to check this area out. See that snake sconce on the left. You can
light these with your lighter just like torches. Do so, then get out your Urgon part and smash open the cracked wall at the
end of this short passage. This pushes a block outside creating your exit. Drop to the ground and push the block toward the
corner of the pyramid one time to line it up under the climbable surface.
Drop down into the darkness below and use your lighter to check this area out. See that snake sconce on the left. You can
light these with your lighter just like torches. Do so, then get out your Urgon part and smash open the cracked wall at the
end of this short passage. This pushes a block outside creating your exit. Drop to the ground and push the block toward the
corner of the pyramid one time to line it up under the climbable surface.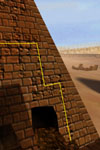 Start the long climb up this side of the pyramid. Your goal is to reach the niche at the top and press the button to open the
door below. Follow the path indicated in yellow to reach the niche then on your way back you can take the alternate green path
and drop to the high ledge with the open door.
Start the long climb up this side of the pyramid. Your goal is to reach the niche at the top and press the button to open the
door below. Follow the path indicated in yellow to reach the niche then on your way back you can take the alternate green path
and drop to the high ledge with the open door.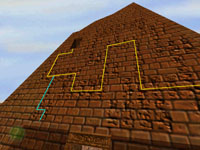 Before you go inside the door you will want to turn and pull onto the high wall behind you on the right to get the
Silver Idol. Now you can drop back down and go inside. This place is crawling with spiders so
keep your gun drawn at all times.
Before you go inside the door you will want to turn and pull onto the high wall behind you on the right to get the
Silver Idol. Now you can drop back down and go inside. This place is crawling with spiders so
keep your gun drawn at all times.
 A spider may or may not be in this hall to greet you. If he's not then he will appear when you go deeper into the passage.
Locate the blue block (see picture) and pull it out from the wall then push it over to the right. Now climb up and use the
block as a step to reach the ledge high above with the Blue Gem. Drop back down and go further
into the passage until it splits. Kill the spider(s) and take the left passage that leads to a ledge overlooking a room below.
A spider may or may not be in this hall to greet you. If he's not then he will appear when you go deeper into the passage.
Locate the blue block (see picture) and pull it out from the wall then push it over to the right. Now climb up and use the
block as a step to reach the ledge high above with the Blue Gem. Drop back down and go further
into the passage until it splits. Kill the spider(s) and take the left passage that leads to a ledge overlooking a room below.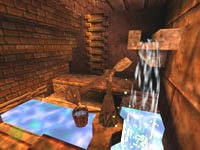 Jump down and cross the dry canal. Approach the wooden arm and hang the bucket on the hook. Indy will swing the arm around and
the mechanism will start to work on its own filling the canal with water which runs outside to the back of the pyramid. When
you are done watching this clever machine you can cross the canal and climb the ladder to return to the previous intersection.
Jump down and cross the dry canal. Approach the wooden arm and hang the bucket on the hook. Indy will swing the arm around and
the mechanism will start to work on its own filling the canal with water which runs outside to the back of the pyramid. When
you are done watching this clever machine you can cross the canal and climb the ladder to return to the previous intersection. When you reach the web-covered entrance turn right and climb up to the ledge. Then turn to face the opposite wall and do a
running jump to grab and pull up to the high ledge. Follow the passage to the left and kill the pair of snakes guarding the
treasure in the room at the end. Get the Red Gem from the coffin. This is the area you saw through
the hole earlier.
When you reach the web-covered entrance turn right and climb up to the ledge. Then turn to face the opposite wall and do a
running jump to grab and pull up to the high ledge. Follow the passage to the left and kill the pair of snakes guarding the
treasure in the room at the end. Get the Red Gem from the coffin. This is the area you saw through
the hole earlier.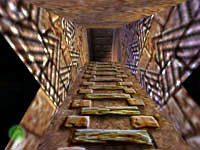 Head back down the hall and climb the ladder about halfway down on the right. At the top, turn right and back off the ledge
and drop to the floor below. The deadly crushing-wall trap is painfully obvious at one end of this area. Don't try to go there
just yet.
Head back down the hall and climb the ladder about halfway down on the right. At the top, turn right and back off the ledge
and drop to the floor below. The deadly crushing-wall trap is painfully obvious at one end of this area. Don't try to go there
just yet.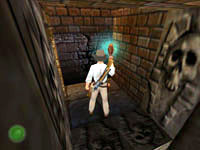 Turn and face the cracked wall and get out the Urgon part. Smash through the wall and you will find an area with two buttons.
Press the button on the right to send a stone block falling between the walls and disabling the trap. Now you can run between
the walls and jump to the block. Climb up and into the high passage to the left.
Turn and face the cracked wall and get out the Urgon part. Smash through the wall and you will find an area with two buttons.
Press the button on the right to send a stone block falling between the walls and disabling the trap. Now you can run between
the walls and jump to the block. Climb up and into the high passage to the left.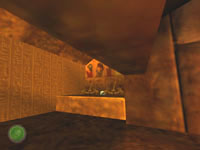 Continue forward and kill the scorpion up ahead. You now need to crouch and crawl through the low opening on the right.
Two scorpions hiss at you from the ledge on the right with the Blue Gem. Angle your crawl toward
the skeleton on the left. Stand as soon as possible and blast the scorpions before they attack. Get the treasure and the
pair of medicinal herbs from the skeleton then crawl back through the low opening.
Continue forward and kill the scorpion up ahead. You now need to crouch and crawl through the low opening on the right.
Two scorpions hiss at you from the ledge on the right with the Blue Gem. Angle your crawl toward
the skeleton on the left. Stand as soon as possible and blast the scorpions before they attack. Get the treasure and the
pair of medicinal herbs from the skeleton then crawl back through the low opening.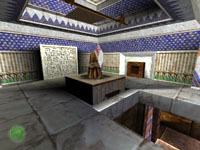 Jump and pull up to the high ledge opposite the low opening and then climb the ladder up to the next higher passage. A short
hall branches to the right. Take this passage and climb up at the end to enter the first of four Lens Rooms. Use your lighter
to set the wood on fire and watch the movie. Now that you know what to do you can drop into the passage and begin your search
for the remaining three lenses.
Jump and pull up to the high ledge opposite the low opening and then climb the ladder up to the next higher passage. A short
hall branches to the right. Take this passage and climb up at the end to enter the first of four Lens Rooms. Use your lighter
to set the wood on fire and watch the movie. Now that you know what to do you can drop into the passage and begin your search
for the remaining three lenses.At the end of this short hall turn right and jump down. You should slide down to the ledge you started this entire path. Drop to the floor and go through the web-covered entrance to the right. Turn left and drop down and continue to drop down until you reach the long hall with steps leading down to a lighted room at the end. A pair of snakes slither around this area. Kill them then enter the light.
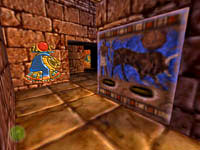
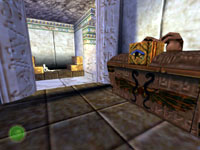 Ignore the skeleton and approach the ornate chest in the room to the left. Pressing the button opens a low panel on the bottom
of this box releasing a lot of snakes. Back away and try to aim through the low opening. Kill as many as you can from here
then crawl through and finish any snakes that remain inside the crypt.
Ignore the skeleton and approach the ornate chest in the room to the left. Pressing the button opens a low panel on the bottom
of this box releasing a lot of snakes. Back away and try to aim through the low opening. Kill as many as you can from here
then crawl through and finish any snakes that remain inside the crypt.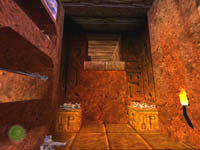 Light the snake-torch on the wall if you want then climb up to the high ledge at the end of this crypt. Enter this next hall
and make a special mental note about the crypt room on the left. I'll call it the "3 Crypt Room" for future reference. You
can even go in and kill the pair of spiders if you want or save them for when you return.
Light the snake-torch on the wall if you want then climb up to the high ledge at the end of this crypt. Enter this next hall
and make a special mental note about the crypt room on the left. I'll call it the "3 Crypt Room" for future reference. You
can even go in and kill the pair of spiders if you want or save them for when you return.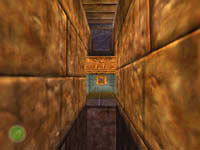 Continue down the hall until you reach the long deep gap. Note the gray stone pillar in the wall to the left which is slightly
lower than the rest of the wall. Your goal is to raise this pillar so it is even with the wall making a smooth ledge for you
to shimmy across. Do a running leap to the opposite ledge and press the button. This raises the gray column for only a few
seconds. Quickly turn and leap back across and go under the column and pull out the stone. The column will slam down onto the
block and you now have a ledge you can shimmy across.
Continue down the hall until you reach the long deep gap. Note the gray stone pillar in the wall to the left which is slightly
lower than the rest of the wall. Your goal is to raise this pillar so it is even with the wall making a smooth ledge for you
to shimmy across. Do a running leap to the opposite ledge and press the button. This raises the gray column for only a few
seconds. Quickly turn and leap back across and go under the column and pull out the stone. The column will slam down onto the
block and you now have a ledge you can shimmy across.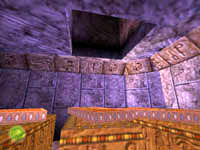 Shimmy across to the opposite ledge and follow the passage around to the right until you reach the T-intersection with the
crocodile head on the wall. Turn right and enter the room with the three coffins. You will probably hear snakes but they are
in the next room. Climb onto the middle coffin and pull up into the hole above. In this room you need to push the stone
panel on the wall. It will fall into the next room and you will be face-to-face with at least five or six snakes. Shoot them
all from the safety of the door if possible. You can always jump out to the ledge opposite the door and kill the rest.
Shimmy across to the opposite ledge and follow the passage around to the right until you reach the T-intersection with the
crocodile head on the wall. Turn right and enter the room with the three coffins. You will probably hear snakes but they are
in the next room. Climb onto the middle coffin and pull up into the hole above. In this room you need to push the stone
panel on the wall. It will fall into the next room and you will be face-to-face with at least five or six snakes. Shoot them
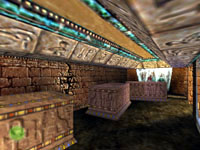
all from the safety of the door if possible. You can always jump out to the ledge opposite the door and kill the rest.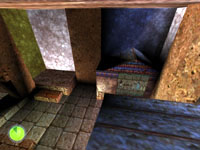 Stay away from the obvious block in the far wall - if you push that out it will trigger the arrival of the Russians and we don't
need them here just yet. Head to the low steps in the corner and run and jump to the roof of the opposite crypt. Turn right
and do a running jump to the next higher roof. If you look down from here it should look like the picture. Above you is a hole
in the roof. Climb up through this hole.
Stay away from the obvious block in the far wall - if you push that out it will trigger the arrival of the Russians and we don't
need them here just yet. Head to the low steps in the corner and run and jump to the roof of the opposite crypt. Turn right
and do a running jump to the next higher roof. If you look down from here it should look like the picture. Above you is a hole
in the roof. Climb up through this hole.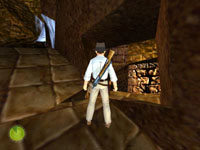 You are now in a passage leading up to a web and a spider that guards the Green Gem. The short
side passage leads to a cracked wall you can use the Urgon part on. This sends a chunk of ceiling falling through the roof
of the middle crypt in the room below. Climb the wall to your left and head forward. Climb up to the next ledge and finally
climb into the second Lens Room.
You are now in a passage leading up to a web and a spider that guards the Green Gem. The short
side passage leads to a cracked wall you can use the Urgon part on. This sends a chunk of ceiling falling through the roof
of the middle crypt in the room below. Climb the wall to your left and head forward. Climb up to the next ledge and finally
climb into the second Lens Room.Use your lighter to start the sequence of events. When you are done you can drop down and make your way back to the room with the two crypts. Jump over to the lower one and drop through the hole in the roof to get the Gold Idol. Push open the door and exit this area through the door you entered. Drop back down to the coffins and head back to the junction.
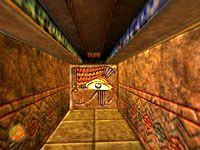 As you start down this passage the eye in the wall opens and a block moves forward to block your path. Use the Taklit part to
become invisible and sneak past the Eye Guardian. Head down the long shallow steps and kill the snakes that you encounter
along the way. Enter the next large burial chamber.
As you start down this passage the eye in the wall opens and a block moves forward to block your path. Use the Taklit part to
become invisible and sneak past the Eye Guardian. Head down the long shallow steps and kill the snakes that you encounter
along the way. Enter the next large burial chamber. Circle around this creepy room to the back and you will find a cracked wall in the central hub of this room. Use the Urgon
part to open it up and get the Silver Coins from inside. Turn and climb the left wall past all
the skeletons. At the top you can shimmy left and drop to the ledge and enter the next area.
Circle around this creepy room to the back and you will find a cracked wall in the central hub of this room. Use the Urgon
part to open it up and get the Silver Coins from inside. Turn and climb the left wall past all
the skeletons. At the top you can shimmy left and drop to the ledge and enter the next area.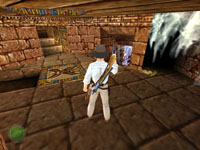 Immediately to your left a spider attacks from the webbed alcove. Kill him then head toward the hole below the Angel Stone
and kill the spider lurking at the bottom. Now head through the remaining door and go up the stairs and around to the right
where another spider waits around the corner. When he is dead you can continue into the next area where you will find a button
on the wall next to a spiked pit.
Immediately to your left a spider attacks from the webbed alcove. Kill him then head toward the hole below the Angel Stone
and kill the spider lurking at the bottom. Now head through the remaining door and go up the stairs and around to the right
where another spider waits around the corner. When he is dead you can continue into the next area where you will find a button
on the wall next to a spiked pit.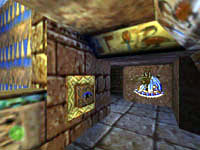 When you press the button a cover will swing up over the spikes. Quickly step to the side and turn and jump to grab the ledge
above. Pull up before the door swings open and dumps you onto the spikes. In this new hall you will go around to the left and
find another button (see picture) which you can push to open the ceiling tile above the Angel Stone down in the previous room.
With the door open you have a vertical shaft you can levitate up through using Azerim's Machine Part. The trick is getting down
there before the ceiling panel shuts.
When you press the button a cover will swing up over the spikes. Quickly step to the side and turn and jump to grab the ledge
above. Pull up before the door swings open and dumps you onto the spikes. In this new hall you will go around to the left and
find another button (see picture) which you can push to open the ceiling tile above the Angel Stone down in the previous room.
With the door open you have a vertical shaft you can levitate up through using Azerim's Machine Part. The trick is getting down
there before the ceiling panel shuts.When you press the button you need to immediately run around the corner and step on the lift at the far end. You will start to go down. Turn left, and run onto the next lift panel and continue down. As soon as you can, jump forward into the dark passage and turn left. You will be in the hole you killed the spider a few minutes ago. Quickly climb up and get out the Azerim part and activate it to levitate up through the shaft and into the third lens room.
 Hopefully you know what to do by now. Once the lens is activated you need to retrace your path all the way back to the
"3 Crypt Room". Here are some quick directions. Levitate back down and go out the door and down the crypt ladder to the round
room below. Go back up the shallow stairs and turn left as the wall with the eyeball chases you down the hall. Turn right at
the intersection then left and shimmy across the ledge on the right back across the long deep pit. Continue up the hall and
turn right into the room with the three crypts. Kill the spiders if you didn't already.
Hopefully you know what to do by now. Once the lens is activated you need to retrace your path all the way back to the
"3 Crypt Room". Here are some quick directions. Levitate back down and go out the door and down the crypt ladder to the round
room below. Go back up the shallow stairs and turn left as the wall with the eyeball chases you down the hall. Turn right at
the intersection then left and shimmy across the ledge on the right back across the long deep pit. Continue up the hall and
turn right into the room with the three crypts. Kill the spiders if you didn't already.Use the Urgon part on the crack on the left wall and get the Gold Coins from the alcove. Now face the opposite wall and use the Urgon part to smash through another cracked wall. Inside is a medicinal herb and another cracked wall to the right. Use the Urgon part again and enter the passage beyond. Kill the scorpion and don't press that button or you will open the ceiling tile to the left and summon the Russian troops.
 Head down the first few steps of the other passage then jump up to the dark ledge above. Pull up and crawl through the low
opening to find the Silver Bar. Crawl back through and drop down to the stairs and go to the bottom
where you can get another medicinal herb.
Head down the first few steps of the other passage then jump up to the dark ledge above. Pull up and crawl through the low
opening to find the Silver Bar. Crawl back through and drop down to the stairs and go to the bottom
where you can get another medicinal herb.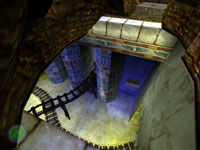 Take a left at the plant and follow the passage down another step and continue until you reach the ledge overlooking the mine
cart tracks below. You need to make a huge running leap to the opposite ledge across this room. Ahead of you is a moveable
block but you can't seem to push it from here.
Take a left at the plant and follow the passage down another step and continue until you reach the ledge overlooking the mine
cart tracks below. You need to make a huge running leap to the opposite ledge across this room. Ahead of you is a moveable
block but you can't seem to push it from here. Back off the white stone ledge and shimmy to the left until you can pull up into the next area. Continue forward until the
passage splits. Spiders attack from the right. Advance down the left hall and kill the spiders so they can't trap you when you
go for the final treasure.
Back off the white stone ledge and shimmy to the left until you can pull up into the next area. Continue forward until the
passage splits. Spiders attack from the right. Advance down the left hall and kill the spiders so they can't trap you when you
go for the final treasure.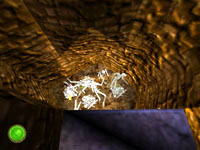 Take the left passage and it will very quickly end in a deep pit full of skeletons. Drop down and get two medicinal herbs and
the final treasure of this level. When you have the Gold Bar you can climb out of the pit. Hopefully
you have killed all the spiders so they won't bite you as you climb out.
Take the left passage and it will very quickly end in a deep pit full of skeletons. Drop down and get two medicinal herbs and
the final treasure of this level. When you have the Gold Bar you can climb out of the pit. Hopefully
you have killed all the spiders so they won't bite you as you climb out.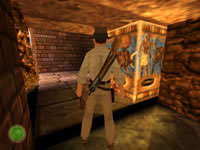 Head back down the previous hall until you reach the end. Kill any more spiders who managed to escape your first sweep of this
area. Locate the moveable block (see picture) and pull it toward the far corner. Then go to the other side and push it all the way
into the corner and climb on top of it.
Head back down the previous hall until you reach the end. Kill any more spiders who managed to escape your first sweep of this
area. Locate the moveable block (see picture) and pull it toward the far corner. Then go to the other side and push it all the way
into the corner and climb on top of it.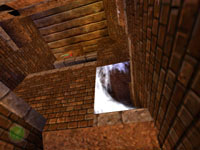 Turn left and do a running leap to the web-covered opening above and pull up into it. Kill the spider waiting inside then climb
the ladder on the left wall leading up to the next ledge. You should now be overlooking the room below with the block in the
corner. Across the way are several stone ledges and a web-covered opening with a stack of wood inside. Do a running leap across
and grab the edge and shimmy to the left until you are above the lower ledge.
Turn left and do a running leap to the web-covered opening above and pull up into it. Kill the spider waiting inside then climb
the ladder on the left wall leading up to the next ledge. You should now be overlooking the room below with the block in the
corner. Across the way are several stone ledges and a web-covered opening with a stack of wood inside. Do a running leap across
and grab the edge and shimmy to the left until you are above the lower ledge.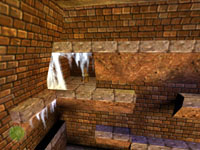 Drop and grab the lower ledge and shimmy left until you can pull up into the alcove and get the Firewood.
Turn and drop to the top of the block below and retrace your path by leaping into the web-covered opening and climbing the ladder
again. This time when you are overlooking the room below, turn and back off the ledge and shimmy left and pull up into the next
area. Move forward and kill the spider around the corner to the left.
Drop and grab the lower ledge and shimmy left until you can pull up into the alcove and get the Firewood.
Turn and drop to the top of the block below and retrace your path by leaping into the web-covered opening and climbing the ladder
again. This time when you are overlooking the room below, turn and back off the ledge and shimmy left and pull up into the next
area. Move forward and kill the spider around the corner to the left.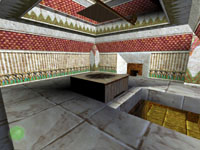 When you reach the dead end you can use your whip on the post above to climb up and swing forward into the next hall. Continue
until you can climb up the next ledge and enter the final Lens Room. Something is different - the pedestal is empty. Lucky for
you, you brought you own bundle of firewood. Put the wood on the pedestal then light it with the lighter to turn on the final
colored lens.
When you reach the dead end you can use your whip on the post above to climb up and swing forward into the next hall. Continue
until you can climb up the next ledge and enter the final Lens Room. Something is different - the pedestal is empty. Lucky for
you, you brought you own bundle of firewood. Put the wood on the pedestal then light it with the lighter to turn on the final
colored lens.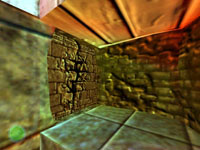 Drop down to the passage below and look back under the overhang. In the darkness you can barely make out the cracked wall to
the left. Use the Urgon part to smash this wall open which leads to an ledge overlooking the desert. As you exit into the
sunshine and fresh air a small army of Russian troops comes over the hill.
Drop down to the passage below and look back under the overhang. In the darkness you can barely make out the cracked wall to
the left. Use the Urgon part to smash this wall open which leads to an ledge overlooking the desert. As you exit into the
sunshine and fresh air a small army of Russian troops comes over the hill.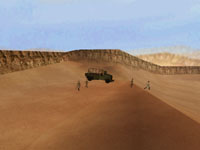 Only six are shown in the movie but you'll end up killing at least eight to ten. They will scatter across the entire area and
two will attack you immediately if you are standing too far out on the ledge. One throws grenades so quickly duck back inside
and get your rifle or machine gun ready. Use the machine gun for multiple targets and the rifle for long-range single targets.
Drop to the sand and start killing soldiers.
Only six are shown in the movie but you'll end up killing at least eight to ten. They will scatter across the entire area and
two will attack you immediately if you are standing too far out on the ledge. One throws grenades so quickly duck back inside
and get your rifle or machine gun ready. Use the machine gun for multiple targets and the rifle for long-range single targets.
Drop to the sand and start killing soldiers.Your jeep makes a great weapon too depending on where you parked it last and if you can get back to it. Kill all the soldiers using guns or the front bumper and collect all the ammo. You certainly won't have to go shopping after this level is over. When all the soldiers are dead you can start the hunt for the Jackal Statues.
 Each of the lenses you turned on earlier is shining out onto the desert marking the location of the four Jackal Statues. The
colored beams of light are hard to see unless you are at a certain angle. You may have noticed some of them while you were
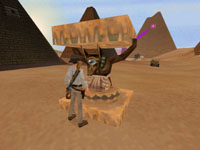
driving around killing soldiers. The first statue is near the beginning of this level. Stand on the spot where the purple
beam hits the ground and the statue will rise up (with you on it). Drop down and use your Crystal Eye on the statue and it will
spin around and reflect the light opening one of four golden arms blocking the entrance to the final pyramid.
Each of the lenses you turned on earlier is shining out onto the desert marking the location of the four Jackal Statues. The
colored beams of light are hard to see unless you are at a certain angle. You may have noticed some of them while you were
driving around killing soldiers. The first statue is near the beginning of this level. Stand on the spot where the purple
beam hits the ground and the statue will rise up (with you on it). Drop down and use your Crystal Eye on the statue and it will
spin around and reflect the light opening one of four golden arms blocking the entrance to the final pyramid. Remove the gem and head off to the ruins to the right with the sign you read during the opening movie. Inside these crumbling
ruins are a First Aid Kit, a scorpion and three blocks. Move the middle block back away from the window until you have revealed
the carved stone beneath. Stand on this to raise the jackal and insert the eye to open the next arm.
Remove the gem and head off to the ruins to the right with the sign you read during the opening movie. Inside these crumbling
ruins are a First Aid Kit, a scorpion and three blocks. Move the middle block back away from the window until you have revealed
the carved stone beneath. Stand on this to raise the jackal and insert the eye to open the next arm.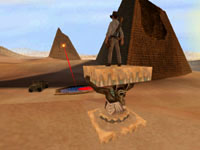 Now you need to head to the large pyramid by the tool shed. Around the back is a small pool of water (remember the bucket device
you turned on - this is what it fills). The red beam bounces off the water (right by a medicinal herb you can take) and strikes
the sand further up the hill. Stand on the sand to raise the statue and use the eye to open the third golden arm.
Now you need to head to the large pyramid by the tool shed. Around the back is a small pool of water (remember the bucket device
you turned on - this is what it fills). The red beam bounces off the water (right by a medicinal herb you can take) and strikes
the sand further up the hill. Stand on the sand to raise the statue and use the eye to open the third golden arm.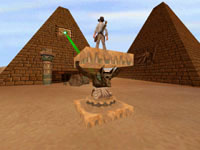 Now head around toward the mining pit and to the smaller pyramid with the green beam coming out of it. There is a Poison Kit
sitting on the ledge up against the pyramid. Activate the final statue and use the gem to open the door to the large pyramid
on your left.
Now head around toward the mining pit and to the smaller pyramid with the green beam coming out of it. There is a Poison Kit
sitting on the ledge up against the pyramid. Activate the final statue and use the gem to open the door to the large pyramid
on your left.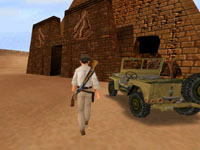 I've been assuming you have been driving from statue to statue. If this is not the case then you need to locate the jeep wherever
you parked it last and remove the red gasoline container from the back of the vehicle. Do this before you head toward the large
pyramid with the door you just opened - you'll thank me later.
I've been assuming you have been driving from statue to statue. If this is not the case then you need to locate the jeep wherever
you parked it last and remove the red gasoline container from the back of the vehicle. Do this before you head toward the large
pyramid with the door you just opened - you'll thank me later.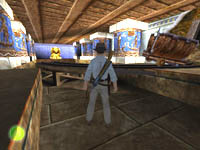 Enter the large pyramid and you should spot the beginning of the mine cart tracks along with an abandoned mine cart over to the
right. Aside from a missing wheel and an empty fuel tank, this baby is ready to roll. Lucky for you, you have both a mine cart
wheel and a can full of gas. Put the wheel on the cart and move to the back of the car to fill the engine with gas. Then
climb aboard and press UP to begin your wild and crazy ride through King Sol's Mines.
Enter the large pyramid and you should spot the beginning of the mine cart tracks along with an abandoned mine cart over to the
right. Aside from a missing wheel and an empty fuel tank, this baby is ready to roll. Lucky for you, you have both a mine cart
wheel and a can full of gas. Put the wheel on the cart and move to the back of the car to fill the engine with gas. Then
climb aboard and press UP to begin your wild and crazy ride through King Sol's Mines.

 Recommended Purchases:
Nothing - You should have plenty of everything