
Welcome to Oddworld: Abe's Exoddus. Do not confuse this adventure with the planned second game in the
series of five. This game is just the continued adventures from the original "Oddysey"; much like an expansion
pack or extra missions.
Of course this game is much larger than the original with new enemies, new moves and verbal commands, fart possession
(don't ask - just wait), and 300 Mudokons to save this time. Naturally we've included locations of all Secret Areas
and Mudokons within the main text portion of the walkthrough. We also brought back the
MUDOKON ROLL CALL section and SECRET AREA INDEX, made famous in our
Original Abe's Oddysey
Walkthrough.
There are lots of Secret Areas in this game and some are very complicated and take many paragraphs to explain. In order
to make these paragraphs stand out from the rest of the walkthrough, all Secret Area descriptions
will be shown in this color. Mudokons will always be numbered and shown in the traditional yellow.
Remember, the following walkthrough is the way "I finished the game". It is not necessarily the right way and it is
certainly not the ONLY way to complete the game. I've played and re-played some sections many times and found that
most puzzles have multiple solutions.
In order to finish this adventure you will have to master several skills. These include:
 - Running and jumping
- Running and dropping into a roll
- Possessing enemies to do your bidding
- Sneaking past sleeping enemies
- Hide in Shadows
- Disarming bombs and throwing grenades
- Possess and use your farts
- Locate secrets by finding green bottles
Most of the first level is a tutorial which will help teach you these basic skills. By the time you finish this
level you should have a good understanding of the skills necessary to finish and win the game. It will take a lot of patience to actually save all 300 Mudokons and get a perfect score.
Now, let's go find and save all those Mudokons...

Tunnel 1 Tunnel 2 Tunnel 3 Tunnel 4
Tunnel 5 Tunnel 6 Tunnel 7 Boilers
Mudokons: 75
Tunnel 1
The signs in this level will prompt you on the various actions necessary to accomplish certain objectives. Follow
these instructions to progress through the level and I will tell you when there is something special to do.
Start off by heading to the right where you should find a mine cart filled with bones on the very first screen.
Climb down behind this cart to find the first secret in the game.
Secret 1
 Head through the door and watch out for the Flying Slig tossing grenades at you. Drop down a couple of times until
you reach the lower area and roll under the metal wall. When the Flying Slig has left the screen you can lead all
three of the Mudokons to the next screen and have them start working so they don't get fried. Pull the lever to
turn off the electricity and have each Mudokon go through the zapper before it turns back on. Jump into the well
and meet up with your friends. Have them stand under each of the three valves and tell them to "Work" to open the
door on the left. Now you can chant to open the portal and save Mudokons 1-3.
Head through the door and watch out for the Flying Slig tossing grenades at you. Drop down a couple of times until
you reach the lower area and roll under the metal wall. When the Flying Slig has left the screen you can lead all
three of the Mudokons to the next screen and have them start working so they don't get fried. Pull the lever to
turn off the electricity and have each Mudokon go through the zapper before it turns back on. Jump into the well
and meet up with your friends. Have them stand under each of the three valves and tell them to "Work" to open the
door on the left. Now you can chant to open the portal and save Mudokons 1-3.
Continue to the left where you will find Mudokons 4-12 and a portal just waiting to be
opened. When these guys are free you can retrace your path back to the start. Watch out for the Flying Sligs who
are still patrolling the previous areas.
Back in the main mines, follow the directions to proceed through the various screens. Make sure to read the Rune
Stone to learn valuable information about the game. Soon you will come to a closed door. Chant to open the portal
and Mudokons 13 will run in from the left and exit which opens the door.
Turn the wheel as instructed by the sign to vent some steam and get the next Mudokon mad at you. Apologize and he
will follow you to the next screen where you can chant and save Mudokons 14. Continue
to the next valve and open the door which releases some laughing gas. The two Mudokons in this area start acting
silly so you will have to lead them off the screen to the right out of the gas. Smack them around so they get
serious. If you hit them too many times they may get angry and you will have to apologize before they will obey
you.
Keep going to the right and get the Mudokons to stand under the valves and have them open the next door. Continue
to the right and chant to free Mudokons 15-16. Then climb over the short wall and
ride the lift up. You can stop off at the first ledge on the left to save your game then continue to the top
and exit to the right.
Pulling the lever to open the doors will also release gas in the upper area. You can lead the Mudokons that are up
there off of that screen prior to releasing the gas and avoid having to smack them around. Either way, once you are
on the top level, sneak past the sleeping Slig with your friends sneaking along behind you. You and the two Mudokons
will have to operate the valves to open the doors, then go down and pull the handle next to the other two Mudokons to
open the next door. Get all four Mudokons to follow you to the left and chant to open the portals and save
Mudokons 17-20 before climbing down the ledge.
Keep climbing down until you reach the Shadow Zone. Sneak to the left and hide in the darkness until the Slig is
going away from you. Sneak behind him and hide in the next patch of darkness until he head off in the other direction.
You will have to leave the first Mudokon behind for now. Continue on past the laughing gas and on to the next screen.
Sneak past another Slig and when he leaves the screen, lead the Mudokon to the next screen to the left.
A pair of bombs needs to be deactivated. Roll up to the bomb and hit it when the light is green. The pattern is

 . When both bombs are disarmed
you can lead the pair of Mudokons to the left and chant to free Mudokons 21-22. Head
back one screen to the right and climb up to the next area.
. When both bombs are disarmed
you can lead the pair of Mudokons to the left and chant to free Mudokons 21-22. Head
back one screen to the right and climb up to the next area.
Climb up to the ledge and jump over the gap and into the well. Continue to the left where you can possess your first
Slig. As the Slig, continue to the left and have him pull the lever at the Teleport Gate. Teleport to the background
and move to the right where you can use another teleport gate. Continue to the right and kill any Sligs in the
foreground including the one guarding that Mudokon you had to pass by earlier. Explode your host and continue as Abe.
Drop down and return to the right to get Mudokons 23 and finally set him free. Return to
where you possessed the first Slig and climb up to the next screen and jump across to the well. Before you jump in, you
may notice the falling rocks to the left indicating a ledge you can drop down. Use it to drop down to the ledge where
the Slig stood a few moments ago and begin Secret 2.
Secret 2
Walk left from the Slig ledge and use the Teleport Gate to transport into the background. Keep heading right and use
the next gate until you reach Mudokons 24-25 which you can lead back to the portal. Head
back to the right and use another gate to reach Mudokons 26 which you can set free before
jumping into the well and returning to the foreground.
Now you can jump into the well on this screen and enjoy the cool animation as you go deeper into the mine. Head to the
right past the sleeping Slig below. Continue until you reach the screen with 6 valves then drop down to the lower
level and sneak back to the left past the sleeping Slig. When you reach the first screen, climb up and continue to the
left and you will find 5 Mudokons working above. Get their attention and have them follow you back to the valves.
Make sure to sneak past that Slig again. Have them all work to open the big door so you can exit the first tunnel.
Tunnel 2
Jump across the first gap and keep going right. Drop and roll continuing on to the right and fall into the area below.
Roll through the narrow caves around the fan until you reach the lower right corner of the screen. While the obvious
exit is up, don't overlook Secret 3 which is behind that big rock in the corner. Climb down.
Secret 3
Drop into the next screen and roll over to the well and jump in. You will appear in the background and should easily
find Mudokons 27-31 who are more than willing to follow you to the right where you can
open the portal and set them free. Jump over the small gap and into the well to return to the foreground and the
beginning of this tunnel.
Retrace your steps through the narrow passages until you reach the ledge that led you to the previous secret. This
time you can climb up the ledges to the next screen and roll to the right. Watch out for the Flying Slig. You should
be able to roll to the right before he can lock-on and drop a grenade. Just keep rolling through the next screens until
you fall off the ledge...
Thought you were going to die, huh? When the well pops you back up to the ledge, pull up and move to the right to avoid
the gunfire from the background Sligs. Don't go in the door just yet as Secret 4 is nearby.
Secret 4
Do a running jump off the door ledge to the left. As long as its a "running jump" you will land in that well again, but
this time it pops you up to the ledge on the left and you can move off to the next screen. Go in the door to reach the
background then move to the right and get one of the Sligs to follow you back. Run and enter the door to reappear in
the foreground, then you can chant and possess the Slig who followed.
 Have him go to the right and kill his partner then explode your host. Now Abe can return to the background and continue
to the right in safety. Enter the next door and appear on the high ledge. Possess the Slig on the middle ledge and
have him walk into the mine below to eliminate two problems at once. Enter that door to appear on a screen with
Mudokons 32-34 who are easily set free with the portal on the lower ledge. Jump into the
well to return to the door ledge and this time enter the door.
Have him go to the right and kill his partner then explode your host. Now Abe can return to the background and continue
to the right in safety. Enter the next door and appear on the high ledge. Possess the Slig on the middle ledge and
have him walk into the mine below to eliminate two problems at once. Enter that door to appear on a screen with
Mudokons 32-34 who are easily set free with the portal on the lower ledge. Jump into the
well to return to the door ledge and this time enter the door.
You will come out on the screen with that Flying Slig again, but this time you are behind the wall so you are safe to
chant and take possession of your first Flying Slig. Fly up to the next screen and quickly toss grenades at the two
Sligs. One should be asleep and easy to kill; the other you will have to wait until he is facing away from you,
otherwise you will get shot down.
Move on to the left and zigzag through the drills then continue on and up to the next screen where another Slig is
waiting to "play catch" with your grenades. When all the Sligs are dead and you get bored of buzzing around you can
kill your host and resume as Abe. Head off to the left and jump in the next well to pop up to a ledge. Before rolling
off to the left you may notice that you can drop down at this ledge to access Secret 5.
Secret 5
Drop down and roll left to find Mudokons 35-38 left unguarded right next to a portal. Set
them free then return to the beginning of this secret area and climb back out.
Roll to the left and find your sick friends lying around the vending machine. You can't help them now so keep on moving
left and climb up and off this screen. You will come to a screen with two wells. Check the Scoreboard - if there are
any Mudokons left in the tunnel you will need to jump in the left well to return to the main tunnel. If you have been
following my instructions you should have a perfect score and can proceed to the Boiler Area.
Boiler 1
 The Slogs are back and they are hungry. Start running to the right and just keep running and taking the lifts.
You will be safe for awhile as the Slogs and Sloggies are all above you. More and more of these foul creatures will
keep getting added to the pursuing pack. When you reach the lever you can pull it to turn on the zapper. Make a note
of how long it stays on as timing will be critical in just a minute.
The Slogs are back and they are hungry. Start running to the right and just keep running and taking the lifts.
You will be safe for awhile as the Slogs and Sloggies are all above you. More and more of these foul creatures will
keep getting added to the pursuing pack. When you reach the lever you can pull it to turn on the zapper. Make a note
of how long it stays on as timing will be critical in just a minute.
Go to the next screen on the right and lure one or two Slogs/Sloggies down to your level then run back and time your
lever pull to zap them. Slogs run much faster than Sloggies so time your pull accordingly. Repeat the process until
all Slogs/Sloggies are dead. Now you can safely go to the next screen and turn the valve to open the Emergency Exit.
Tunnel 3
Jump up to knock some rocks loose from the sack. You will get 9 of them and you can only get more when you are totally
out of rocks, so sometimes it's better to throw away 1 or 2 so you can pick up 9. Always try to keep as many rocks as
possible on you at all times.
Roll to the right and stand on the designated spot and throw rocks to explode the three bombs in the area. Various
combinations of the direction keys and the throw button will throw the rocks in various arcs. To get the high arc needed
to explode the upper bombs you will need to face the bomb you want to destroy and press in the opposite direction while
throwing to get a high arc. Pull both of the levers on the ledge to open the door and reload your rock supply
(if necessary) before continuing to the right.
Secret 6
Throw more rocks on this next screen to clear the opposite ledge of the four bombs. Jump across the gap but do NOT pull
up - instead drop down to the lower area then enter the door on the bottom level. Jump into the well to arrive at the
next Mudokon puzzle - and it's a tough one! A Quick-Save is in order here.
NOTE: The Mudokons in this area are BLIND. They will not stop moving until they fall, hit a wall, or die. Make sure
to use the "Wait" and "Work" commands to keep them from going too far and/or dying.
Get rid of the bomb with a rock for starters, then pull the lever to close the upper left hatch. Get the attention of
a single Mudokon and tell him to "Follow me". As soon as he clears the first hatch, flip the lever to raise the right
hatch and he will walk off to the right and start working on the next screen. Repeat for the remaining two Mudokons,
then move to the right to find them all working. Once again, have each one follow you and pull the lever as they pass
over the hatch to drop them down to your level. Lead them all back to the left and drop them down the left corner
by pulling that first lever again. Pull it one last time and run and drop through the hatch to join them.
Lead your three new friends down and past the well to the left where 4 valves are waiting to be turned. Your friends
will line up along the lower wheels so climb up and take care of the fourth valve yourself. The lift will come
down and you can have everyone climb onboard and take them up to where more Mudokons are working. Chant to open the
portal and save Mudokons 39-45. Ride the lift back down and return through the door
and the well to get back to the main level.
From the other side of the gap that led to the previous secret, you can pull up to the catwalk and head back to the left
and enter the open door. Roll down the steps and walls will pop up behind you blocking any chance of escape. Destroy
the bomb with a rock then roll off to the right. You need to blow up each bomb then roll one space closer to blow up
the next. Don't get too close or you will die.
When the path is clear, return to the left to reload your rock supply then head back to the right. Repeat the process
or blowing up the bombs with the rocks, but make sure to always retreat before the drill comes back and kills you.
When the path is clear, return to the left to reload your rock supply then return to this screen. Time your roll to
follow the drill and quickly stand and pull up to the ledge as the drill passes beneath you. Jump across and pull the
lever to stop the drill before dropping down and then climbing down the end of the ledge.
Throw more rocks in this screen to get rid of the bombs in the area then continue left along the bottom. Flip the lever
to lower the walls above then backtrack one screen and pull up to the catwalk and head left. Destroy any bombs blocking
your way or just jump over them. The walls will spring up again blocking any retreat so just enter the door.
Tunnel 4 (Blind Mudokon Zone)
Have Mudokons 46 follow you then pull the lever to drop him down and
chant to free him and open the door. On the next screen, roll under the drill and pull the lever to stop it then
continue right. Repeat the procedure on the next horizontal drill and once more on the pair of drills moving in both
direction. Keep going right until you reach the door and climb up to the ledge to flip the lever which lowers a wall
back where you entered.
Mudokons 47 is now free to follow you, so go back past all those drills
and have him follow you all the way back to the right where you can send him through the portal. The door opens and you
can exit this tunnel.
Tunnel 5
Use a rock to destroy the mine or just roll under the drills and jump over it if you are out of rocks. Destroy more
mines with your rocks. If you are out of rocks then jump across the gap and pull up and go to the right. Have the Mudokon below
move over and turn the wheel for you so you can access the bag of rocks.
Climb onto the catwalk and head back left to flip the pair of levers that shut off the drills below.
You will also need to remove that bomb between the drills if you haven't already. Now lead Mudokons 48
past the drills and chant to free him. The lift should rise and fill the gap.
Eliminate the bombs blocking your way to the right and go get the Mudokons 49
who is on that screen (the one who may have turned that wheel for you). Bring him back to the lift and drop down to
the next screen where you can chant to set him free. The door opens and you can enter.
Secret 7
You appear on a small ledge and a pair of drills block your way. A cleverly hidden secret is in the middle of this
screen and you need to do a running jump to reach it. Grab on and pull up to the hidden platform and chant to save
Mudokons 50-51. Drop back off the hidden ledge and you will be between the drills.
Do a timed jump over the final drill and continue left. Time your roll so you follow the drill then stand and pull up
to the ledge before it returns and kills you. Before heading left, take a moment to claim the final secret in the mines.
Secret 8
Jump back across the gap (avoiding the drill of course) onto a hidden platform. Pull up into the next area and pull the
ring to shut down the drill. There are no Mudokon so save in this secret area but if you somehow managed to miss out on
the pair in the previous secret area you can head left and save them now from behind the wall. Head back down and jump
the gap and continue going left.
Keep moving left past the three drills and over the gap. Check your score as you pass the big sign - you should have 51
Escapees by now. Keep going until you get to the sign that says "Only a Murderer would pull the lever." Since there are
two Mudokons working in the path of a drill, it's pretty obvious what would happen if you pulled that lever. Get their
attention and lead them back to the previous screen and have them work. Now return and pull the lever which starts the
drill but also raises the lift.
Ride down to the first small ledge and stop. Wait for the Slig to leave the area then have the Mudokon follow you to
the left of the drills then have him stop before he falls into the shaft. Now when the Slig returns, wait for him to
pass beneath the drill then pull the ring to kill him. Take the lift down to the bottom and head off to the right.
Climb up and backtrack to the left and keep going up until you reach the well. Jump in and when you land, move to the
right and pull the lever to lower the lift. Return through the well and make your way back to the lift and take
the Mudokon back up with you. At the top have him follow you to the left and wait with the pair you saved from the drill
earlier.
Go to the right and take the new lift up and continue right. Flip the levers to turn off the three drills then climb
up the right ledge. Do a running jump to clear the gap then roll under the drill and pull the ring to turn off the
drills. Have these three Mudokons follow you all the way back down. Get the Mudokon working between the three drills and
return to the screen where you have the other three waiting. Have them all follow you to the nearby portal and chant to
free Mudokons 52-58.
Return to the far left and ride the lift to the bottom and head all the way to the right and exit through the door.
Tunnel 6
This area is protected by Motion Sensors so make sure you are standing STILL when the red beams pass through you. Sneak
past the sleeping Slig to the right then drop down and sneak to the right past another Slig. Drop down between some bombs.
You can either defuse the bombs or jump over them. The pattern is a simple
and it's probably easier to disarm them than jump over them.
Continue to the left until you reach the mine car which is protected by four bombs. They are widely spaced and easily
jumped. Enter the car and get ready to roll. The mine car is impervious to everything and so are you as long as you
stay inside. Start rolling right blowing up bombs and squishing Sligs and keep going up and right until you reach an
area with Mudokons and a Slig.
 Wait for the Slig to move away from your friends then drop the car on him. Exit the car and lead Mudokons 59-61
to the right where you can send them through the portal. Get back in the car and roll to the right and down where you
will crush another Slig. Exit the car and survey the next few screens on foot. You need to quickly roll up to the bomb
and disarm it before the Slig guard returns. The pattern is . When
the bomb is off, roll back off the screen to the left and wait a minute. Then roll back and have the Mudokon follow you
to the left PAST the mine car.
Wait for the Slig to move away from your friends then drop the car on him. Exit the car and lead Mudokons 59-61
to the right where you can send them through the portal. Get back in the car and roll to the right and down where you
will crush another Slig. Exit the car and survey the next few screens on foot. You need to quickly roll up to the bomb
and disarm it before the Slig guard returns. The pattern is . When
the bomb is off, roll back off the screen to the left and wait a minute. Then roll back and have the Mudokon follow you
to the left PAST the mine car.
Enter the car and roll to the right. The alarm will sound and the bomb will explode and you can crush the Slig who
comes running in to see what's happening. Exit the car and repeat the previous procedure on the next screen.
NOTE: There is a second Mudokon hiding in the far right shadows who will not come the first time you call him. Make
sure you get BOTH Mudokons to the LEFT side of the mine car before you proceed.
Get back in the car and keep going right destroying everything you run into and over. When you get to the screen where
the track starts to go back up, stop the car and get out. Return and collect Mudokons 62-64
and lead them to the portal on the far right.
Get back in the car and ride it up until you reach a flat area of track with an upper ledge to the left. Exit the car
and climb up to this ledge and go left. Roll along the low area and drop down to the door on the left side of the
vertical shaft you previously went through in the car. Enter the door and come out on the right side and collect the
Mudokons as you continue right. Chant to open the portal and send Mudokons 65-68 home.
Make your way back to where you parked the mine car and sneak onto the next screen to the right. There are several
Mudokons at work and a Slig guard is slapping one of them around. While he is busy, sneak up to the bomb and disarm it.
Then run/roll back to the left. The guard will hear and chase you but you should have a good headstart and can get back
in the car and roll over him. Exit the car and go right and get Mudokons 69-71 to follow
you to the right where you can set them free.
Tunnel 7
You enter through the background door. Move off to the right and sneak past the sleeping Slig and climb up onto the
ledge. Chant to possess the Slig. If he runs off the screen wait for him to come back and move to the far right before
your start to chant again. Once possessed, use him to shoot the Slig in the foreground then explode your host. Drop
down and flip the lever before moving to the right.
Jump into the well and land near three sleeping Sligs who wake up as you land. Run to the right and pull the lever as
you pass by. Drop down a series of ledges and keep running. Ignore the next lever and keep running until you reach
the high platform with the Teleport Gate on it. Climb up and wait for the first Slig to appear. Possess him then send
him back to the left to kill any other enemies who are still pursuing you. Have him flip that lever you skipped over
then explode him.
Abe can now flip the lever to use the gate which zaps him to the foreground. Start going left until you reach the mine
car then get in and keep going. Roll over anything that gets in your way and don't stop until you reach the screen with
the well in the background. Exit the car and get the four Mudokons in this area to follow you to the left where you can
chant and free Mudokons 72-75. Enter the door marked Boiler Access.
Boilers
The Boiler area is pretty much an arcade/action sequence. You will be pursued by a Flying Slig, but you can easily lose
him by hiding in the shadows and waiting for him to leave. When you appear in this area, do a running jump to the left
and pull up to the upper ledge. Keep moving to the left and up until you reach the top of Boiler #1. Jump across to the
right and turn the valve. The light will turn green and the meter should move to the right.
Retrace your patch and repeat this procedure for the other two Boilers. Make sure to dodge the Flying Slig as you do all
this, hiding in the shadows when necessary. When you turn the final valve a 15 second countdown begins. Start running
to the right and dropping off ledges. Don't stop for anything, and you will just make it out alive as the game cuts
into a movie before dropping you into Necrum.

Mudokons: 10
Necrum is a short outdoor level that leads to the branching point to the next two levels; Mudanchee, and Mudomo. There are
some challenging areas in this level and two very tricky secrets, so lets get started by going to the left. Jump down to
the low middle ledge and get ready to get the first secret.
Secret 1
Do a running jump from the middle ledge back to the right where you will land on a hidden ledge. Drop down and land in a
well which will shoot you to the foreground of a cityscape with several Sligs on patrol in the background. Wait until all
the Sligs are moving AWAY from you then drop down and run and jump over the gap and onto the next screen.
More Sligs in the background will try to kill you on this screen, but you have columns you can hide behind. Roll so you
are hiding behind each column then after the Sligs shoot at you (and miss) roll to the next. Repeat as you make your way
up to the middle and the top level and finally roll off the top right of the screen.
ACT FAST! Mudokons 76-78 are working underneath a drill which is slowly moving toward them.
Jump to the middle ledge then over the drill to the ledge on the right. Lower yourself down and have all three Mudokons
follow you to the right corner as the drill hits bottom. Make your way over to the three bombs and disable them. The
pattern is .
Chant to free the Mudokons then jump in the well on the right ledge to return to the forest.
Return left to the middle ledge and continue left. Keep going until you can start pulling up the ledges to the screens
above. Keep going to the top then go left and hand and drop down into the well. Continue exploring the forest and moving
to the right. Read the Rune Stones as your find them to learn valuable information about your quest and tips for playing
the game. Roll right under the large tree and fall to the lower level.
When you reach the pair of doors you will notice they are both shut and the four torches are not lit. To light the torches
you need to find and read four more Rune Stones. Drop down to the base of the tree and follow the upper and lower paths
in each direction to find these Rune Stones. Save the lower right stone for last and when you have read it you can drop
into the well to shoot yourself back to the doors. The top door is open so go inside.
Start walking right through the Crypt and read the next stone to open the door. Enter to return to the tree where a bird
portal is waiting to be opened. Jump through and when you reappear, head to the right. Enter the door and continue to
the right until you come to your first encounter with the Fleeches and Slurgs.
 Slurgs are harmless but if you step on them they make a loud squeak which will wake up the Fleeches and that isn't good.
Fleeches will pursue you and constantly lash out at you with their long tongues. Sometimes you can avoid them for a few
seconds and escape the screen, but the best policy is to just not wake them up in the first place. These Fleeches are
behind the wall so you can make all the noise you want THIS TIME!
Slurgs are harmless but if you step on them they make a loud squeak which will wake up the Fleeches and that isn't good.
Fleeches will pursue you and constantly lash out at you with their long tongues. Sometimes you can avoid them for a few
seconds and escape the screen, but the best policy is to just not wake them up in the first place. These Fleeches are
behind the wall so you can make all the noise you want THIS TIME!
Drop down a few screens until you reach the bottom. There is nothing protecting you from the sleeping Fleech this time, so
be very quiet and don't step on the Slurgs. Sneak across and jump to the ledge on the right or if you are daring, just
make a run for it - you should be able to outrun the Fleech as long as you can do a running jump and grab. If you miss the
ledge, you will probably die.
Read the next Rune Stone then smack the Ghost Trap to open the door. These next four screens can be very hard so I highly
recommend quicksaving after each screen. The first screen is the easiest; pull both levers without stepping on a Slurg and
enter the open door before the Fleech can eat you. Remember to always SNEAK! Walking or running will wake up the Fleech.
The second screen has three levers to pull and the Fleech will wake up when you pull the first, so you need to get those
last two pretty fast. Always keep moving (even if you have to backtrack) to avoid the Fleech's tongue. Exit through the
door to the next screen.
The third screen is really hard. You have three levers and each lever wakes a Fleech. Sneak to the middle ledge and flip
that lever then jump to the left and flip the second lever then double-jump back to the right to flip the third lever.
Drop down and quickly enter the door. And YES - it is much harder to actually do than I just made it sound.
The final screen is easy compared to that last nightmare. Sneak over and pull the three rings then sneak to either one of
the ledges (I prefer the left) and pull the lever. The Fleech will wake up, so run and jump and pull the remaining lever
then enter the open door.
Sneak to the right, drop down, and read the Rune Stone. Then sneak to the left and drop down to find the Ghost Trap which
you can smack. A green ring will appear around Abe - this is your Invisibility Power which you can use when the time is
right - NOT NOW! Jump into the well and when you land go left and drop down to the bottom. Now you can chant to become
invisible (for a short time) and start running and rolling to the right. When you reach the end, climb up and head back
left then climb up and exit through the open door.
Go left and enter the door. Jump over the gap and chant to open the portal and use it to cross the large gap. Use the
well to pop into the background. Continue to the right where you will come to another well. This is your branching point
to the next two levels. You can drop off the right edge of this ledge to drop into a well and launch yourself into the
Mudomo level (click here), or jump into the well up here and continue on to Mudanchee (keep reading).
When you land, head to the left where you will find another well that will actually take you to Mudanchee. But first, why
not get the final secret in Necrum.
Secret 2
Roll to the left past the Mudanchee well and onto the next screen. Chant to open the portal and jump in. You will find
yourself hanging from a ledge with a sleeping Slig below and another Slig on guard duty above. Quicksave here! When the
Slig above turns and is walking away from you, pull up and immediately jump back to the bottom right ledge. If you are
fast enough, the upper Slig won't notice and the bottom Slig won't wake up.
 Pull the lever to lower the barrier then jump the gap and sneak past the sleeping Slig and continue to the next screen.
This room has a tricky puzzle. Climb to the top ledge and when the flaps close, quickly roll next to the bomb and disarm
it, then roll forward before the flap opens. Again; easier said than done! Repeat for the second bomb. Both bombs use
the same repeating pattern.
Pull the lever to lower the barrier then jump the gap and sneak past the sleeping Slig and continue to the next screen.
This room has a tricky puzzle. Climb to the top ledge and when the flaps close, quickly roll next to the bomb and disarm
it, then roll forward before the flap opens. Again; easier said than done! Repeat for the second bomb. Both bombs use
the same repeating pattern.
Pull the lever in the top left to lower the barrier below. Now roll back to the right and drop down and activate the bomb
on the floor. Wait for the Greeter Robot's motion sensor to touch you then roll to the right. If the Greeter picked up
your movement he should follow and blow himself up. If not; repeat the process until he explodes.
Mudokons 79-80 are depressed, so you will have to go up and pat them on the shoulder to cheer
them up before they will follow you down. Chant to free them, then jump into the well to return to the main level. Now
you can jump into the final well to enter Mudanchee.
Mudanchee Hub Mudanchee 1 Mudanchee 2 Mudanchee 3
Mudanchee 4 Mudanchee 5 Mudanchee 6 Final Test
Mudokons: 14
Mudanchee Hub
Begin by going to the right and entering the door. When you find the well go one screen to the right to pull the lever
then return and jump in. Continue to the right and read the Rune Stone (these start to repeat after awhile), then possess
the Scrab in the background. Practice using the Scrab's moves then kill the Fleech. Depossess the Scrab (you can't explode
these guys) and when you are Abe again, jump across and continue.
 Pull the ring and the lever then head back to the Ghost Trap and smack it to open the door. Enter and get ready to run!
When you appear, Fleeches will already be after you. Jump the gap and start running to the left. Keep on running through
several screens and jump in the well at the end to make it safely to the foreground.
Pull the ring and the lever then head back to the Ghost Trap and smack it to open the door. Enter and get ready to run!
When you appear, Fleeches will already be after you. Jump the gap and start running to the left. Keep on running through
several screens and jump in the well at the end to make it safely to the foreground.
Smack the Ghost Trap to get the Inviso-power and use it. Start running to the right and pull each of the levers as you
pass by. When you reach the far right, pull up to the ledge just as the invisibility is wearing off. Enter the door then
continue to the right and jump in the well. Climb up to the top and start sneaking to the left Jump over the gap and pull
the lever to release the Scrab then take possession of him. Take the Scrab to the right to kill the Fleech then bring him
back and depossess him. Pull the lever to close the gate then return to the right which is now Fleech-free.
Drop down and pull the lever then smack the Ghost Trap to power up the Inviso. Drop down and start sneaking to the right.
Jump in the well to reach the middle ledge then chant to go invisible and start running to the right. Climb the ledges at
the end to reach another Ghost Trap which will open the door below. Drop back down and enter. If you want, you can possess
the Scrab and kill the Fleeches, but it's not really necessary.
Read the Rune Stone and continue right. Possess the Scrab and take him all the way to the right to kill the Fleech, then
back to the left where you can fight the other Scrab. Use the floor pads to open the barriers. If your Scrab loses the
battle then just possess the other one and walk him to the far left and trap him behind the barrier. Release the Scrab
and have Abe come down and over to the left.
Climb up the ledge and jump the gap to hit the first Ghost Trap. Then go all the way to the far right and hit the
remaining Ghost Trap to open the door back in the middle screen. Return and enter. Go left and enter the next door.
When you reappear, keep going left until you reach the bird portal. A secret is nearby so don't jump in just yet.
Secret 1
Roll left under the ledge and drop to the ledge below. Chant to open the portal and jump through before the Scrab gores
you. This secret is on a timer. You don't need to be super-fast, but don't take your time either. Get the attention of
both Mudokons then pull the lever so you drop down to their level. This starts the timer
which is slowly releasing the Fleech one flap at a time.
Have your friends follow you and drop down the middle gap. Pull the lever to lower the wall and start the drills. Drop
down to the lower left and have both the Mudokons wait while you roll under the drills. Carefully climb to the ledge and
time your roll past the drill so you can stand and pull the lever and duck before the drill returns. Drop to the floor
and chant to free Mudokons 81-82 then jump into the well to return to the main level.
 Now you can climb up to the top ledge and read the Rune Stone and open the portal. Jump through to arrive at a closed door,
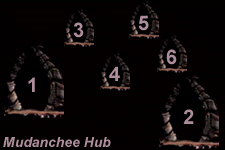
a well, and another Rune Stone. Read the stone if you wish then jump in the well to arrive at the Mudanchee Vault Hub. Each door
leads to a small area which will test your skills. When you complete each area a torch will light back at the main door.
When all six torches are lit, the exit will open and you can return to Necrum. You can do the doors in any order you wish.
Just click on any door on the image to the left to go to the appropriate text.
Now you can climb up to the top ledge and read the Rune Stone and open the portal. Jump through to arrive at a closed door,
a well, and another Rune Stone. Read the stone if you wish then jump in the well to arrive at the Mudanchee Vault Hub. Each door
leads to a small area which will test your skills. When you complete each area a torch will light back at the main door.
When all six torches are lit, the exit will open and you can return to Necrum. You can do the doors in any order you wish.
Just click on any door on the image to the left to go to the appropriate text.
Mudanchee 1
When you appear in the background, go left and climb up then jump the gap and go to the next screen. Go to the far left on
this screen and climb down to the bottom. Over by the barrier is a concealed ledge that you can use to drop down to the
lower screen where the first secret is located.
Secret 2
Hit the ground running and make your way to the first well and jump in. You will appear on the lower level and the Scrab
will no longer be chasing you. Move to the left and get ready for some more fast action. When the Scrab is under you,
run and jump off the ledge and quickly jump onto the opposite ledge. Possess the Scrab and walk him into the box then
release him and pull the level to lock him in. Quickly tell the Mudokons to follow you so they don't get crushed by the
drill which is slowly moving down toward them.
When they are out from under the drill tell them to "Wait" then get on the lift and ride down to the first ledge and
have both of the Mudokons follow you so they get out from under the drills. Have them "Wait" when they are safe then
lower down to the bottom ledge and have them both get on. Ride back to the top and pick up the first pair then back down
to the first ledge with the portal and release Mudokons 83-86. Hop into the well on the right
to return to the main level.
Once you pull that lever the barrier will drop and the Fleeches will come after you. Keep moving and they shouldn't have
time to swallow you. Roll up and smack the Ghost Trap then jump in the well to shoot to the top and roll back to the right.
Jump the gap and climb down to the bottom ledge then jump over to the small sandy ledge and lower down to the next screen.
You are now in the background. Roll to the right and get the attention of the Fleeches so they follow you back to the
left. Use the well to pop into the foreground and get under the ledge. When the Fleeches are above you quickly roll to
the left to bait them down to the bottom level, then roll to the right and smack the Ghost Trap and quickly jump into the
well to return to the background. Climb back up to the previous screen where the exit door is now open and return to the hub.
Mudanchee 2
Climb up and roll right through the narrow tunnel. Jump the gap and continue rolling to the right checking out the dangers
that lurk below. When you reach the far right you should see the locked exit door. The lock shows two lights which is how
many Ghost Traps you must open to unlock the door. Drop down and go back to the left.
 Pull the lever to drop the barrier and run back to the right with Fleeches in hot pursuit. Jump to the ledge and back
to the upper left and roll back to the previous screen. Jump the gap over the Scrab and watch as the Fleeches cower in
the corner. Possess the Scrab and stomp on the Fleeches. If you aren't fast enough the Fleeches will eat your Scrab and
this area will be a bit more difficult (but not impossible) to finish. A Quicksave may be a good idea.
Pull the lever to drop the barrier and run back to the right with Fleeches in hot pursuit. Jump to the ledge and back
to the upper left and roll back to the previous screen. Jump the gap over the Scrab and watch as the Fleeches cower in
the corner. Possess the Scrab and stomp on the Fleeches. If you aren't fast enough the Fleeches will eat your Scrab and
this area will be a bit more difficult (but not impossible) to finish. A Quicksave may be a good idea.
Head back to the right and drop down and go left to smack the Ghost Trap the Fleeches were guarding earlier. Return to the
ledge above the Scrab and chant to turn invisible so you can drop down and pull the lever and smack the final Ghost Trap.
Climb out before you are visible and head to the right and through the door.
Head to the left where some Fleeches are behind a protective wall. Get them to all come to your side of the screen. Call
them if necessary with the "All of ya" command. Head back and jump in the well to pop into the upper ledge in the background.
Drop down and jump into the left well while avoiding the patrolling Scrab.
You should now be back on the screen with the Fleeches you had gathered in the corner. They should be sleeping but not for
long. Jump across the gap and smack the Ghost Trap. The Fleeches will wake up, so quickly drop into the well to shoot back
to the upper ledge on the right screen. Return to the foreground and move back to the screen on the left. The Scrabs can't
see you now so chant to turn invisible then get ready to run really fast!
Run back right and into the well. When you appear in the background jump into the well on the right to pop into the next
screen. Quickly smack the Ghost Trap and jump into the well before you are visible and the Scrab kills you. Return to
the foreground and use the exit to return to the hub.
Mudanchee 3
Head right and pull up onto the upper ledge then drop and hang as the Scrab charges. He will fall to the bottom so you
are free to walk along the top path. Return to the left screen and flip the lever to release the Scrab. Roll to the left
and wait for the two Scrabs to meet. While they are fighting drop down and smack the Ghost Trap and quickly jump back to
the upper ledge before the winner kills you too. Pull the lever to trap the remaining Scrab then make your way to the door
and leave. If you are REALLY DARING you can trying smacking the Ghost Trap then running through the Scrab fight and
into the door.
Continue to the right and jump in the well when the Scrab has left the screen. Smack the Ghost Trap and when the Scrab
comes charging back at you, jump into the well to pop into the screen to the left. Jump up to the safety of the ledge and
when the Scrab has returned and left again, drop down and smack this Ghost Trap and jump into the well when the Scrab comes
after you. When you pop into the right screen jump to the upper ledge and into the well to appear in the background and
exit through the open door.
Drop down the ledges and into the well to pop into the foreground on a ledge above the Scrab. Head left when the Scrab is
to the right of you and jump to the ledge. Roll up to the Ghost Trap and stand up. When the Scrab is on the left edge of
the screen and is facing away from you, smack the Ghost Trap. The floor will drop and you will fall. Hit the ground
running and go back to the right and jump to the ledge. Jump into the well to return to the background and start climbing
the ledges and continue up and to the right.
Jump in the well to get to the foreground. Run to the right and smack the final Ghost Trap while avoiding the Scrab.
Return to the background through the well and continue back to the right where the open door leads to the hub.
Mudanchee 4
Begin a long run to the left jumping into wells and over gaps when necessary. Fleeches will be chasing you so keep moving
until you reach the first Ghost Trap. Smack it and more Fleeches will start to chase you. Keep running left to the end
of the line. Jump in the well to pop into the foreground. You will probably land on a Slurg which will wake up the
Fleeches so start running to the right and jump off the edge.
 Keep moving around this screen so the Fleeches can't "lock on" with their tongues. Smack the Ghost Trap and jump into the
well to launch into the next area. Smack the next Ghost Trap and jump into the well to pop around several screens. You
will eventually land right next to a Scrab so start running to the right and jump up to the ledge. Keep going right then
come back along the lower path where you can slap the final Ghost Trap. The Scrab will chase you, so run back to the right
and jump to the ledge and through the door to return to the hub.
Keep moving around this screen so the Fleeches can't "lock on" with their tongues. Smack the Ghost Trap and jump into the
well to launch into the next area. Smack the next Ghost Trap and jump into the well to pop around several screens. You
will eventually land right next to a Scrab so start running to the right and jump up to the ledge. Keep going right then
come back along the lower path where you can slap the final Ghost Trap. The Scrab will chase you, so run back to the right
and jump to the ledge and through the door to return to the hub.
Mudanchee 5
Head to the right and drop down and roll back left. Drop down to the bottom and sneak to the hidden ledge on the right to
find the final secret.
Secret 3
Drop down from the main area and open and enter the portal to warp to the secret area. Roll to the screen on the right
and drop down. Pull the lever to drop the barrier then jump back up and roll left with Fleeches in hot pursuit. Roll up
to the lever and pull it to zap the Fleeches as they try to enter this screen. When they are all dead you can get the
attention of Mudokons 87-89 and have them follow you back to the right. Chant to set them
free then return to the main level via the well.
Sneak over to the Ghost Trap and smack it. Run and jump into the well to return to the beginning of this area. Head back
to the right and drop into the well to shoot into the next area. Walk up to the top lever and chant to become invisible.
Pull the lever to drop down and pull the second lever then run to the right. Smack the Ghost Trap and keep on running.
Jump to the ledge and head back to the left along the upper ledge and enter the door to return to the hub.
Mudanchee 6
Head to the right running past the Fleeches and jump into the well. When the Scrab is under the ledge on the right, pull
the lever to trap him then drop down and go back left. Pull the lever there which will release the Fleeches then run back
and jump to the ledge and pull the lever to free the Scrab.
Possess the Scrab and use him to kill the Fleeches then return him to the right and depossess him and pull the lever to
close him back up. Drop back down and return to the left to smack the Ghost Trap. Finally, pull the lever to open the
wall blocking your way to the exit. Chant to become invisible then walk past the Scrab and into the door.
Drop down and roll left to the lever. Pull it then return to the first screen. Possess the Scrab and kill the Fleeches
then go to the far left and depossess him. As Abe, roll along the bottom to the left and pull the lever to trap the Scrab
then go back right and up to the top ledge and go back left. Hop in the well to pop to the background then sneak to the
lever and pull it then sneak back to the well and jump in.
Make your way to the lever in the bottom left where you trapped the first Scrab and flip it again. Possess the Scrab in
the foreground and move him off the screen. Release him then possess the Scrab in the background and have him walk to the
far right and dance on those Fleeches. Return him to the left and release him. Roll over and possess the other Scrab and
put him back in his cage, then roll back to the left and flip the lever to lock them both in.
Now you can make your way back around, through the well and into the background where you are free to smack the Ghost Trap.
The exit door is open but it is blocked by the gate keeping the Scrab locked up. Make your way all the way back to the lower
left and flip that lever a final time to drop the gate. Return to the middle level and chant to become invisible. Run to
the left and into the door to return to the hub.
Mudanchee Final Test
With all six areas complete, you can now hop into the left well to return to the main door which is now open. Enter and get
ready to run like crazy! The key to this level is to run and keep running. You need to be able to drop to a roll without
stopping so learn how to do this in the safety of the background before it gets really dangerous. Survey the foreground to
see what traps are waiting for you. There are a few places where you can pause to catch your breath, but never slow down or
stop unless you are in one of these "safe areas". Ready....set....go!
Walk to the left several screen and check out what lies ahead in the foreground. Enter the teleport and appear in the
foreground. Start running to the right and drop to roll under the metal wall. Continue into the next teleport and roll
until you fall off the ledge. Reverse and run into the teleport behind you to pop in behind the surprised Scrab and keep
on running right. Jump in the well and land on the stone pillar. REST AREA - Save your Game!
Roll of the pillar and into the teleport. When you reappear, head left and into the next teleport then run and jump to the
ledge on the right. Jump again to the right and return to the previous screen. Drop to the bottom and reverse into the
teleport to dodge the charging Scrab. Keep running right and you will trip a floor plate that raises a protective barrier.
Walk off the ledge and land next to a snarling Slog. Quickly jump to the safety of the ledge on the left. REST AREA - Save
your Game!
Do a running jump over the Slog and keep going right into the next teleporter. You will get zapped to the top where you
need to roll under the metal wall and drop off the edge. Pull up and run right before you get shot. Run onto the next
screen and into the teleporter before the Slig here can shoot you. Quickly possess the Slig and bring him to the top ledge
and get him between you and the charging Slogs. Use your machine gun to kill the multiple waves of Slogs that come out of
the kennel. When they are all dead, quickly explode your host and dodge the attacking Fleech. Run to the right and smack
the Ghost Trap. Chant to turn invisible then continue right and smack two more Ghost Traps before running into the next
teleporter. REST AREA - Save your Game!
 You're almost home. Don't move until you are ready. Move towards the right and the Fleeches will activate. Quickly climb
up and smack the final Ghost Trap then jump to the opposite ledge and drop down. This should keep the Fleeches from locking
onto you and you should be able to get inside that door with no trouble.
You're almost home. Don't move until you are ready. Move towards the right and the Fleeches will activate. Quickly climb
up and smack the final Ghost Trap then jump to the opposite ledge and drop down. This should keep the Fleeches from locking
onto you and you should be able to get inside that door with no trouble.
Head to the left and find Mudokons 90-94 hard at work. Smack the Ghost Trap to turn off the
deadly electricity then get everyone's attention and have them follow you back to the right where you can set them free.
Jump into the well and return to Necrum then proceed to the Paramite Vaults.
Mudomo Hub Mudomo 1 Mudomo 2 Mudomo 3
Mudomo 4 Mudomo 5 Mudomo 6 Final Test
Mudokons: 5
Mudomo Hub
Enjoy the cool misty background of the first screen - it doesn't last long. Head right until you reach the ledge then
climb up and keep on going. Move to the next screen and a Paramite will back away. Run off the ledge and run to the
right along the bottom with a pair of Paramites chasing you.
 Possess the Paramite and have him eat the Slurgs then use him to pull the ring to lower the wall. Release the Paramite
and continue to the right. Possess a Paramite in the background and climb the web to reach the ring. Pull it so Abe can
continue to the right. Stand on the trapdoor and possess the Paramite so he can climb the web and pull the ring.
Depossess the critter and keep going right.
Possess the Paramite and have him eat the Slurgs then use him to pull the ring to lower the wall. Release the Paramite
and continue to the right. Possess a Paramite in the background and climb the web to reach the ring. Pull it so Abe can
continue to the right. Stand on the trapdoor and possess the Paramite so he can climb the web and pull the ring.
Depossess the critter and keep going right.
Climb the ledges and get over the tall pillar then drop down to the next area and run to the left. Possess the Paramite
and have him climb up to pull the ring and summon the lift. Release the Paramite and get on the lift and ride it
down. Pull the lever before the Paramites can attack you then continue to ride the lift down to the next lever. Pull
it, then run to the ledge before the Paramite stops you.
Keep going right and pull the next lever then start running as more Paramites give chase. Keep going to the right until
you can jump and pull up to the ledge and enter the door. Continue to the right and jump in the well to go to the
background. Head right and check out all the Fleeches in the foreground. Jump in the next well to return to the foreground
then head left to read the Rune Stone to learn how to speak "Paramite".
Possess one of the Paramite then have him get the others to follow him to the left to kill the Fleeches. If you try to take
just one he will be outnumbered and probably get eaten. Then have him jump up and pull the ring so you can continue along
the top through the open barriers. Drop into the hole to fall to the lower level then jump in the well. Start running to
the right when you land and enter the door.
Head to the left this time and climb to the middle ledge. Jump to the left ledge and jump under the sack to get a piece
of meat. Drop down and continue left to the Ghost Trap which is being guarded by a Paramite. You can either bait him with
the meat by throwing it to the right and smacking the trap before he's done eating, or walk back to the right and quickly
climb up to the meat sack ledge. When the Paramite follows just crouch and throw the meat to the right and it will fall
into the pit and the stupid Paramite will jump in after it.
After you smack the Ghost Trap, continue to the left and make sure you have a new piece of meat. The next pit is too wide
to jump so toss that piece of meat down there and while they are busy eating, drop down and run and grab onto the left
ledge and continue. On the next screen you can finally use that Invisibility and drop down to smack the Ghost Trap and open
the door above. Climb back up and enter.
This strange screen isn't as dangerous as it looks. Just jump up to each of the ledges and smack each of the Ghost Traps
to open the door. No surprises! Start running to the right through several screens then jump to the ledge and chant to
open the portal and jump in.
 Jump into the well to pop into the background where six doors lead to six challenge levels. These levels are much shorter
than the Mudanchee levels, but they also require some more strategy. You can do the doors in any order you wish and when
all six are completed you can return to the foreground and drop off the ledge to take the Mudomo Final Test. Once you
complete the test you will return to Necrum to heal your sick friends you had to leave behind earlier in the game.
Jump into the well to pop into the background where six doors lead to six challenge levels. These levels are much shorter
than the Mudanchee levels, but they also require some more strategy. You can do the doors in any order you wish and when
all six are completed you can return to the foreground and drop off the ledge to take the Mudomo Final Test. Once you
complete the test you will return to Necrum to heal your sick friends you had to leave behind earlier in the game.
Mudomo 1
Slap the Ghost Trap then possess a Paramite. Pull the ring to open the gate then climb down the web and head left. If
the Fleeches wake up you can probably kill them all if you attack quickly. If you die you always have another Paramite
waiting back at the starting screen.
Climb up the next web and pull the ring next to the Ghost Trap to lower the lift then drop down and continue left. Jump the gap
and take the web down to the next level. Climb up the web on the right to the narrow pillar and pull the ring there to
raise the lift up to the top screen. Hop down and go left and kill the Fleeches on the middle pillar. They will try to
evade you so you will have to jump around pretty fast to catch and kill them. You're done with this guy so depossess him
or have him leap to his death.
Now that you are Abe, you can walk to the left. If you didn't kill the Fleeches earlier and they are still sleeping then
you need to be sneaking across this screen. On the next screen you can ride the lift up to the stone pillar and smack the
Ghost Trap. Ride back down and continue left and down on the next lift. Walk all the way to the left and jump up the
ledges to reach the final Ghost Trap. Give it a smack then return all the way back to the beginning screen where the door
is now open. Return to the hub.
Mudomo 2
Roll to the right then climb up and pull the lever. Possess the Paramite that drops in and walk to the right. Use the
webs, jump the gaps, and dodge the rocks to keep going right and pull the ring to lower the wall. Repeat this on the
next screen and pull the ring in the middle to lower the next set of walls. Continue right and make your way to the final
ring. Pull it then release your Paramite.
Now that all the walls are down in the foreground, Abe can head right. The Ghost Trap is tricky because rocks are falling
exactly where you need to stand to smack it. Time your jump then smack the trap and run and jump to the right ledge and
continue. Pull up onto the ledges and enter the open door to return to the hub.
Mudomo 3
Hang and drop off the ledge to fall through several screens. Pull up and smack the Ghost Trap then chant to go Invisible.
Quickly climb the ledges to the right and smack the Ghost Trap on the screen above. Before continue upward you may want
to get the first secret.
Secret 1
Drop down and jump over to the small ledge on the right and roll into the next screen. Chant to turn invisible then jump up
and into the door to enter the secret area.
While the drill is moving to the left, time your pull of the ring so you can drop to the right or it and roll off the end
of the ledge. Fleeches will be arriving shortly so quickly but carefully make your way to the left past the pair
of drills then roll up next to the vertical drill and wait for the Fleeches. They should drop down and kill themselves in
the vertical drill. You may have to roll to the opposite side depending on which direction the Fleeches attack.
When they are gone you need to roll under the drill on the right and time your pull up to the ledge above. Keep pulling up
to the next screen when an angry Mudokon is turning a valve. Go up to him and pat him on the should and say "You're Sorry"
and he will follow you back down. Grab the other two and chant to send Mudokons 95-97 through
the portal. Hop in the well to return to the main level.
Back on the screen with the Ghost Trap you will find your Inviso has recharged. Use it then quickly climb the ledges past
the Paramites. Jump up and to the left to make your way along the narrow ledges and pull up to the final screen. Jump over
and smack the final Ghost Trap and jump into the well before the Fleeches even know what happened. Return to the hub.
Mudomo 4
Drop into the well then continue to the right. Sneak over and pull the lever then start running to the right and jump to
the ledges and over the other side. The Fleeches will be following so roll back to the left and trigger the floor plates
to raise the wall and trap the Fleeches. Now you can climb up and hit the Ghost Trap then go back to the left.
 Ride the lift up and knock a piece of meat down from the sack on the left. When the Paramite starts to eat, run to
the other sack and knock some meat loose and take it before the Paramite eats it too. Ride the lift up to the next screen
and throw the meat to the right. The left Paramite will jump the gap and you can climb up the left ledge and run to the left
before they finish dinner. Jump to the ledge and enter the door to return to the hub.
Ride the lift up and knock a piece of meat down from the sack on the left. When the Paramite starts to eat, run to
the other sack and knock some meat loose and take it before the Paramite eats it too. Ride the lift up to the next screen
and throw the meat to the right. The left Paramite will jump the gap and you can climb up the left ledge and run to the left
before they finish dinner. Jump to the ledge and enter the door to return to the hub.
Mudomo 5
Walk left right past the lever and keep going until you can jump into the first well. Pull the lever when you land and a
Paramite appears in the foreground. Keep going left until you get to the Ghost Trap. Smack it then return to the previous
screen and possess the Paramite. Go play with the Fleeches, but make sure that he dies.
Jump into the well on the left then go right and pull the next lever. Keep going right and hop in the well to pop into
the foreground. Drop to the lower path and head to the left. The Paramite will back off and force the Fleeches back to
a safe distance. Smack the Ghost Trap then possess the Paramite and have him kill all the Fleeches here and on the other
screen.
Release the Paramite and have Abe head left and smack the final Ghost Trap. Continue left until you reach the well. Jump
in to return to the hub.
Mudomo 6
Slap the Ghost Trap then roll to the right as a pair of Paramites drop in. Jump into the well which sends you to the next
Ghost Trap. Smack it then roll to the right, off the ledge, into the tunnel and keep on rolling right of the ledge. As
you fall you will grab onto the ledge and can pull up to the door. The final secret is nearby so don't go in just yet.
Secret 2
Jump to the ledge on the right and roll off the screen. The floor plate will trigger falling rocks, so possess the Paramite
and have him hide under the ledge until the rocks stop falling. When it is safe, move him over and pull the ring to turn
on the well. Release him and have Abe jump in the well.
Possess the next Paramite and use the webs to go left where he can pull the ring. Then go up and call the other Paramites
down to help you work. Have them all "Work", "Come", and "Work" again to help save the pair of Mudokons. When they are
safe, depossess the Paramite and chant to open the portal and free Mudokons 98-99. Jump in
the well to return to the main level and enter the door to return to the hub.
Mudomo Final Test
With all six levels completed, you can now return to the foreground and drop down to the next screen. Pull the lever and
run as Fleeches begin a high speed pursuit. Climb up and roll to the right then climb up again and keep on rolling right
off the ledge. Keep rolling and dropping and rolling until you reach the dead end. Quickly run and jump to the right
ledge and pull up and start running to the right along the upper path.
Roll then jump the gap and quickly hop into the well. Hit the ground running to the right and start rolling all the way
to the ring and quickly jump and pull it before any Paramites arrive. Keep rolling right through a couple more screens
then do a running jump across the gap and keep going right.
Jump to the ledge with the Ghost Trap and smack it then jump into the well behind you. Run left when you land and jump the
next gap and roll back through several screens and exit through the door. Paramites are waiting for you when you exit
so run to the right and jump into the well to return to Necrum.
After the Mudomo level is finished and you have seen the movie you will be able to heal Mudokons 100-104 back at the
vending machine. When they are better, take them to the next screen and have them "Work" to turn the valves. Finally,
lead these guys back to the right and send them through the portal before returning to the left and jumping in the well to
move on to the Feeco Depot.

First Visit
Second Visit
Third Visit
Mudokons: 26
First Visit to Feeco Depot
This is the main train station that leads to all the remains areas of the game. Your first time through the depot will be
fast, but you will return to pick-up several more Mudokons later in the game. For now, climb the ledge and watch the News
Report on the TV. Don't pull the lever unless you feel like dying and restoring your game. The only secret on this level
is below so go get it before continuing.
Secret 1
You start in the upper right in darkness. Wait until the Sligs are gone or at least facing away from you then jump to the
first shadow. When it's safe, sneak or run to the next screen and jump to the ledge. Open the portal and free
Mudokons 105-107 then return to the left and jump back in the well to return to the main level.
Continue to the right along the upper ledge until you get to the vending machine. Drink a brew then move next to the mine
and fart. You have 4 seconds to get clear of the explosion which will also destroy the mine. Move to the next screen
where more brew awaits and the next screen where lots of mines block your path. Time to practice some remote control farts.
 Drink a brew then fart. You have 4 seconds to chant and possess the fart. Now you can control the movement of the green
cloud and send it anywhere you want. When you are ready, just chant to detonate the vapor and anything nearby. Practice
on the bombs and when they are gone send more farts further right to kill some patrolling Sligs. Farts can also blow-up
the Chant Zappers. It's always good to have a brew in your belly before you leave a vending machine. You never know when
an explosive fart will come in handy.
Drink a brew then fart. You have 4 seconds to chant and possess the fart. Now you can control the movement of the green
cloud and send it anywhere you want. When you are ready, just chant to detonate the vapor and anything nearby. Practice
on the bombs and when they are gone send more farts further right to kill some patrolling Sligs. Farts can also blow-up
the Chant Zappers. It's always good to have a brew in your belly before you leave a vending machine. You never know when
an explosive fart will come in handy.
Load up a brew at the next vending machine and then pull the lever to drop down a level. Fart and possess it, then fly it
down and put it next to the Chant Zapper. When both Sligs are nearby, KABOOM! Drop all the way to the bottom and start
running to the right to avoid the Flying Slig. Roll onto the next screen then jump some mines. On the next screen, jump
the mines and grab the ledge and quickly pull up. Keep going up until you reach the lever. Pull it then head back to
the left where all this started and grab another brew.
Return to the right along the top this time and send a fart over to take out the four mines on the ledge. Now you can enter
the door to reach the main train station lobby. View the map to see how the rest of the game is all inter-linked through
this hub then move on to the right. Jump to the ledge and drink a brew. Drop a fart next to the Chant Zapper and run away.
When the zapper is gone you can drink some more and this time possess you farts and send them out to do your dirty work.
Your first two farts should clear out all the mines on the screen to the left. One last fart can go left then up and right
and up and right to kill the Slig next to the Bonewerkz door. Your butt should be a little sore by now so follow the path
of your last fart left then up and right until you reach the door marked "Employees Only" and go inside.
You should be in the background with lots of Sligs in the foreground. Go all the way to the left and pull the lever to turn
off the zapper. Then return to the door and back to the depot. Drop down one ledge and enter the Slig Barracks door to
reappear in that last set of screen - this time in the foreground. You will be in the top right in the shadows. Wait until
it's safe then drop down and hide in the shadows as you make your way left.
Get inside the next door then go left and down to find the lift you can ride to the next area. Jump in the well to pop
into the background and go left until you reach the Ghost Trap. Smack it then pull the lever and jump in the well to return
to the lift. Climb up to the upper ledge on the left and chant to go invisible. Run to the left past many Sligs. You
will have to jump to a ledge on one screen and duck under a wall on the last screen and finally pull up to the ledge on the
left just as you become invisible. Timing is critical - one pause or mistake and you will reappear too soon and get shot!
Start climbing up and keep going through several screens until you reach a lever on a ledge next to a red emblem with a Slig
rifle. Pull the lever and a Slig will pop out of the tube. Possess him and send him to the right. Say "Hello" to the
computer and repeat the phrases to lower the barrier. Pull the lever to teleport to the upper ledge and continue right.
Drop down and open fire on all your fellow Sligs.
Second Visit to Feeco Depot
You will need to repeat the first few screens using the same methods used on your first trip. Load up on brew and take out
the Chant Zapper then possess several farts to clear the mines and Slig before heading left and up. Follow the signs to
find the door leading to the Bonewerkz terminal. Grab some bones from the meat sack on the left ledge before entering the
door on the right.
Toss a bone to the hungry puppies then drop down and flip the lever to open the upper floor hatch. Quickly jump out of the
pit to the right and drop through the hatch before it shuts. Throw a bone so it lands to the right of the floor plate. When
the Sloggie goes to get the bone he will step on the plate and turn off the zapper. Run and enter the door before you get
shot by the Sligs in the background.
On the next several screens you will always want to move only when the Sligs are facing away from you. Always get ready to
duck behind the nearest object so they can't shoot you. Climb up to the ledge and jump over the mines and run to the right
dropping to a roll as you enter the next screen. A secret area is right in front of you so explore it before continuing.
Secret 2
Climb down by the bottles into the next area and move to the middle of the ledge. Jump back to the right and immediately
duck and roll into the center tunnel. When the gunfire is over, roll under the ledge and pull up then jump into the well.
This is a pretty fun and easy puzzle which is good because you are only saving one Mudokon.
 You will notice the pair of levers which are color coded to match certain walls below. You also have Mudokon 157
working hard in the corner and a snapping Slog on the same screen. Slogs will never attack Mudokons as long as they are busy,
so the trick is to get and keep the Slog behind a wall while you lead the Mudokon to the portal on the right screen.
You will notice the pair of levers which are color coded to match certain walls below. You also have Mudokon 157
working hard in the corner and a snapping Slog on the same screen. Slogs will never attack Mudokons as long as they are busy,
so the trick is to get and keep the Slog behind a wall while you lead the Mudokon to the portal on the right screen.
Jump the center gap and enter the next screen. While you are here you can possess the Slig in the background and explode him
then walk back to the left and flip the lever to raise the wall and trap the Slog. Stay hidden in the top right and call the
Mudokon over to you. When he bumps into the wall, tell him to "Work" then release the Slog. Jump the center gap and wait
for the Slig in the background to calm down and the Slog to chase you to the lower left. Then pull the left lever to trap
the Slog on the left and jump back to the right and pull the lever there to lower the wall.
Tell the Mudokon to follow you and lead him to the right and chant to open the bird portal and set him free. He will step
on several floor plates which will free the Slog from the left area of the previous screen, but he will still be trapped
behind the right wall. You need to jump into the well directly below, so drop off the ledge and jump OVER the floor plate
(which would lower the wall and release the Slog) then jump into the well.
Repeat the procedure for making your way back through the next screen. Make sure to only move when BOTH Sligs are facing
away from you. Sometimes this means they will be going in opposite directions. Get to the ledge on the left and climb up
to the main level and quickly move a few steps to the left and duck before you get shot.
When the time is right, start running right and jump the bombs and keep running. Drop to a roll and go to the next screen.
You will be ducked down behind some crates, so wait for the Sligs to face away then run for the lift and ride down quickly
before they shoot you. When you are even with another lift, jump over and ride it up once screen and jump to the ledge to
stock up on bones. You can get nine bones from this bag, but you may have to throw away whatever you currently have in your
inventory. Throw them off the ledge to the right then hit the sack to knock nine new bones free. Get back on the lift and
ride it to the bottom.
Go to the upper left ledge and on to the next screen. Throw a bone to the Slogs below then quickly drop down and run and jump
to the next ledge. On the next screen wait for the Slogs to see you then lead them back one screen and throw another bone.
All the Slogs will fight for this one leaving you free to run back left and drop to the floor. Roll into the next area and
jump to the left and head to the next screen.
Get the attention of the Sloggie and lead him back to the right. Toss him a bone then roll along the floor back to the left
and climb up to the ledge. You can get to the lever right now, so jump the gap and climb up. Head right and climb the ledge
and move to the lift on the next screen. Quicksave your game now as there is a bug in the game which may cause a Mudokon
to move to an un-saveable position. If this happens, you can just die and restart here.
Ride the elevator up and flip both the levers and have both the Mudokons get on the lift. These Mudokons are blind and you
will have to give them extra commands to stop them, etc. If a Mudokon falls off the lift and lands below he will not die, but
he will appear on the lower left screen below the ledge and he will be un-saveable. When you have both Mudokons back at the
bottom you should spot more Mudokons working on the other side of that wall. Tell your first two to wait while you return to
the left and drop down to the lower screen.
The wall is down allowing you access to the lever, but the Sloggie is back and wants another bone. Give him one then quickly
drop down and pull the lever and jump back up before he finishes. Return back up and to the right to find the wall is now
gone and you can have all the Mudokons get on the right lift. Make sure to tell them to "Wait" when they get on the lift or
they will keep on walking. The fourth and final Mudokon won't come when you say "All ya". You will have to call him
individually - maybe even after setting the first three free. Do whatever it takes to get Mudokons 158-161
down below and through the portal.
Now you can ride this same lift all the way up and enter the door to the terminal leading to the train. Climb aboard and
take a very cool train ride to the Bonewerkz.
Third Visit to Feeco Depot
Back at the depot again. You know the drill...get the brew...fart...blow up the chant zapper...drink...fart...possess fart, only
this time you are sending your farts down below. Your first target is the Greeter Robots. When the path is clear you can
drop down and head right to the Executive Office. Make sure to load up a brew before you go.
Climb up and right and enter the door to appear in the foreground. Pull the lever to open the wall in the background then
return and continue right. Keep going right through a very complicated screen while avoiding the grenades of the Flying
Slig and keep going until you reach Baggage Claim. Pull the lever to crush the Sligs with a pile of baggage and also open
the area with the Ghost Trap on the previous screen. Return to that screen and dodge the Flying Slig as you make your way
to the center and smack the Ghost Trap. Chant to turn invisible then drop to the floor and run right through all the screens
and jump into the well back in Baggage Claim.
 You must sneak and hide in this next dark screen. Pull up and slap the Slig on the upper ledge and pull the lever then drop
down and continue right. Climb onto the tiny ledge and wait for the Slig to go to the left before jumping down and pulling
the lever to trap him behind a wall. Enter the bathroom...err...office to the right and jump to the ledge and possess the
Glukkon. Talk to the VoiceLock to teleport to the left and summon a Slig to pull the lever and lower the wall.
You must sneak and hide in this next dark screen. Pull up and slap the Slig on the upper ledge and pull the lever then drop
down and continue right. Climb onto the tiny ledge and wait for the Slig to go to the left before jumping down and pulling
the lever to trap him behind a wall. Enter the bathroom...err...office to the right and jump to the ledge and possess the
Glukkon. Talk to the VoiceLock to teleport to the left and summon a Slig to pull the lever and lower the wall.
There are way too many Sligs in this area, so lead them all to the left and say "All ya" to get them all to the ground floor.
Then issue the "Kill 'em" command and watch a massive shootout where only you should be the survivor. One Slig may still remain
after the bloodbath both he won't matter for long. Talk to the VoiceLock to teleport to your private chambers and use the
Security VidPhone to issue the final order.
Abe can now run back to the left and into the door and enter the President's private chambers. Go all the way left and free
Mudokons 193-202 then head back one screen and use the door to return to the Feeco Depot Lobby.
Repeat the "drink brew-fart" drill one last time to clear the Greeter from below. Load up on a brew and drop down and head to the
left this time. You should spot some barrels by the door and one of the barrels covers the foreground - an obvious secret!
Secret 3
Drop down behind the barrels and drop down the gap between the pair of Greeters. You can't chant here but if you have good
timing a 5 second delayed fart can take out both of these guys (or at least one). Fart and climb up to avoid the blast zone.
Proceed down and jump into the well when you are ready.
This is a nasty screen so sneak and hide in shadows at all times. Enter the door when the Slig turns to walk left and follow
him back until you can climb the ledge and keep going left. If he shoots at you he will probably kill a Mudokon - not good!
When the next two Sligs are looking away, jump and hang from the ledge. Drop down when they are looking away. The noise
will alert them so stand still until they resume their patrol.
Sneak left behind the Slig and hide in the shadows. When both Sligs are to the right and facing away, pull up and quickly
pull the ring to drop the top Slig down. You will fall too and both Sligs will be very suspicious now. Be VERY still! When
things are back to normal, pull up and possess a Slig. Kill or be killed, then take the remaining Slig and pull the lever.
Go under the drill and to the right.
Carefully squeeze off a SINGLE shot to kill the Slig without harming the Mudokons then explode your host. Abe can now return
and bring Mudokons 203-205 back to the left ONE AT A TIME and set them free. I HIGHLY
recommend saving one at a time and saving after each rescue. Stand on the right and chant and to open the portal as the drill
is coming down. The Mudokon should run through and into the portal. Return right and get the next and repeat until all three
are away. Retrace your steps to return to the main level.
Enter the door and roll to the left and turn the valve to open the barrier. We'll be back for these guys later, so climb down
and continue. Call Mudokon 206 and get him to work to lower the pair of walls. Chant to set
him free, then drop down and enter the door.
Sneak past the Greeters and keep going left. Now it gets really tricky. You need to roll to cover without getting scanned
by the motion detectors. Keep going left. Now you just have to make a run for it. Wait for the red beam to be on the far
left then run and jump to the ledge and enter the door.
Ride the lift up and read the Rune Stone then jump to the left and keep climbing up. Pull the lever then slam down a brew
and start farting. Possess and send your fart to the right where you can destroy a Chant Zapper. Take the next lift and
continue up. Quickly roll left and possess the Flying Slig. Take him right and destroy all the mines and finally explode
your flying host.
Send Abe all the way to the right and pull the lever to summon the lift. Ride down and start collecting those Mudokons
you passed by earlier. These guys are blind so they are a real pain to control. Get them all on the lift and take them up.
Lead them back to the left and onto the lift there. Save often as these guys like to walk off ledges.
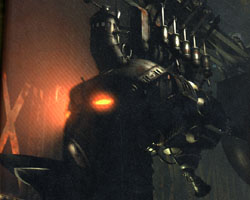 HINT: It's really hard to get all four Mudokons to stop on a lift, BUT if you lower the lift down just a bit so they fall
onto it, they will stop walking and begin working. Very handy on this and future lifts.
HINT: It's really hard to get all four Mudokons to stop on a lift, BUT if you lower the lift down just a bit so they fall
onto it, they will stop walking and begin working. Very handy on this and future lifts.
Bring them down to the next screen where you need to transfer them to the right lift and continue down. Get them to line up
in front of the valves and turn them to lower the walls below. Now have them follow you down and chant to free
Mudokons 207-210.
Go through the door on the left and make your way to the train. Climb aboard and enjoy the scenic train ride to the
Soulstorm Brewery.

Rifle Range Workers' Campus Slig Bunks
Bombing Range War Room
Mudokons: 49
Head for the door on the left then start moving to the right. Wait for the Slig to leave then roll up and pull the lever
then quickly pull up to the ledge before he returns. Continue to the next screen and wait for the Slig to face away then
roll right and fall off the ledge. You will hang from another ledge and must wait until the Slig on the right is facing
away from you and the other Slig has left the area. Then pull up and jump to the ledge and pull the lever to take the
lift.
Wait for the Slig to turn away then climb onto the ledge and run to the right off the ledge. Pull the lever and quickly
climb back up as the Slig falls down to the floor. When the Slig crosses the the lift and stops jump over him to the
floor and quickly jump back up to the ledge on the left.
Wait for the Flying Slig to leave the screen then climb up and jump the gaps to get behind the wall to the right. Possess
the Flying Slig and head up where you can drop grenades on a pair of Sligs. Wait until they are looking away before you
attack or you will get shot. Keep going up and pull the lever to drop a Slig down a level so you can kill him. Then kill
the other Slig on the left. Pull the other lever to turn off the power then fly up the left side to the next screen.
Another Slig is waiting for your grenade toss and you can end your flight by getting next to the Chant Zapper and throwing a
grenade so it kills you and the zapper. If you survive then just explode yourself to return control to Abe. Now you are
free to climb up into these areas, but watch out for another Flying Slig who is flying around the area. Jump the gap to the
left and continue your climb until you reach the door.
Sneak forward then when the Slig is either gone or has his back turned, climb and drop into the darkness. Sneak into the
next screen and carefully climb to the top of the middle ledge . Keep sneaking and wait for when there is only a single
Slig and he is facing away from the Grenade Machine. Jump into the shadows and wait until it is safe then press the button
and take a grenade. Run and jump back up to the ledge and make a lot of noise so both Sligs are on the screen and below
you. Throw the grenade against the left wall and it will bounce back and stop between the two Sligs - KABOOM!
Get another grenade and return to the screen on the right and take out another Slig. Load up once more for the remaining
Slig then get one last grenade before you climb up and turn the valve to open the door. Chant to possess the next Slig and
explode him. Sure, you could use a grenade but why risk killing the pair of Mudokons working nearby or wasting a grenade?
Drop down and ride the lift to the next screen.
Ride to the bottom and flip the lever to turn the power off. Go to each of the four Mudokons and say "Sorry" so they will
follow your orders. Have them all get on the lift and ride back to the top. Get four of them to stand by the valves
and have them "Work" to open the door above. Then have them all get back on the lift and take them to the portal below
and set Mudokons 108-113 free. Return to the top, climb up the ledge, and go through the door.
You are now at the Barracks Hub which leads to the next four areas. Each area is access by a door in the background and each
door is accessed by a numbered well. Check out the map to see how everything is connected and catch the latest news flash
on the TV to the right. We'll do the wells and doors in numerical order to make things easy, so jump into the first well
and enter the door when you appear in the background.
Door 1: Rifle Range
You will be under constant fire from Sligs in the background on this level so be fast and make sure to hide behind foreground
objects. Get on the lift and ride it up and then roll to safety behind the pipe. Keep making your way down and to the
left seeking shelter whenever possible. Roll under the Grenade Machine on the next screen and get a grenade (if you need one)
then jump over and get behind the next pipe.
Roll and hide behind the Mudokon targets then make a running leap for the ledge to exit this dangerous screen. Jump the next
gap and hide behind another pipe then continue to the left. Climb up and join the Mudokon and toss a grenade to destroy the
Chant Zapper leaving you free to possess and kill the Sligs in the background. Move on to the left and roll to the lift
and hide. Then roll and jump to the far left ledge and pull the lever to lower the lift. Tell the Mudokon you're sorry
then drop down and say "Sorry" to the other Mudokons.
WARNING: Do not have Mudokons follow you unless you are hidden. Sligs won't shoot workers but they will shoot at you if
you are visible and will probably kill those you are trying to save.
Roll to the middle of the lift and when the gunfire is over, have the Mudokons follow you. Get them all in the CENTER of
the lift then ride to the top. Have them wait and you roll to the right. When the Sligs stop shooting, call the Mudokon
and have them follow you back to the right. Lead all the Mudokons down off the ledge and have the other two join the party.
Chant and send Mudokons 114-119 on their way home, then return to the screen on the left and go
in the open door to return to the Hub and enter Door 2.
Door 2: Workers' Campus
Time your jump over the mine and roll to the left. Jump the next gap and time you climb to the middle ledge so you can run
and jump to the left without getting blown-up. You can now ride the lift down until you reach a second lift. Jump over to
that one and make your way to the lever which raises a third lift creating a bridge so you can exit to the right.
Jump the various gaps while missing the mines. Go all the way right, then climb up and return across the top to pull the lever
which will close all the floor hatches. Return to the bottom right and say "Sorry" to the Mudokon then have him follow you
off this screen. You may find it easier to cross over first and call him from the left side of the screen. On the previous
screen you can now both get on the lift and ride up to the portal. Chant and set Mudokon 120 free.
Continue your exploration of the treetops and pull the next lever to bring up another lift. Ride it down and head to the left
where you will find a lonely Mudokon hard at work surrounded by bombs. The pattern is a simple
so disarm all the bombs then have Mudokon 121 drop down to the right and follow you back to the
nearest bird portal.
Return to the screen with all the disarmed bombs and continue to the left until you reach the door. Enter, then start going
right. The Slig is asleep so sneak past him and climb up to the ledge where you can safely possess him. Walk into the mine
to get rid of both obstacles. Before you continue up you may want to drop down and roll right for the first secret.
Secret 1
Jump to the middle ledge and dodge the circling mine. Drop into the right well to enter the secret area. You will be hanging
from a ledge when the screen changes so just stay hanging. Wait for a few seconds and eventually the Slig will detonate one
(or both if you're lucky) of the mines. Now pull up and jump across the small ledges. Avoid the mine if one still remains
and make your way to the next screen.
A mine is on a collision course with Mudokons 122-123. Quickly chant to open the portal and set
them free then jump the ledges and into the well to return to the main level.
Now return back to the left and start climbing up then go left until you reach a pair of Mudokons who get dropped into a
chamber of laughing gas. Disarm the three bombs which are still using the
pattern then jump up and dodge the mine to flip the lever and lower the wall. Slap the Mudokons so they get serious then lead
them back to the lift on the previous screen. Get them all in the CENTER and ride up to the top. Have the Mudokons wait while
you go lower the next lift down. Stay hidden as you call them to the new lift then ride it to the top.
Head left and add a third Mudokon to the party. Note that the portal has a "3" in the center. This is the number of Mudokons
you must send through the portal at once to charge your Shrykull power. Chant to send Mudokons 124-126
through the gate then climb the ledge and head left. Use your devastating Shrykull chant to clear out this screen then turn
the valve to open the door and return to the hub.
Door 3: Slig Bunks
 Read the Rune Stone and you will learn about Crawling Sligs. Head left and you will find some. They will wake up when you
enter the screen so run back to the right of the lever and start zapping them as they try to enter your screen. When all four
are dead you can go back and possess the Slig on the upper ledge. Have him drop down and head right killing anything that gets
in his way. Using Slig Speak, have him repeat the phrase on the Voicelock to drop the wall and shoot the Crawling Sligs before
you explode him.
Read the Rune Stone and you will learn about Crawling Sligs. Head left and you will find some. They will wake up when you
enter the screen so run back to the right of the lever and start zapping them as they try to enter your screen. When all four
are dead you can go back and possess the Slig on the upper ledge. Have him drop down and head right killing anything that gets
in his way. Using Slig Speak, have him repeat the phrase on the Voicelock to drop the wall and shoot the Crawling Sligs before
you explode him.
Climb up and turn the valve to open Bunk A. Do NOT touch the lever or you will cause another Slig to appear under the red
sign. There are many such levers in this area, so don't touch them unless you are instructed to do so. Drop down and go all
the way to the right. Possess the Flying Slig - if he isn't on this screen then climb up to the next to get him. Now fly him
around and kill the other Flying Slig above then answer the VoiceLock to open the door. Now fly down and around to the beginning
of this level and go straight up.
Kill all the Sligs on the ledges. Remember to wait for them to turn away before you get above them and drop a grenade. If
you do die, Abe can always pull the lever to summon a new Flying Slig. When the center shaft is clear of all Sligs, explode
your host or even better; take out a Chant Zapper with a grenade and die in the explosion. Have Abe climb up and turn the valve
to open Bunk B then return to the bottom and back to the beginning screen. Start climbing up to the ledges with the Bunk
Doors and enter Bunk A.
BUNK A
Possess the Slig and pull the lever to open the door then explode the Slig. Have Mudokons 127-128
follow you to the bottom then exit the screen to the right to reset the portal. Return and chant to set them free then exit
through the top door. Back in the shaft, jump over and enter Bunk B.
BUNK B
Pull the lever then run off the ledge to the right to avoid the Slig who pops in. Possess him and bring him down to turn off
the zappers using the VoiceLock then explode him. Climb up and walk off the top-left to reset the portal then chant to free
Mudokons 129-130.
Return to the main shaft and climb up to the top. Wait for the Slig on the upper ledge to exit to the right then quickly climb
up and sneak to the left and hide in the shadows. Hopefully you still have a grenade, but if not, wait for the Slig to turn
away then roll up and press the button to drop a grenade from the machine and quickly roll back off the screen to the right.
Sneak back left and pick up the grenade then sneak to the narrow column and hide in the shadows. Throw the grenade in a high
arc after it beeps four times. This should take out the Chant Zapper and the Slig.
Now chant to possess one of the Sligs below. Shoot the other Slig then explode, or if you get shot, just possess the other
Slig and explode him. When both are out of your way, drop down and pull the lever then turn the valve to open Bunk C. Climb
back up and get a fresh grenade and head right. When the Slig is off the screen, drop down to the floor then lob a grenade to
the right ledge when he returns. Climb up to the left and go back to get a new grenade then return to the right and jump over
the gap and onto the next screen.
Destroy the Chant Zapper with the grenade this possess one of the Crawling Sligs. Use him to press the button on the right to
lower the walls then go grab his pants from the locker on the left. Have him kill the remaining Sligs then explode him and drop
to turn the valve to open Bunk D. If your Slig dies before he can get his pants on you can just have Abe go get another
grenade and kill the remaining Sligs. Before going down to Door C make sure you grab one last grenade.
BUNK C
Pull the lever then chant to possess and kill the Slig who just arrived. Say "Sorry" to the Mudokons so they will follow you
to the bottom then leave the screen at the lower right. Return and chant to free Mudokons 131-132
then exit through the door and move on to Bunk D.
BUNK D
Pull the lever to drop a Slig into the area and quickly hide in the shadows. When he turns around, run off the ledge and then
possess him from below. Have him use the VoiceLock to turn off the zapper then explode him. Leave the screen at the top left
then return to activate the portal and free Mudokons 133-135. Return to the top of the shaft and
go through the door which should now be open. Return to the hub, jump in the last well and enter the final door.
Door 4: Bombing Range
Sneak through this first screen and climb up and go through the teleporter when the bottom left Slig is off the screen. Quickly
climb to the left ledge when the Slig's back is turned then climb up to the next ledge and roll to the left. When the Slig is
gone from this screen, drop down and smack the middle Ghost Trap and chant to turn invisible. Run to the right and zap the
two Sligs with the lever then return and smack the remaining two Ghost Traps. Now lead all six Mudokons back to the portal and
chant to free Mudokons 136-141.
Return to the left until you reach the door and enter. Run and jump to the left and roll into the next screen. Wait for the
Flying Slig to move away from the lever then drop down and quickly pull the lever and roll to the right through the open hatch.
Drop down the steps to the left and into the gas. Climb up to the left and continue through the next several screens past the
Flying Sligs. Do not pull any levers until you reach the last screen with a well and a cage above it.
Pull the lever to open the bottom of the cage and release a Flying Slig. Jump in the well to shoot into the safety of the cage
where you can now possess the Flying Slig. Use him to kill the other Flying Sligs on the previous screens and finally kill
yourself by throwing a grenade at the Chant Zapper on the screen with the bird portal and getting caught in the explosion. If
you don't die in the blast then just explode yourself.
Climb down from your cage and have the other Mudokon follow you. Return to the previous screen and pull the lever next to the
target to add a few more Mudokons to your group. Finally, go to the right and pull the lever to get the laughing Mudokons.
Return to the left and chant to send Mudokons 142-146 through the portal. Before you leave you
may want to get the very clever secret hidden on this screen. When you have finished the secret you can leave using the door
on the far left screen.
Secret 2
On the screen where you opened the portal are some rocks in the foreground. Near the right they just cover the level that
Abe walks on. When you cannot see Abe's feet, climb down the secret ledge, chant to open the portal then jump through. In
the next area, chant and possess the Flying Slig. Quickly pull the lever then fly right and stay ahead of the pursuing mines.
You will need to go through a couple of screens and quickly pull the lever to turn off all the zappers then quickly fly into
the bombs before they hit the pair of Mudokons working in the lower corner.
Back as Abe you can now run to the right and jump through the portal. When you appear, chant and free Mudokons 147-148
then jump in the well to return to the main level.
Door 5: War Room
The lower door in the foreground should now be open back at the hub. Return to the foreground and enter the door. Drop down
and read the Rune Stone to get some background on what you are about to do. Pull the lever then jump to the ledge and roll
to the left. The lever below opens the hatch to the Security VidPhone, but you can't use it so head right and pull the lever. Jump in
the well before the Crawling Slig finds his pants and hang from the ledge until the Slig is facing the other way. Pull up and
continue into the shadows and keep going right.
Jump to the lever and pull it then head for the well and jump in. You will end up hanging from a ledge so pull up before you
get shot. When the Slig leaves the area walk off the ledge to the left to land between the bombs. Jump the right bomb and pull
the lever then jump back to the left and into the well on the right. You will shoot through several screens to land between a
pair of Greeters.
 Carefully move to the left and pull the lever then move to the right and jump into the well to shoot to the top right ledge.
Remember not to move when the motion detector beams are touching you. Possess the Glukkon on the left and have him talk into
his VoiceLock. Say "Hey" then "Doit" to be teleported to the next area.
Carefully move to the left and pull the lever then move to the right and jump into the well to shoot to the top right ledge.
Remember not to move when the motion detector beams are touching you. Possess the Glukkon on the left and have him talk into
his VoiceLock. Say "Hey" then "Doit" to be teleported to the next area.
You need to clear the floor of all the mines so yell "Help, Hey, Come Here" in that order to summon as many Sligs as it takes
to clear the floor. Now you can safely jump off the ledge and continue left. Jump over the gap and keep going until you can
fall through another gap to the lower screen. Keep going down and left until you reach the barrier with more mines and some
levers. Repeat the commands to get more Sligs to drop in and remove the mines. Have the last Slig pull the lever by saying
"Do It" while he is next to it. Then go stand on the floor hatch and call the Slig over and have him pull that lever to drop
you down to the Security VidPhone.
Talk into the VidPhone to start a small movie which will get the poison gas turned off and also kill the Glukkon. Back as Abe you
can drop down and enter the open door. The Greeters are still deadly, so watch out for those motion detectors. On the
next screen is the exit, but first, continue to the next screen and free Mudokons 149-156, then return
and chant to open the portal and return to the Feeco Depot to catch the train to Bonewerkz.
Annex 1 Annex 2 Annex 3 Annex 4 Annex 5
Annex 6 Annex 7 Annex 8 Executive Offices
Mudokons: 31
Bonwerkz is made up of several mini-levels which are really just short challenge levels (except for Annex 7 which is huge).
When you first appear, jump over the gap and dodge the rocks as you pull the lever and return to the lift. Ride it down and
jump over to the right then run and jump over the mine and pull up to the ledge. Sneak onto the next screen and run to the
ledge and pull up before the Slig can shoot you. Pull the lever to summon the lift then wait for the Slig to face away from
the lift and jump to the center of the lift and go down quickly. Enter Annex 1.
Annex 1
Grab and hang on the ledge and when the Sligs are leaving, pull up and sneak behind them into the shadows. Continue to the
left and go past the lever to get the first secret.
Secret 1
There is a door hidden in the darkness to the left of the lever. Enter the door and get ready for some fast action. Wait
for the Slig below to turn away from the teleport then go through the top teleporter and appear below. Jump right and pull
the lever then jump and pull another lever to get sent to the background. You will appear right next to a Slig so slap him
and run to the right.
Jump onto the next ledge and go through the teleporter. Back in the foreground, keep running right, off the ledge and into
the next teleporter to appear above behind a Slig. Do a quick reverse and go into the next teleporter to appear in the background
where you are now safe to possess one of the Sligs.
Have him drop down and shoot the other Slig (or get shot). Take the remaining Slig through the right teleporter and appear
in the background with Abe. Walk to the left onto the previous screen and carefully shoot the Sligs in the foreground. You
can't do anything about the middle Slig who is below you in the background. When both of these guys are dead, explode your
host and have Abe go get Mudokons 162-163 and send them through the portal. Jump in the well
and return to the main level.
Pull the lever to trigger the alarm and make the Sligs start running around. Make your way back to the right, hiding in the
shadows when necessary. Drop down and get Mudokon 164 to follow you to the left. Stand him
next to the right lever and jump to the other lever and tell him to "Work" so you both pull the levers and kill the Sligs
above. The floor hatch will close and you can now chant to set him free.
Head right and when the Slog starts to chase you run and jump to the ledge. Grab some meat and toss it so the Slog is tricked
into getting smashed by the rocks. With him out of the way you can safely go get the next secret.
Secret 2
Time your roll under the falling rocks and into the wall. Jump over the gap and pull the lever then open the portal and free
Mudokons 165-169. Don't you wish they were all this easy! Return to the left.
Jump up to the ledge on the left and head left to the next screen. Pull the lever and when the lift arrive, ride it up to
the door and enter Annex 2.
Annex 2
Sneak over and pull the lever to teleport then sneak over and enter the door. This is a one-room challenge with a bunch of
bones as your reward. The bones will come in handy later so I recommend getting them. Exit and sneak past the sleeping Slog
when you are done. Stay ducked down and roll to each of the safe areas then enter the next door to Annex 3.
Annex 3
Head left and enter the door leading to the mine car. Head to the right and jump over the mines without getting caught by
the motion detector beams and make your way to the mine car and get in. Just start rolling over everything and anything that
gets in your way between here and the end. Hop out of the car and enter the door to enter Annex 4.
Annex 4
Head right and climb up to the upper level and go back left. Possess the Slig and go through the teleporter to the background
and start killing Sligs. Pull the levers to turn off the three zappers then explode him. Return to the right and drop down
and go through the deactivated zappers and enter the door to Annex 5. I told you these were short!
Annex 5
Wait for the Flying Slig to leave this screen then enter the door on the left to appear in the foreground. The Slig won't
be gone for long so get ready to start jumping. The secret for the next few screens is that all the mines can be jumped by
just doing a series of standing jumps provided you are starting from the proper location. Line up your jumps and just
hop...hop...hop... and move to the next screen and repeat. You will pass the Flying Slig as you go, but if you are fast
enough you will make it to the door on the far right and can continue to Annex 6.
Annex 6
Go left and roll under the wall and pull the lever to turn on the well on the other side of the wall. Roll back right and
climb up and start going right. Sneak onto the screen with the sleeping Slogs and jump over the floor plate. Now start
running to the left. The floor plate will lower the wall and the Slogs will start chasing you. Run back to the far left
and jump the gap so you end up hiding in the shadows.
The Slogs and a single Sloggie will all run and fall down the gap allowing you a casual stroll back to the right where you
can enter the door. You will reappear next to the well you turned on earlier so jump in.
Annex 7
This is the BIG ONE! Save your game often. First thing to do is flip the three levers to turn off the zappers below. Only
the lower left lever presents any real challenge. You must pull it then immediately run right - you have no time to spare!
Head along the bottom to the next screen and start climbing more ledges until you reach the lever back on the left. Pull it
to lower the wall on the upper right and jump back across and enter the next screen.
Pull the lever to raise the lift and start more rocks falling. Get the Mudokons to get on the left and ride down, then lead
them left past the falling rocks and onto the previous screen. Have them wait while you go get the Mudokon from the middle
ledge, then lead all three back to the right and onto the next lift.
Ride down and jump the gap to pull the lever to close the floor hatch. Get the Mudokons to wait over to the right of the
lever while you go back up. A new middle passage is open to you now, so go back left and climb the first ledge and return to
the right past the falling rocks and climb up to the open passage. Drop down the shaft to land below where you left the
first three Mudokons. You should be on an upper ledge and call pull the lever there to summon the next lift. Roll off the
left back to the ledge with the Mudokons and get on the lift and ride down.
Get the three Mudokons to join you on the lift and take them up and have them wait with the first three. Don't free them yet
as there is a secret you need to get and you don't want to have the Shrykull Power before you enter the secret area.
Secret 3
After you have all six Mudokon waiting on the ledge by the lever, get back on the lift and ride down to the open area below.
You can access the secret by either ledge but since you are already on the right, just do a standing jump from the end of
this ledge to drop into the well far below. You will land on the opposite ledge where you can then drop into the left well
and enter the secret.
Go left and quickly climb and jump over and hang until the Slig turns away. Then pull up and pull the lever to crush him with
the drill then jump the gap and pull the other lever to raise the lift with the Mudokon on it before he gets the same treatment.
Have him follow you back to the right to the huge line of drills. As the three drills are coming down, start to chant and
the portal will open and Mudokon 170 can escape.
His escape triggers the remaining four drills which move MUCH quicker than the other three. You will need to time your roll
so you can pause under each of the three slower moving drills. It's not easy so save your game. Climb the ledge and jump
into the well when you make it past the drills.
 Return to the screen with Mudokons 171-176 who are still waiting patiently and set them free.
You will recharge your Shrykull Power which you can use in the upper screen to clear out all those mines. When your path is
clear you can then make your way to the far right and exit this screen.
Return to the screen with Mudokons 171-176 who are still waiting patiently and set them free.
You will recharge your Shrykull Power which you can use in the upper screen to clear out all those mines. When your path is
clear you can then make your way to the far right and exit this screen.
Enter the next screen and chant to free Mudokons 177-179 then climb up and around and enter the
door to Annex 8.
Annex 8
Head right and jump the gap and enter the door. Keep going right and start climbing the ledges. Read the Rune Stone at the
top then start climbing back down the other side of the wall. Dodge the rock and roll under the saw and start climbing the
right ledges to enter each of the four Boiler Room Doors. You can do them in any order you want, but I am listing them here
in numerical order.
Boiler Door 1
Slogs are pacing below you so start running to the right and jump to the next ledge and keep going. You can run off the end
of the ledge on the next screen and the Slogs will all run right into the drill and kill themselves. Continue under the
next set of drills and pull up to the ledge and turn the valve until the meter is dark and the green light comes on. Pull
the ring to drop the wall and exit through the door.
Boiler Door 2
Load up on meat from the hanging sack and start blowing up mines. You can destroy them all or just enough to get past them.
Continue right along the upper ledge to the next screen where you will need to throw more meat to destroy more mines before
continuing to the next screen.
Take out more mines and restock your meat supply if necessary. Continue to the next screen and take out the mines on the
ledges. Your exit path is up and to the left but there is the final secret to get so do a running jump to the middle ledge
then one more jump to the far right and lower down.
Secret 4
Drop to the floor and have Mudokons 180-183 join you. Chant to open the portal and set them
free. Climb back up and enter the main level.
Make your way up and to the left and destroy any mines in your way. Turn the valve to shut down Boiler 2 then exit through
the door.
Boiler Door 3/4
Sneak left past the sleeping Slogs and climb up and back to the right. Pull up to the next screen and turn the first valve
to shutdown Boiler 3. Drop back down and return to the starting screen. Get the attention of the Slogs and bait them with
some meat. While they are occupied you can climb up to the left ledge and start jumping up and to the right until you can
enter the door and access the valve for Boiler 4. The door on the left will open and you can leave.
Boiler Door 5
Go to the right and turn the valve for Boiler 5. An alarm goes off and Slogs come running out of the pipe to the right. Run
back to the left and jump into the well. Hit the ground running as more hungry Slogs are already chasing you. Make your way
to the right and jump to the ledge and exit through the door to enter the Executive Offices.
Executive Offices
Time your roll through the drills and jump into the well. Check out the News Update on the TV then take off running to the
right with the Slogs in hot pursuit. Jump to the ledge when you enter the screen with the Slig and keep on running right over
him and on to the right. Jump the pair of mines and grab the ledge and pull up to jump in the well.
You land in a really dangerous place so quickly jump to the right ledge and possess the Glukkon below. Have one of the Sligs
pull the lever and take him to the right. Order him to raise the lift and shoot the other Slig on the top then have him lower
the right lift down so you can access the VoiceLock and teleport to the next location.
This next screen is REALLY HARD so save our game. Have the Slig pull the lever then open fire on the waves of Slogs who
attack from the left. Drills are slowly moving down at you and toward you from the left. When the horizontal drill is
almost to the lift the Slogs will stop attacking. You must JUMP to the left and quickly turn and call the Slig and have him
lower the lift before you are chopped up.
This next screen is a repeat of the one above, but you deserve a break so here's a trick. Get off the lift and tell the
Slig to "Do it" and he will ride back up. Now you can drop down and avoid another lengthy shootout. Get in the lower right
corner and call for another Slig who will drop from the left. Have him come over and pull the lever and start killing more
attacking Slogs. They will stop just in time for you to walk out from under drills which are moving down upon you.
Use the Slig to ride the next lift down and pull the lever and kill more Slogs and dodge the drills then move to the right
where you will find another VidPhone. Call security and watch the movie. When you are in control of Abe again, quickly enter
the open door and start running right. The timer is ticking so time your roll through the saws and onto the next screen.
Climb up and jump back left and flip the lever to smash the Sligs then pull it again to stop the drills and jump back right
and into the well.
Run to the right (actually you can walk now that you are out of danger) and free Mudokons 184-192
who are just hanging around. Jump up and pull the lever to open the door back to the left, then return and enter to
return to the Feeco Depot for the third and final time.

Zulag 1 Zulag 2 Zulag 3 Zulag 4 Zulag 5
Zulag 6 Zulag 7 Zulag 8 Zulag 9 Zulag 10
Zulag 11 Zulag 12 Zulag 13 Zulag 14 Big Finish
Mudokons: 90
It's just a short trip to this first Brewery Hub. You begin in the background so enter the door to appear in the foreground
and wake up the sleeping Crawling Slig. Exit to the right screen and climb up to the lever. The Crawling Slig should have
found his pants by now and will be coming onto this screen shortly. When he gets to the right of the barrier, flip the lever
to trap him on this screen and possess him.
Ride up the lift and shoot the Slig at the top then explode yourself. Drop down and pull the right lever to bring the lift
back down then ride up and grab a brew from the vending machine. Send one of your farts back to the first screen and blow-up
the Chant Zapper, then have Abe return to this screen and return to the background and possess the Glukkon. Talk to the VoiceLock
and have them teleport you.
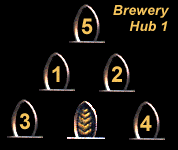 Have the Glukkon go right and order the VoiceLock to raise the lift. Go left at the top and talk to the next VoiceLock to lower
the wall then explode your host. Abe can now reenter the foreground and return to the top and jump in the well to appear at
the first hub. View the map to see what challenges lie ahead. Feel free to do the doors in any order you wish.
Have the Glukkon go right and order the VoiceLock to raise the lift. Go left at the top and talk to the next VoiceLock to lower
the wall then explode your host. Abe can now reenter the foreground and return to the top and jump in the well to appear at
the first hub. View the map to see what challenges lie ahead. Feel free to do the doors in any order you wish.
Zulag 1
Head right and wait for the Slig to leave before rolling across the floor hatches. Hang from the final gap and wait for the
Slig to return and leave again, then pull up and sneak behind him to the next screen. Roll through the tunnel and jump the
mind and hang from the ledge until you can safely pull up and continue to the right.
The mines are spaced so you can quickly jump all of them, but the opening floor hatches only give you about a half-second margin
for error. Begin the first jump even before the first hatch is fully closed then repeat twice more and save your game so you
never have to do that again. Continue right through the tunnel and hang from the next ledge. Pull up and jump and hang
from the next and wait for the Slig to leave then pull all the way to the upper ledge.
Continue right along the upper ledge and pull the lever to drop a Glukkon onto your screen. Possess him (which will drop a
second Slig into the area) then have the first Slig kill the other. Get on the lift and have the Slig pull you up to the
top level. Go left and bring the Slig with you, right past Abe and onto the next screen. Jump the gap and keep on going as
your Slig falls in and dies.
Go left to the next VoiceLock and have it lower the wall. Continue left with another Slig and lower another wall and continue
one more screen left where you can explode some mines, the Slig and the Glukkon. There are two mines by this lever. If one
still remains you will have to bring a second Glukkon over to detonate the mine for you.
DANGER: Before you summon another Glukkon make SURE you have Abe take the lift back DOWN and go left to climb back to the
upper ledge. If you don't, when you attempt to possess the next Glukkon a new Slig will drop to the lift above and shoot you!
Take another Glukkon up and over to the lever (see above warning) on the far left. Talk to the VoiceLock and jump through
the floor hatch when it opens. Repeat this process to get down below. Finally call for another Slig and have him pull the
lever to open the floor hatch and drop you down. Summon another Slig and have them kill each other then explode your host.
NOTE: If you are unable to summon a second Slig, just explode the Glukkon and continue. The original Slig won't be here
when you return with Abe and his friends.
Back as Abe you can now head left along the upper deck and have both the Mudokons follow you. Retrace the path you took earlier
with the Glukkon and drop down the various ledges. You may have to continually keep calling the Mudokons to get them to drop
down from above. Get them to the bottom and head right to open the portal and free Mudokons 211-212.
Turn the valve to open the door and return to the hub.
Zulag 2
Start going right and enter the door. Continue to the lift and go down a few screens then time your run through the zapper
and drop to the bottom level. Continue right and jump the mines on the next few screens and pull the lever before running
to the next screen to avoid the Flying Sligs. One Flying Slig should kill himself trying to get you, so possess the remaining
Flying Slig and return left.
Destroy all the mines with grenades. If the other Flying Slig somehow managed to survive, kill him too, then fly all the way
left through the lower zapper and then down below the lift. Pull the lever on this screen then return above and go back through
the lower zapper, up through the gap and left through the upper zapper. Head up above the lift and kill another Flying Slig
and pull the lever to drop the Mudokons below. Then head up and take the left tube which wraps around to the right.
Kill the Flying Slig on this screen then pull the lever and explode yourself. Have Abe walk back to the left and climb up the
gap in the upper walkway and go right to the door. Enter and appear up top where you can chant to free Mudokons 213-215
then return back through the door and go left.
Mudokons 216-217 are still scrubbing away on this screen so get them to follow you down through
the gap and all the way to the right where you can chant and set them free. Go one more screen to the right and turn the valve
to open the door and return to the hub.
Zulag 3
This Zulag is really hard so save after each screen. Roll under the first set of drills and climb up to pull the lever. Move
on to the next screen and keep on rolling under more drills. Onto the next screen where more drills are waiting to chop you to
bits, but this time you will have to pause under the middle drill before continuing to the right. Keep going to the next
screen where more drills and some Mudokons are waiting for you.
Roll under the drill and climb up on the right then jump over and say "Sorry" to the Mudokon so he stops pulling the lever.
The drills will stop and you can start going back to the left along the upper ledge. Pull all the levers and jump the gaps
to get most of the drills to stop and the rest to start moving slower. Return to the right and get all the Mudokons to follow
you back to the left along the lower path. Time your run under the slow moving drills and when you get all the way to the
start and tell one of the Mudokons to "Work" while you turn the other valve to open the exit. Chant to open the portal and
set Mudokons 218-222 free then return to the hub.
Zulag 4
Read the Rune Stone then drop down and roll left. Drop to the floor and don't get caught by the Greeter. Save your game before
going to the next screen. You have a 50-50 chance of walking into the motion detector beam as you enter. Make your way across
this screen without getting scanned by the Greeters then pull the lever on the next screen to lower the wall. The Mudokons
will join you and you can pull the lever to shut the wall and clear the area of gas.
Smack each of them to get them sober then make your way all the way back to the left and to the upper ledge. Roll all the
way back to the right and get on the right ledge. Pull the lever to summon a Slig then drop off and wait for the Slig to go
to the bottom while you pull back up to the ledge. Now you must act fast - tell the Mudokons to work and they will lower
the wall while you start to chant and possess the Slig.
Move the Slig off to the left and start blowing away the Greeters. When they are all gone you can explode your host and have
Abe collect Mudokons 223-225 from the bottom screens and release them in the middle screen where
the Greeters used to patrol. When they are free you can return to the right and drop down the ledge by the broken well.
Ignore the lever and go right, jumping the gap and continuing to the right. Pull the next lever to release some Slogs then
quickly reverse and roll back and jump the gap. The Slogs will fall below and you can go back to the right. Pull the next
lever which summons a Slig then quickly hang from the ledge and wait for the Slig to drop down. Pull up and possess him then
have him say "Here Boy" so the Slogs calm down. Pull the lever and say "Here Boy" to get the Slogs to follow you then lead
them to the left where you can dispose of them with your machine gun. Use the lever to zap the Sloggies then explode the Slig.
Abe can now drop down and collect Mudokons 226-227 and send them through the bird portal.
Use the door to enter the next area and climb up through the next disturbing screen where Mudokons are being shocked to make
them cry so their tears can be collected. Head to the right and jump to the middle ledge. Pull the lever to have a Slig
drop down. Turn to the left and chant (you will get shot if you don't) and possess the Slig. Now drop down and blast those
Greeters and explode the Slig.
This next screen is tricky so Quicksave then start rolling to the right whenever the Sligs are looking away. Each time you
roll they will hear you and turn so this takes awhile. Jump the gap and hide in the shadows of the middle ledge and finally
jump down to the lower right. When the Sligs are looking to the right, quickly pull up both ledges and jump in the well to
pop into the foreground. Run to the left before the Sligs figure out what happened and shoot you.
Watch the movie then pull the lever to free the crying Mudokons and drop down to the next area. Pull the lever then run left
as the Slig you just summoned chases you. Jump in the well and possess the Slig then use him to operate the VoiceLock and
lower the wall. Explode him when you are done then have Abe go to the right and drop down the ledge. Say "Hello" to the
Mudokon in the background who will give you the "Healing Power" which you can now take back up to the three crying Mudokons.
Once Mudokons 228-230 are healed, you can lead them down and to the left where you can chant to
set them free. Turn the valve to open the door and return to the hub. The top door of the hub should
now be open and you can enter the next area.
Zulag 5
Head to the first door and enter then keep going until you reach the screen with the Sligs. Sneak behind them to the shadows
in the middle and pull the ring to drop them through the floor hatches. Climb up and say "Sorry" to the Mudokon so he quits
working then keep moving left along the top ledge.
Say "Sorry" to the next Mudokon so he quits his work and obeys you. Then jump back to the right and get the Sloggies under you
and have the Mudokon "Work" to trap them. Jump down and get under the ring and have him "Work" again to free the Sloggies
and when the time is right, pull the ring to drop the Sloggies through the floor. Move on to the left.
Run and jump so you knock some bones loose then quickly get on the left ledges. Jump over the Slog and back to the right ledge
and get the bones. Use a bone to decoy the Slog as you drop down and lead him back to the right where you can pull the ring
and drop him through the floor. With all enemies gone, you can collect Mudokons 231-233 and
lead them back to the right. Have each one stand by a valve and order them to "Work". You turn the forth valve and the door
will open. Now lead them back to the left and send them through the portal before you return and use the door to return to the hub.
 Take the middle bottom door on Hub 1 to reach this hub. Jump in the well in the foreground to shoot to the lower ledge in
the background. You cannot reach the second ledge on your own, but a second trip through the well will shoot you to the
upper ledge where you can tackle the first pair of doors. Then you can drop down and do the remaining doors before taking
a final trip through the well to reappear in the foreground and exit through the door on the right.
Take the middle bottom door on Hub 1 to reach this hub. Jump in the well in the foreground to shoot to the lower ledge in
the background. You cannot reach the second ledge on your own, but a second trip through the well will shoot you to the
upper ledge where you can tackle the first pair of doors. Then you can drop down and do the remaining doors before taking
a final trip through the well to reappear in the foreground and exit through the door on the right.
Zulag 6
Make your way through the doors until you reach the screen with zappers and Mudokons. Get through the lower zapper and say
"Sorry" to the Mudokon so he stops pulling the lever and pull the ring on the right to drop the wall. Lead them all to the
left and free Mudokons 234-236 at the next portal. Use the teleporter and continue left where
you can flip the lever to activate the well.
Water spills on the Mudokons above and they start beating each other up. You must quickly roll through the zappers and get
into the well so you can shoot to the foreground and say "Stop it" before they kill each other. Once you have broken up the
fight, continue to the right and get on the lift and ride it up. Exit to the right and get past the zappers and the floor
hatch. Jump into the well before the Slig can kill you to pop to a new area.
The monitor has instructions for using the zappers and will also show you the current status of the zappers. Pull the lever
to turn on the first one and kill the Slig. When you here him scream you can turn off the zapper and head left.
Mudokon 237 in this area is already pulling the lever. Say "Sorry" so he stops then check the
monitor to make sure the zappers are OFF. Go get the lonely Mudokon and lead him to the portal and set him free.
Return through the well and all the way back to where you broke up the fight. Have all the Mudokons follow you to the lift
on the right and take them up. Get all five of them to wait on the floor hatch while you go back to the lever which was being
operated by the last Mudokon. Pull it to drop Mudokons 238-242 down next to you and lead them
to the portal on the right. Head back along the upper ledge and turn the valve to open the door and
return to the hub.
Zulag 7
Roll under the drills and call the blind Mudokon. You may have to make him wait between the drills if you don't time it
perfectly. Keep going right and add another Mudokon to your group. Leave them next to the lift while you ride it down
past a deadly drill. At the bottom, call to the Mudokon and lead him through the drills and get him on the lift. Go back
to the top and have all three Mudokons follow you to the right.
Get some bones from the sack and ride the lift down. Now get all the Mudokons to follow you and immediately throw a bone
to the opposite wall so it bounces back under you and distracts the Slog. Jump off and run to the lift with the Mudokon
right behind you. When they are all on the lift, pull the ring to close the door so the Slog cannot attack. Ride down to
the next screen and repeat the pattern. Quicksave after each successful screen.
On the forth time you will want to just run to the right and have the Mudokons follow you to the lift and take them up. Go
to the right and free Mudokons 243-245 and charge your Shrykull Power. Return to the lift and
ride down to chant and kill all the Slogs below.
Drop down and continue to the right and open the portal to free Mudokons 246-250. Turn the valve
to open the door and return to the hub.
Zulag 8
Head to the right and pull the lever then retreat to the safety of the ledge behind you. Now run and jump to the right ledge
and continue. Pull the next lever and repeat the retreat maneuver to avoid the Slogs. Repeat this procedure until you reach
the lever that summons some Sloggies. No need to retreat from them; just jump over and continue to the right.
Turn the valve to open the door then summon a Flying Slig with the lever. Possess the Slig and fly back to the left and kill
all the Slogs with grenades. When you reach the yellow arrow, fly up and pull the lever to open the door and continue to bomb
anymore Sloggies you meet. Fly down into each of the cages and pull the levers to drop the Mudokons to the floor below as you
keep moving to the right.
Fly through the tube to reach the last Mudokon and don't forget to kill the Slog hiding in the upper part of the tunnel. When
you have dropped all the Mudokons and pulled all the levers and killed all the Slogs you can explode your Flying Slig. Abe
can now run along the bottom and collect Mudokons 251-254 and set them free at the far left
screen. Your chanting will wake up some Sloggies who will chase you all the way back to the right where you can enter the door
and return to the hub.
Zulag 9
When you enter this screen have the Mudokon below "Work" to open the hatch on the left then jump over the Slig and roll through
the floor before he can shoot you. You will fall through many screens and land in a well to pop back up to a ledge above a
Slig guarding a vending machine. When the Slig is facing away, drop down and take one step into the shadows and wait. Sneak
to the button and grab a brew then sneak back and pull up to the ledge. Fart at the edge then go duck in the right corner
while the fart explodes the Chant Zapper.
Now you can possess the Slig and explode him for unlimited access to the vending machine. Start grabbing brews and farting.
Send each fart up the shaft on the left and kill the Sligs on the various screens above EXCEPT the screen directly above this
one (you'll know why soon). When all the Sligs (except the one) are dead you can flip the lever to turn on the well and jump
in to make your way to the top level. Make sure to load up a brew before leaving.
Pull the lever to free the Mudokon from the ledge and have him follow you down the hole in the floor. Add another Mudokon to
the party and have them stand on the floor hatch while you pull the lever to drop them down. Get the Mudokons to stand on
the floor hatch on this screen then go in search of a Glukkon to operate the VoiceLock. I recommend trying the top-right door.
DOOR 1 (Top Right)
Go to the left screen (without a Chant Zapper) and send a possessed fart back to kill the Slig on the lower level. If you
forgot to load up a brew there is a machine here but you will have to watch out for the Slig patrolling the lower level. Use
the ledge near the vending machine to escape if he returns. When the Slig is dead you can grab another brew and send another
fart over to destroy the Chant Zapper. Then go to the right and up to the ledge and pull the lever to summon a Glukkon.
Possess the Glukkon which will also summon a new Slig. Command the Slig to pull the lever to set you free then have the Glukkon
go left and talk to the VoiceLock to teleport to the main shaft. He should appear with the pair of Mudokons that you conveniently
have waiting on the floor hatch. Talk to the VoiceLock to drop them and you to the next level. Repeat the process for the
next screen and drop down to join the Slig you spared earlier. Have the Slig pull the lever to open the hatch, drop down and
call the Slig to follow you. Talk to the next VoiceLock to drop down again and when you reach the bottom (next to vending
machine), stand by the well and call the Slig who will leap to his death in the left shaft. Explode the Glukkon.
DOOR 2 (Top Left)
Now Abe can go back left and up to the exit door to return to the main shaft. This time enter the door on the opposite ledge
and go right to possess the Glukkon you summon when you pull the lever. Have him go left and use the VoiceLock to open the
door above then call the Slig over to the wall. Have him "Doit" to pull the lever and turn on the zapper then tell him to "Kill"
which will cause him to fire into the wall. The recoil will push him into the zapper. Explode the Glukkon and have Abe go
get Mudokon 255 and take him back to the portal on the right. Exit this area through the door
where you found the Mudokon.
DOOR 3 (Bottom Left)
This door is hidden in the shadows below Door 2. Enter and go to the left. Pull the lever and quickly jump to the ledge to
avoid the Slig and possess the Glukkon. Have him go left and jump to the VoiceLock and talk to open the floor hatch. Call
the Slig who will blindly fall into the hole. Jump over the hatch and go right. Call the Slig above and have him "Doit" to
pull the lever and then lead him through the hatch and back to the left. Jump the gap and have him fall to his death.
Abe can now go fetch the pair of Mudokons back to the right and send them through the bird portal. Once Mudokons 256-257
are free you can return to the main shaft and do the final clean-up.
Start dropping down the levels through the hatches the Glukkon opened earlier. Collect the Mudokons along the way. When you
reach the upper ledge of the vending machine screen, tell the Mudokon in the room to the right to "Work" to pull the lever
and drop himself below. Keep going down and take all the Mudokons with you. Pull the lever to open the barrier and chant to
free Mudokons 258-261 then go through the open door.
No - we're not done with Zulag 9 yet. Go right and smack each of the Mudokons once to get them serious. Lead them back to the
left and hop to the upper ledge and roll under the wall and to the LEFT of the lever. Quicksave then pull the lever and begin to
chant to open the portal. If you are fast enough Mudokons 262-265 will make it through the portal
before the Fleeches can eat them.
The Fleeches will come after you after the Mudokons have escaped. Flip the lever once more to close and open some walls and
open the floor hatch. If you are lucky, all of the Fleeches will drop down and you can casually walk to the right, pull the
lever and exit through the door above. If any of the Fleeches are still chasing you, run to the right and pull the lever
to open the door above and turn on some zappers. The Fleeches will fry and you can climb up and go through the door. Turn
the valve on the next screen to open the exit and finally return to the hub.
Zulag 10
Head to the right and duck into the door. Keeping going right and enter the next door to appear in the background. Flip the
lever to turn off the zappers, then return and jump to the left ledge and pull the lever to summon a Slig. You'll be using
this guy for a long time, so start off to the right past the deactivated zappers and under the inactive drills. Keep going
right and teleport to the background and kill the Slig patrolling this area. Yell "Look Out" if you must fire on a screen
that has Mudokons on it. Return through the teleport and get on the lift and go down.
Go through the next teleporter and another one after that. Carefully shoot the foreground Sligs without harming the Mudokons
then return through the teleporter and head left. Walk off the ledge and use the teleporter again and shoot a few more Sligs.
Return through the teleporter and head left in the foreground until you reach the lever that summons the lift. Ride up and
go left to use another teleport gate. You will appear in the background where this all began. Pull the right lever to turn
off the zapper and start all those drills you avoided earlier.
Now Abe gets to recreate the previous journey and gather all the Mudokons along the way. The drills are now all activated so
things will get tricky. Head right past the saws and into the first teleporter. Walk right, through the background and get
Mudokons 266-267 to follow you to the portal where you can set them free. Return through the
teleporter and pull the lever to summon the lift. Ride it down past the horizontal drills.
Teleport when you reach the bottom and lead the next Mudokon to the left through a dangerous set of drills. When he is past
the drills, chant and send Mudokon 268 through the portal and continue left.
Keep going left, down and left again. Wave to the Mudokon as you pass by (you'll be back). Pull the lever to bring down
the lift and ride up and go left to get the Mudokons here to follow you to the right. Have them "work" to turn the valves
and open you exit. Then get them all on the lift and ride down and head right. Add that forth Mudokon to the party and
go to the next screen where you can chant and send Mudokons 269-272 through the portal. Return
left and take the lift to the door and return to the hub.
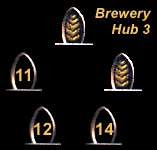 Get to the foreground on the Hub 2 screen and go through the right door to appear in the final Hub. This hub is unusual in
that if you look at the map, the door I have labeled as 14 is shown as Zulag 13. This is partially true. When you enter this
door you will actually go to Zulag 14 and have to do some "stuff" before you can reach Zulag 13. The true entrance to Zulag
14 is through the top door which opens after you have completed the first three. When all doors are completed you can exit
this hub through the left door in the foreground.
Get to the foreground on the Hub 2 screen and go through the right door to appear in the final Hub. This hub is unusual in
that if you look at the map, the door I have labeled as 14 is shown as Zulag 13. This is partially true. When you enter this
door you will actually go to Zulag 14 and have to do some "stuff" before you can reach Zulag 13. The true entrance to Zulag
14 is through the top door which opens after you have completed the first three. When all doors are completed you can exit
this hub through the left door in the foreground.
Zulag 11
Head right and climb to the ledge and pull the lever to summon a Flying Slig. Much like the previous Zulag, you will take this
guy through most of the level to clear the way. Head to the right past the lift and go down and through the narrow tunnel.
Start flying down through the next two screens and take out the other Flying Sligs with your grenades. Make sure not to kill
any Mudokons in the crossfire. If you lost your Flying Slig, just summon another and try again.
When you reach the bottom, start killing the Sligs on the floor and move quickly so you don't get shot by the Sligs in the background.
Go all the way to the right then up and kill another Flying Slig and pull the lever before you explode yourself. Now Abe can
continue to the right and talk to the Mudokon in the background. He will give you healing powers so ride down and heal the
first pair of Mudokons. Go back up and get recharged then go down and heal the next pair and repeat for the third pair. On
your third trip down you can collect the first four Mudokons, then lead all six of them right, down, left, and down to the bottom
screen.
Have the Mudokons wait while you roll forward. Stay behind cover so you don't get shot then call the Mudokon and have them
follow you. Quickly roll off to the next screen to stay hidden behind the crates. The Mudokons will join you on this screen.
Repeat the process until you can get them all on the lift to the right, then take them up and head right. Open the portal
and release Mudokons 273-278. Turn the valve and use the door to return to the hub.
Zulag 12
This level begins with a pair of Greeters patrolling the floor below. Wait for their red beams to both be right of center
then do a running leap over both of them and go left. Climb up and grab a brew and send a fart back to take care of the
Greeters. Send another fart to the left to kill the sleeping Slig and one more to the far left to kill the Slig on the middle
ledge. Grab a brew for later and continue to the far left.
Climb up and roll to the left and turn the valve to open the floor hatches. Drop through the one with the arrow pointing
down to arrive at the lower screen. Chant or talk to get the Slogs all down to the floor. Fart and send it right to kill the
Slig on the upper deck. Now you are free to go right and possess the lower Slig. Use the VoiceLock to open the wall and call
the Slogs. Lead them right and tell them to "Get'em" and they will run through the tunnel and kill the other Slig. Now call
them back to the previous screen and shoot them before you kill yourself.
Go to the left and make your way to the well in the upper left. Shoot up to a ledge where you can get some healing power
from a lonely Mudokon. Jump back in the well to return to the bottom then go all the way right. Roll through the tunnel
and climb up to the valve and turn it to release the Mudokons. Chant to heal them then lead Mudokons 279-280
to the portal and set them free. Take the well back to the top and exit through the door back where the Greeters used to be.
return to the hub.
Zulag 14
Pull the lever to drop the Mudokons out of the cage, then go right. The Mudokons will breath the gas and get goofy on you
making the next series of screens very frustrating. Lead them through the next several screens of closing walls and zappers.
Sometimes you will have to backtrack and other times you will have to jump over pressure plates. When you finally get them
to the last wall you will need to drop down to the floor and return left to open the door using the pressure plate on the
right.
Smack them around to get them serious, then get them all on the lift and take them up and chant to open the portal. When
Mudokons 281-285 have been freed you will have the Shrykull power and can now go in search of
Zulag 13. Ride the lift down and head all the way back left along the bottom floor. Jump in the well to land on a ledge
above. Go right and chant to destroy a LOT of mines. When the path is clear, enter the middle door to access Zulag 13.
Zulag 13
So what are they hiding in this hard-to-find Zulag? Drop down into the shadows and sneak behind the Slig to the right. Wait
in the next dark area until both Sligs are leaving then sneak right to the next screen and hide again. Now you must wait for
three Sligs to be looking away before you can continue right. Break into a run and head for the ledge and return back to the
left.
Summon a Glukkon with the lever and have him control the Sligs so they kill each other. Any survivors can be ordered to leap
to their death at the far left screen. Have the Glukkon use the VoiceLock then explode him. Now Abe can go get the healing
power from the background Mudokon and heal Mudokons 286-288. Turn them loose through the portal
then exit through the door and return to the hub where you can now enter the top door and finish Zulag 14.
Zulag 14 - Final Door
It's just a short run to the final stage so start off to the left and enter the first door. Continue left and do a running
jump across the large gap. Jump to the ledge and turn the valve to summon a Slig. Jump over the Slig and run back to the
right and across the pit. When it's safe, pull up and up again to the next higher ledge where you can safely possess the Slig
and use him to get past the VoiceLock.
Get on the lift and ride it down and start killing all the Sligs. Go left and gun down more Sligs then explode yourself.
Have Abe go left and turn the valve to raise the lift and ride it back down. Go left and climb up to the ledge and turn the
valve to summon a Glukkon. Talk to the VoiceLock to lower the wall and raise the lift. Now walk to the right and talk to the
VoiceLock here to drop the pair of Mudokons to the floor. Continue to the right and call for a Slig. Lead him to the left
and have him operate the lift to take you down to the next level. Have him follow you to the right while you drop down and
use the final VoiceLock to drop the wall. Now order ALL the Sligs to follow you to the lower level. When they are all gathered
around order the attack and they will all drop. Explode the Glukkon and return to Abe.
Abe can now collect the top three Mudokons and ride the lift down and get the other three. Have them all follow your to the
left and operate the valves to open the door and the wall blocking the bird portal on the right. Then lead them all to the
right and open the portal and free Mudokons 289-294. Return to the left and go through the door
to return to the hub. Take the well to the foreground and exit through the left door to the finale.
Big Finish
The primary strategy is to save your game at the beginning then Quicksave as you progress through this fast, action-packed level.
You are on a very short clock, so if you screw up you will always be able to start over as long as you save your game. I
will post my "remaining times" on various screens so you can compare how you are doing.
Head to the right until you reach the Rune Stone. Get some background info and enter the door to watch a cool movie. Make
your way to the wheel and SAVE YOUR GAME (to memory card if playing on PSX). Turn the wheel to start the countdown and the
drills. Immediately climb up and roll to the left ahead of the drill. Drop down and roll back right when its safe and move
onto the door.
Quickly turn the valve and enter the next door. Roll to the right through several screens and drop of the end and enter the
door to appear in the foreground (in the darkness). Run left ahead of the drill or follow the drill and wait for it to stop
then run left (whichever is safest for you). Quickly roll under each of the drills and disarm the bombs which are all using
a repeating pattern. You should have about 3:00 left
on the clock after you disarm the bombs.
Say "Sorry" to the Mudokon and get him lined up by the valve. Roll back to the other valve and order him to "Work" so you
both can turn the valves. Have him follow you back to the right and down the lift. Wait for the three lifts on the left to
all line-up. Have the Mudokon's attention and when the three lifts all line-up, tell him to "Follow" and run to the right
and drop to the lower lift. He will follow.
Ride down and have him help you turn the valves to open the door. You should have around 2:30 on the clock. Enter and start
running left past the Flying Slig who is trying to bomb you. Duck into the door to appear in the foreground and run back to
the right past the drills and turn the wheel to lower the wall. Have the Mudokon follow you carefully past the drills to the
next screen.
Lead him to the lower valve but watch out for the opening floor hatch. When he is in position you need to climb to the upper
valve and order him to work and both turn them together. Get on the lift and bring both Mudokons with you. You will have to
say "Sorry" to the top one. You should arrive at the next screen with about 1:35 on the clock.
Have the Mudokons use the lower valves while you turn the top then quickly tell them to all follow you then drop to the lift
and ride up before the drill kills them. At the top, chant to open the portal and free Mudokons 295-296
and gain the Shrykull Power.
Roll to the left and chant to destroy all the mines and Chant Zappers. When the path is clear, climb up and turn the final
valve to drop below. Chant to free Mudokons 297-300 in the background and watch the closing movie.
Conclusion
 Congratulations!! You just completed Oddworld Exoddus. If you saved less than half of the Mudokons then you may not enjoy
the final movie. But if you used my solve (which you must be doing since you are reading this) then you should have easily
rescued more than 150 Mudokons and will get the "Heroes Ending". Hopefully you were able to find and rescue all 300 and get
a Perfect Score.
Congratulations!! You just completed Oddworld Exoddus. If you saved less than half of the Mudokons then you may not enjoy
the final movie. But if you used my solve (which you must be doing since you are reading this) then you should have easily
rescued more than 150 Mudokons and will get the "Heroes Ending". Hopefully you were able to find and rescue all 300 and get
a Perfect Score.
I hope you enjoyed the game and found my walkthrough useful, maybe even invaluable. If you need to replay the game to find
a missing Mudokon or a Secret Area make sure to use the handy index below which will link you back to the main solve.
That's all for now. See you on Abe's next adventure...
Here are some links to the text above which will assist you in locating those hard-to-find Secret Areas and Mudokons.
SECRET AREA INDEX

Soulstorm Mines

Secret Area 1 in Tunnel 1
Secret Area 2 in Tunnel 1
Secret Area 3 in Tunnel 2
Secret Area 4 in Tunnel 2
Secret Area 5 in Tunnel 2
Secret Area 6 in Tunnel 3
Secret Area 7 in Tunnel 5
Secret Area 8 in Tunnel 5

Necrum

Secret Area 1
Secret Area 2 on the Mudanchee path

Mudanchee

Secret Area 1
Secret Area 2 behind door 1
Secret Area 3 behind door 5

Mudomo
Secret Area 1 behind door 3
Secret Area 2 behind Door 6

Feeco Depot
Secret Area 1 first time through
Secret Area 2 second time through
Secret Area 3 third time through

Slig Barracks
Secret Area 1 in Worker's Campus
Secret Area 2 in Bombing Range

Bonewerkz
Secret Area 1 in Annex 1
Secret Area 2 in Annex 1
Secret Area 3 in Annex 7
Secret Area 4 in Annex 8 - Boiler Door 2

Soulstorm Brewery
No Secrets

Playstation Codes
Advance to next path:
Hold R1 and press Circle(2), X(2), Square(2) during game play. Note: This
will not play any FMV sequences. The final level must still be played to
advance to the end of the game.
View FMV sequences:
Hold R1 and press Up, Down, Left, Right, Square, Circle, Triangle, Circle,
Square, Circle, Up, Down, Left, Right at the main menu.
Level select:
Hold R1 and press Down, Up, Left, Right, Triangle, Square, Circle, Triangle,
Square, Circle, Down, Up, Left, Right at the main menu.
Invincibility:
Hold R1 and press Circle, Triangle, Square, X, Down(3), Circle, Triangle,
Square, X during game play.
Hint: Extra Mudokons:
After completing the Feeco executive office, enable the "Invincibility"
code, then repeat that section of the game. Just go through the electric
walls and have a look at the video to get back in. Every time this is done,
you will receive an extra ten Mudokons. Repeat the "Invincibility" code and
resume game play after collecting enough Mudokons/
PC Codes
Cheat mode:
Hold [Shift] and press the following cursor keys at the indicated screen to
activate the corresponding cheat function.
Effect / Screen / Code
Skip Level / Main Menu / [Down] [Right] [Left] [Right] [Left] [Right] [Left] [Up]
Next Path / During Game / [Left] [Right] [Up] [Down] [Left] [Right]
Next FMV / Main menu / [Up] [Left] [Right] [Left] [Right] [Left] [Right] [Down]