

Dracula Resurrection Walkthrough
by N.Kuderna and Ozma38
March 29, 2000
This is a complete walkthrough, but only use it if you are absolutely stuck! There is a lot to explore in the game and you should take your time playing and enjoying it.
![]()
After the prologue, you will be standing in front of the Golden Crown Inn. Enter and talk with the Innkeeper (Barina) and the old man at the table (Micha). Ask them about the castle.
Leave the Inn and follow the sign for the bridge (Pons) [F x3, L x1] to the sign for the cemetery. Follow the path forward once to the signs of the cemetery and the cross. Doesn't matter where you go first but you need to pick up objects at both locations. For the cemetery, go forward through the gate to the back and turn right and then go forward to the shed and pick up the ax. Go back toward the gate and turn left to go to the swirling bluish white lights. Use the pick ax on those lights and pick up the dragon ring.
Leave the cemetery and go to the Cross. [F x2, then R] You need to go around the other side of the cross and look down at the base to find a sling shot. Return to the Inn and ask Barina and Micha about the ring and sling shot. Micha will tell you it is practical to use the sling shot to hunt birds by the big oak tree at the lake.
Time to check out the LAKE.
From the Inn, follow the sign to the lake (Lacus)
Go up to the man in front of the cabin and he will tell you to get away! He is one of Dracula's henchman that you saw in the prologue and at the Inn earlier. Turn around and go to the oak tree [F, L, L], Go up on to the tree and use the sling shot on the birds. The man will run out and you will be able to get to the cabin. Pick up the club that is leaning against the front of the cabin. Use the club on the man. Turn to your right and pick up the reed flute in the open barrel. Go out on the pier and pick up the knife stuck in the other barrel.
Return to the Inn. Talk with Micha and Barina about the flute. You will find out what it is used for and the code.
You can check out the Basement and the Bedroom upstairs in the Inn now. Go down to the basement and pick up the telescope that is in the closet. Go up stairs to the bedroom and move the chest. Climb up the chest and get the knob that is hidden on the beam near the ceiling. Turn to the left and use that knob on the handle. Go up to the loft and you will see a large black crown supported by a heavy rope and a tripod. Use the telescope on the tripod. Look through the telescope and you will see another henchman warming his hands near the bridge. Use the flute on the henchman. He is runs over to the Inn and stands right below that big black crown. Use your knife on the rope and the crown will knock him out. Go back to the bedroom and Barina will come up and talk with you. You can't go out the front door so you must go out the door that is now available in the bedroom. Go to the knocked out henchman (Iorga) and pick up the keys that are on his belt. Now go to the unguarded Bridge and on your way notice the well.
You can get to the bridge by going right after getting the keys from Iorga. You try to get over the bridge but it is old and collapses! Can't get out that way!
Go to the WELL.
Use your small key on the well. Go up the stairs and pick up the lamp. Go back down the stairs and turn right to go toward the darkened corner. You will get a magnifying cursor near the left of that dark area. Use the lamp on that hook. Pick up the grappling hook. Go back to the Inn and use that grappling hook to get back up through the hole in the balcony.
Go back downstairs and question Micha and Barina about the bridge and the lake cabin. Barina will tell you about a passage in the cellar and give you a key for the hutch. Open the drawer and pick up the lighter, key and read the diary.
Go down into the basement again and use the lighter on the candle. Use the rusty key from the drawer on the barrel. Use the dragon ring on the mechanism. Go through the tunnel and you will end up at the mine. It is sealed up with rocks, but there is a door at the other end that you can get out of by using your dragon ring again.
Go to the cabin by the lake. Micha said that the cabin conceals an access to the Castle and you must get to the Castle to save Mina. At the Cabin, use the key to open the door. Go toward the barrels and grab the crowbar holding the barrels in place. Enter the small elevator. Turn around and click on the switch, the elevator starts to move. Viorel cuts the cable and you will be at the bottom of the MINE.
The MINE
At the MINE go toward the left and use the crowbar on the chain. The wooden support beams will fall and you can pick one of them up to use as a plank to get across to the opening in the rock wall. Go forward as far as you can and use the plank on that opening. Walk across and you will see a large pile of rocks in front of you blocking a doorway. Use the crowbar again on those rocks. Pick up the skeleton arm. Use the lighter on the rugged oil lamp hanging from the bars. Use the skeleton arm to reach the bar with handles. Turn around and go down farther into the mines. You will come to another broken bridge. Go forward as far as you can go and use the bar with handles on the chain to get across. The gates don't open but you can go along the path down to the bottom of the mine.
Find the working cart that is on the top of the track to your right. Go forward all the way to the other side of the cart, turn around and use the lever that is on the lower left side.
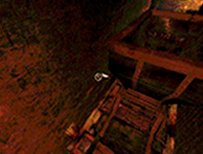
After your ride, go forward out of the cart and look up at the pulley. Take the S shaped hook. Go back down to the cart room by turning left at the table again. Go forward to the cart that is off the track. You will see a lever next to it. Use the S shaped hook on that mechanism and then pull the lever to move the tracks. Go back to the cart that you were just in. Pull that lever to make it go again and enjoy another ride! Toward the end of your ride you will jump out just before the cart crashes to the bottom of a pit and breaks with the oil drum that was in there with you.
Go forward and find the lamp on the left side of the tracks. Use your lighter to light it, then pick it up. Since there is no way to get across you need to find another way. Turn around and move the door leaning against the right wall. In that room you will find a gear to raise the tracks. Open the mechanism and use your ring. Now you can cross that bridge, but UH OH, Bats! Go back one step and turn around. Use your lantern on the oil spill at lower left side of the pit. Now you can cross the tracks. Go to the right through the archway and up the small stairs. Pull the lever. You will get in the small gondola and go for another exciting ride to the CASTLE!
The CASTLE
Go forward through the graveyard to the entry on the right. Go down the spiral stairway and use the ring on the lock to the left of the cell door. Enter the room, going around as far as you can and light the oil lamp on your left. You will meet Dorko. Ask her about Mina. She will tell you to bring her the amulet, but before that you need to bring her the Medal of the Dragon Brotherhood, which is the key that unlocks the system. She knows how to make it work! Go back to the spiral steps and go up this time. You can't get through the door so turn and try to go toward Dorko. She will open the door for you but won't be able to go any further.
You will be in the GREAT HALL. Go across the center area to the arched foyer just to the left of the main staircase. Get the key from that door. Go back out and up the main stairway through the door at the top of the stairs. Turn to the right down a small corridor and then through a door to your left that leads to DRACULA'S BEDROOM!
Look at the ball on the pedestal and take it. Get the picture and gem from the trunk. Place the picture on the wall to the right of the door you entered from. Look at the picture and then leave the room through the other door (to the left of the one you came in). This will take you to the BALCONY OF THE LIBRARY.
Turn to right and go into the room at the end of the row of bookshelves. Move the handle on that device and it will raise the Chandelier in the Great Hall.
Leave the room, turn left, go forward, turn right and go forward through the door which takes you to the main part of the LIBRARY. Turn to your right and look at the top of the ladder. A letter will fall and you will read it. Climb up the ladder and move the lever. You can click on the ball in front of you but it will not stay open. Go down the ladder and to the left of it as far as you can then pan the bookcase to your right until you get the Look cursor.
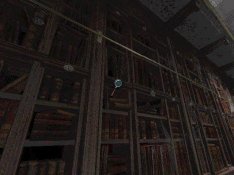
Look and open the little oval panel and place the gem in it that you got from the trunk. Go back up the ladder and click on that ball that wouldn't stay open before. A light will be directed toward the big carved wooden desk. Go there and click on the look cursor in the center of the desk. The middle panel will open showing many pictures (the Brotherhood of the Dragon). Back out of that close up and look just below at the roll top part of the desk above the red blotter. Open that roll top panel and pick up the plaque, the medal of the dragon, the key and the cross in the circle. Now it is time to see Dorko!
After talking with Dorko you need to get back into the castle. Go back up the stairs with the stone wolves.
There is one thing that you need to pick up that will come in handy later. Go down to the great central room of the castle. There is some rubble next to the pillars. Look there for a shield and you will pick up a gauntlet. Go up the main stairs to get to Dracula's bedroom again. Put the crystal ball on the pedestal and you will see the picture and mirror. Go to the right and then turn towards the pedestal. You will get a look cursor. Open the drawer and look at the cards which give you clues to the mirror puzzle. Back out and turn around to look at the broken mirror. Click on the corresponding signs of the zodiac that were on the 3 cards that you saw through the crystal ball. LEO, ARIES, and VIRGO
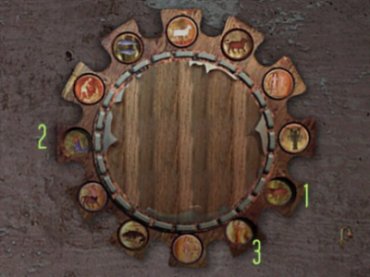
A door will open. Turn around and go through that newly opened passage. Use the dragon ring on the locking mechanism. A hidden drawer opens beneath the dragon to reveal a sword. Pick it up. Go back to the lock and use the sword in the locking device. Pull down on the sword handle, Use your gauntlet on the mouth that opened. Pull the ring. Put the painted plaque of St. George in the spot above the desk. A golden ornate case will rise to reveal a Faberge egg. Use the Jeweled Key on Dracula's picture. Get the gem and the key. Time to get back to the main Library room. Grab your sword before you leave! You will need it!
Go to the writing table and move the miniature globe. Use the ring on the map and move it so that the feet of the dragon ring circle 40N. and 25 E. Note those numbers and the color blue for North and red for East.
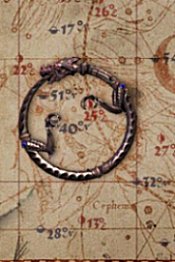
Use the small key on the clock. That will open Dracula's picture on the desk panel. Use the Medal of the Dragon on that picture. The markers on the globe will move. Go around the side of the globe and get a close up view. Adjust the coordinates and then move the top of the globe.
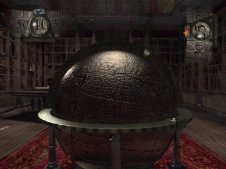
Use your sword on the dragon and use the gem on the tip of the sword handle where you see the claws open. The beam of light opens another secret passage.
Go through the passage and look to your left to see a recess in the wall. Turn to your right and go up the stairs. Read the letter on the table to your left, then go to the table on the right side of the lectern. Move the book which knocks over a bottle of acid. Take the bottle of acid. Turn back to the lectern. Place the cross medallion on the carved out spot above the book. The pedestal turns to reveal another Medallion, take it. Move your cursor toward the top to open the panel.
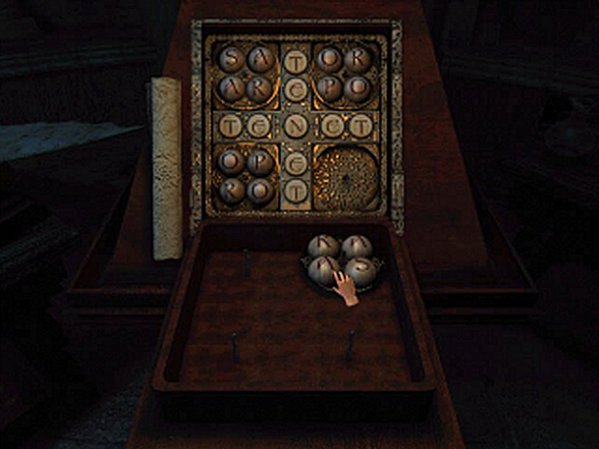
The Ball Puzzle ~ Place the balls in the top area to spell out SATOR across the top row. The balls should spell out ROTAS across the very bottom row. Take the Cross. Leave this room and go down the stairs to the recess in the wall straight ahead.
Go into the new opening in the CRYPT. Go left to the Alter, use the acid on the chain. Take the Amulet, UH OH! Vampires! After the vampires talk to you , turn to the left of the Altar, go to the handle/switch on the wall and pull it. A window opens and the light scares away the vampires. Go to the opposite side of the room and place the Cross in the recess. Go through the new opening and up the stairs. Dorco appears and takes the Amulet. Dorco leaves you locked in the room with Mina. Go toward Mina, pan with your cursor and follow the arrows to the far right side of the room. Place the Angel Medallion on the wall. Turn the ring. A portal to the outside will open. Turn around and follow the arrows back to Mina. Pick her up and ENJOY THE FINALE!
![]()
This walkthrough will be updated frequently.
This document may be freely distributed by any means as long as the context is not altered in any way and reference/links are provided to this site.