 Level 5 - Puzzle of Bastet

"Lara's senses tell her that she is not alone - yet she has not been followed. She resolves to be on her guard."
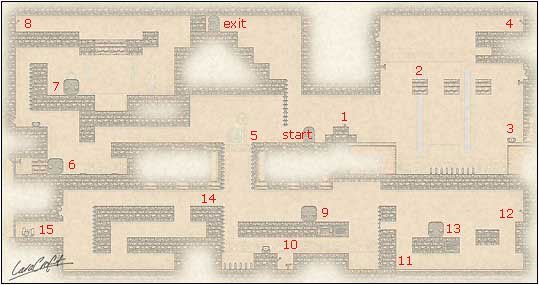
Pick up the Golden Eye (1) resting on the pedestal to your right (cut scene: the stairs to the exit transforms to a high wall). Go to the right. Jump onto the moving brick (2). When on top jump to the middle brick and the to the third one. Face left and draw your guns. Shoot and you will hit the button on the wall. This will cause the brick you stand on to start moving. Holster your guns. When it is all the way down, jump off it to the right to pick up the Medi-Pack (3). Jump back onto the moving brick. Face right and draw your guns. Shoot at the button in the wall. It will start the middle brick to move. Holster your guns. Jump onto the middle brick (you may have to wait a awhile before they the bricks are at the same level). Haul yourself on top of the brick and ride it to the top and jump to the right. Lara will grab the edge. Haul up. Pull the lever (4) (cut scene: first part of the stairs to the exit will be restored). Go to the edge. Press DOWN and one more time to drop down and let Lara grab on to the hand-hold. Wait until the third moving brick is beneth you before letting go. When you let go Lara should grab on to the brick. Jump to the middle brick and then to the one on the left. Continue to the left. Draw your guns (5), crouch and wait for the snake on the other side. Shoot it! Jump over to the other side and continue to walk down the hallway. You hear a sound when you walk over a button in the floor. Pull the brick (6) away from the wall. Then go to the other side and push the brick all the way to the right. It pushes one of the buttons in the floor. Stand on the other one. This will cause a wall to open to the left. Draw your guns and shoot to the left. You will hit a button (cut scene: one level up a large brick will be placed in the big hole). Pull the brick back to where it was. Climb up and take the Medi-Pack. Climb up the ladder. Push the brick (7) all the way to the right. Climb up on it, jump and haul yourself up. Jump to the other side and go left. Jump over the gap and continue left to pull the lever (8) (cut scene: second part of the stairs to the exit will be restored). Go back and jump the gap. Go left and drop yourself onto the brick. Go all the way back to the start. Climb down the ladder (5). Climb over the brick (9) and push it all the way to the left. Continue to the right. Jump to grab the ladder on the other side. Climb down. Go left. When you step up, draw your guns and shoot the soldier. Pick up the Uzi (10) and pull the lever (three of the spears in the floor to the right will go away). Pick up the Medi-Pack and go back to the right. Climb the ladder and descend the high wall (11). (continues on the right column)
Quickly draw your guns and kill the soldier. Climb up and to pull the lever (12) (cut scene: third and final part of the stairs to the exit will be restored). Push the brick (13) to the left. Climb on to it and jump to grab the other side. When on top you can not jump across! Climb down. Walk to the left and pass the lever (10). Continue to the left through the spears. Be quick! Climb up. Draw your guns (14) and kill the snake. Holster your guns. Drop down and kill the soldier. Drop down one more time and kill another soldier. Go to the left and climb the ladder. Pick up the Glyphed Parchment (15). Go to where you killed the snake (14). Jump to the brick we moved earlier. Jump up to grab the ladder. Go to right. Now the ladder to the exit is reachable. Climb up on the right side of it. Go through the door to end this level.
New items found in this level
 Item Code CX3981
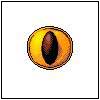
Golden Eye
"On closer examination, this golden object appears to be the eye of a statue, possibly a cat. The slight indentation around the edges of the fitting imply that it might act as some kind of switch when placed in its correct location. This is an item that will probably have a use in one of the later levels
in the game."
 Item Code GN1372
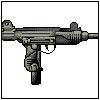
Uzi
"This is a more powerful gun than the standard pistols that Lara always carries. They do twice as much damage as the pistols but have a limited ammount of ammunition. More ammunition can be picked up during the game. When you pick up the Uzi it automatically replaces the pistols until the ammunition
runs out."
 Item Code CX1179
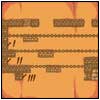
Glyphed Parchment
"This fragment of parchment shows a glyph of a yew tree. This was believed to be the tree of life by the ancient Egyptians (although conversely, its poisonous leaves also endowed it with connotations of death). On the reverse Lara discovers these diagrammatic markings: . Interpreting the marking implies that 'solving the puzzle of the moving platforms is reliant on moving the top platform first'."